background image

iBT25

Using the

6

P10

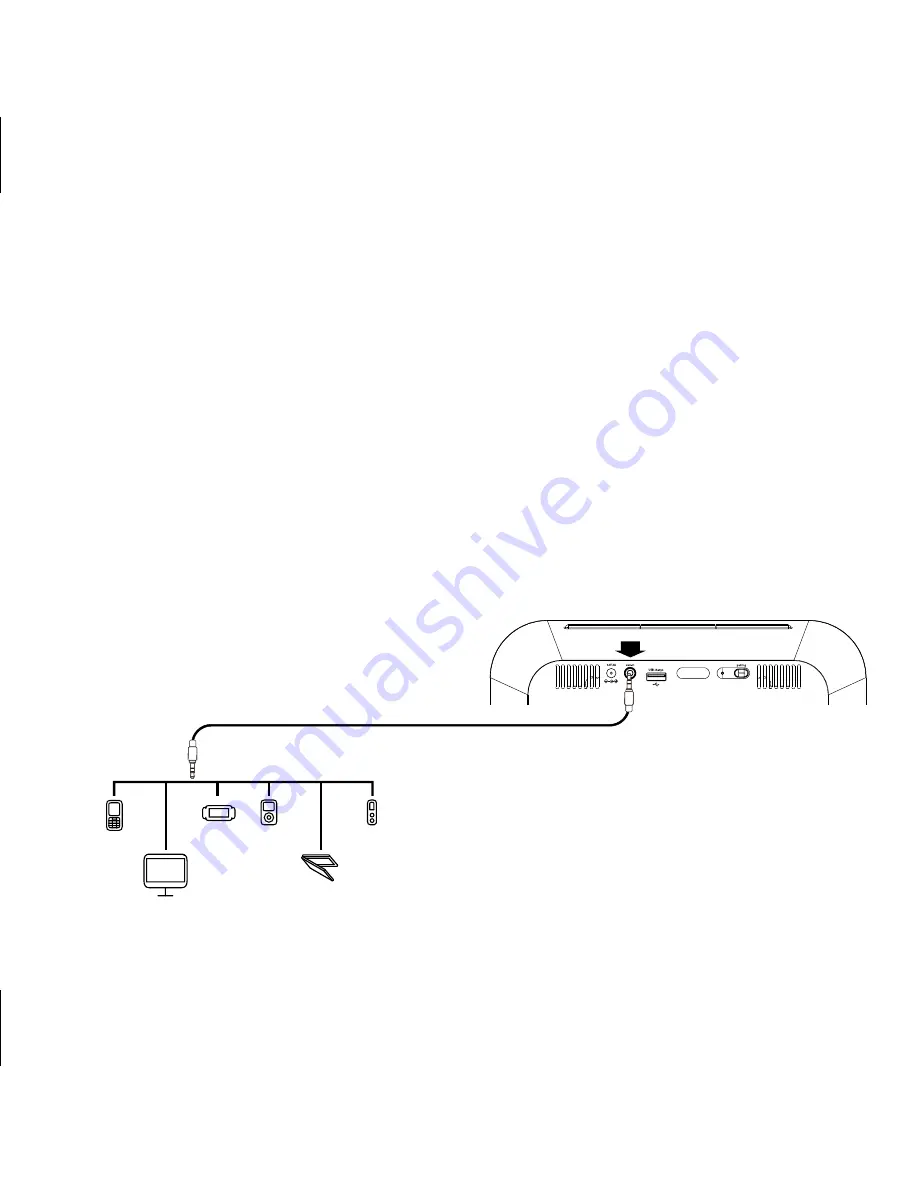
Playing Audio via Aux In

1.  Connect one end of the included 3.5mm stereo audio cable to the Aux line-in jack on the back of the 

unit and connect the other end to the headphone or line-out jack on your audio device.  

2. 

Press and hold

 the 

Power Button

 on the unit to turn it on.

3.   Power on the audio device and use the controls on the device to play or pause audio, and navigate 

tracks.

4.   Adjust the volume on the unit by pressing the 

Volume Down Button

 or 

Volume Up Button

. You can also 

adjust volume on your device. 

5.  When done listening, 

press and hold

 the 

Power Button

 for 2 seconds to turn the unit OFF. Remember 

to turn off your audio device, too.

mobile phone

PSP

iPod

Laptop

PC

MP3/MP4

Summary of Contents for iHome iBT25

Page 1: ...iBT25 instruction manual iBT25 IB Size 153mm x 120mm Printing color Black Jan 03 2012 P1 Bluetooth Wireless Stereo Speaker System with USB Charging ...

Page 2: ...f the unit Please read them carefully and keep for future reference Place the unit on a level surface away from sources of direct sunlight or excessive heat Protect your furniture when placing your unit on a natural wood and lacquered finish A cloth or other protective material should be placed between it and the furniture Clean your unit with a soft cloth moistened only with mild soap and water S...

Page 3: ...lowing measures Reorient or relocate the receiving antenna Increase the separation between the equipment and receiver Connect the equipment into an outlet on a circuit different from that to which the receiver is connected Consult the dealer or an experienced radio TV technician for help This Class B digital apparatus complies with Canadian ICES 003 Cet appareil numérique de la classe B est confor...

Page 4: ...ng Up the Unit Turning the Unit ON and OFF 3 Using Bluetooth Pairing Your Device 4 Playing Audio Via Bluetooth 5 Playing Audio Via Aux line in 6 Charging Via USB Port Switching Grille Covers 7 Consumer Product Safety Guide 8 9 Troubleshooting 10 Warranty 11 P4 ...

Page 5: ...iBT25 1 Included iBT25 Speaker Extra removable grille Stereo 3 5 mm audio cable 100V 240V universal AC adaptor P5 audio cable iBT25 Speaker Extra removable grille power adaptor ...

Page 6: ...Power Button Volume Up Button Volume Down Button Pairing Button Aux in Jack DC Jack Back Bluetooth Indicator Front Power Pairing Indicator located behind speaker grille USB Charging Port Top Back 12V 2A pairing aux in USB charge ...

Page 7: ... the unit ON The blue power indicator on the front of the unit will light and ascending tones will sound Press the Power Button again to enter standby which uses less power but still allows normal operation The blue power indicator will pulse slowly in standby mode Note that if no audio is detected within 3 minutes when power is on the unit automatically reverts to standby mode indicated by two to...

Page 8: ...rs tap on iHome iBT25 to begin complete pairing If your device asks for a password enter 1234 on the keyboard of your device If no device is paired within 2 minutes the unit will revert to its previous state To retry pairing follow steps 1 2 3 Once paired with a device the blue indicator lights will glow steadily and a confirmation tone will sound There should be an indication on your device that ...

Page 9: ...e to play or pause audio and navigate tracks 3 Adjust the volume on the unit by pressing the Volume Down Button or Volume Up Button The front panel LED blinks 3x when unit is at maximum volume You can also adjust volume on your device 4 When done listening press and hold the Power Button for 2 seconds to turn the unit OFF Note Audio playing through the unit via the Aux line in jack will be interru...

Page 10: ...d the Power Button on the unit to turn it on 3 Power on the audio device and use the controls on the device to play or pause audio and navigate tracks 4 Adjust the volume on the unit by pressing the Volume Down Button or Volume Up Button You can also adjust volume on your device 5 When done listening press and hold the Power Button for 2 seconds to turn the unit OFF Remember to turn off your audio...

Page 11: ...es use a proprietary charging method and will not charge using the USB Port If this happens you must charge your device using the charger that came Switching Grille Covers 1 Gently pry the current grille away from the unit and set aside in a safe place 2 Carefully line up the other grille with the holes and press gently into place NOTE To avoid charging noise do not connect a device to the USB cha...

Page 12: ...on openings Also it should not be placed in a built in installation such as a bookcase or cabinet which may impede the flow of air through the ventilation openings 3 Heat The unit should be situated away from heat sources such as radiators heat registers stoves or other appliances including amplifiers that produce heat 4 Power Sources The unit should be connected to a power supply only of the type...

Page 13: ...sonnel when A the power supply cable or plug has been damaged B objects have fallen into or liquid has been spilled into the enclosure C the unit has been exposed to rain D the unit has been dropped or the enclosure damaged E the unit exhibits a marked change in performance or does not operate normally 12 Periods of Nonuse If the unit is to be left unused for an extended period of time such as a m...

Page 14: ...f the unit will flash rapidly to indicate the unit has been reset Once reset all previous settings are erased and you will need to adjust them and re pair with your Bluetooth devices Trouble pairing device computer with iBT25 Bluetooth implementation varies depending on your device s hardware and operating system Please see our website for updates on pairing Make sure you have the latest firmware ...

Page 15: ...eturned and the return authorization number No unit can be processed without a return authorization number 4 Write the return authorization number on the side of the shipping package and send the unit prepaid and insured to the Factory Service Center address authorized by SDI Customer Service Disclaimer of Warranty NOTE This warranty is valid only if the product is used for the purpose for which i...

Reviews: