background image

6

quick start: connections

Connect provided 
connector cable from the 
back of the Subwoofer to 
the back of the Receiver and 
tighten screws.

Attach a pair of speaker wires 
from the matching red and 
black terminals on the 
Subwoofer to those on each 
speaker (red to red, black to 
black). 

1:subwoofer

2:speakers

a) Snap the AM antenna into the 

provided stand, then plug 
antenna cable into AM 
antenna plug on rear of 
receiver. Antenna should be 
kept 12 inches from unit. 

b)  Use a Phillips screwdriver to 

loosen the two FM antenna 
pole screws on the rear of the 
receiver. Insert FM antenna  
leads and tighten screws. 
Locate FM antenna for best 
reception. Do not alter 
antenna wire.

3:antennas

sub level

right

speaker

left

speaker

to receiver

subwoofer

subwoofer

speaker

speaker

receiver

sub level

right

speaker

left

speaker

to receiver

If you wish, plug the 
appropriate video cable (not 
included) from either the 
composite video output
or S-video output jack to a 
VCR or Monitor video in jack.

4:video outs

Plug AC cable on back of the
iH52 subwoofer into a 
working wall socket

5:power

sub level

right

speaker

left

speaker

to receiver

receiver

receiver

Summary of Contents for iH52

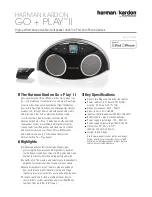
Page 1: ...Model iH52 The Home System For Your iPod Questions Visit www ihomeaudio com ...

Page 2: ...nando problemas 15 16 Warranty Information 17 Congratulations on your iH52 home sound system for the iPod Before you set up your unit please check to see that the package contains the following items 1 Subwoofer 1 Receiver with 3 AA batteries pre installed for clock battery backup 1 connector cable connects subwoofer to receiver 2 Stereo speakers with thumbscrew mount stands 2 sets speaker cables ...

Page 3: ...oint within an equilateral triangle is intended to alert the user of the presence of important operating and maintenance servicing instructions in the literature accompanying the appliance The symbols above are located on the rear of the subwoofer CAUTION To prevent electric shock match wide blade of plug to wide slot Fully insert CAUTION To reduce the risk of fire do not place any heating or cook...

Page 4: ...ed away from heat sources such as radiators heat registers stoves or other appliances including amplifiers that produce heat 4 Power Sources The unit should be connected to a power supply only of the type described in the operating instructions or as marked on the appliance 5 Grounding or Polarization This product is equipped with a polarized alternating current line plug a plug having one blade w...

Page 5: ... of the mast and supporting structure grounding of the lead in wire to an antenna discharge unit size of grounding conductors location of antenna discharge unit connection to grounding electrodes and requirements for the grounding electrode 9 Power Lines An outside antenna system should not be located in the vicinity of overhead power lines or other electric light or power circuits or where it can...

Page 6: ...amaged E the unit exhibits a marked change in performance or does not operate normally 15 Antenna Do not connect an external antenna to the unit other than that provided 16 Periods of Nonuse If the unit is to be left unused for an extended period of time such as a month or longer the power cord should be unplugged from the unit to prevent damage or corrosion 17 Servicing The user should not attemp...

Page 7: ...radiate radio frequency energy and if not installed and used in accordance with the instruc tions may cause harmful interference to radio communications However there is no guarantee that interference will not occur in a particular installation If this equipment does cause harmful interference to radio or television reception which can be deter mined by turning the equipment off and on the user is...

Page 8: ... Phillips screwdriver to loosen the two FM antenna pole screws on the rear of the receiver Insert FM antenna leads and tighten screws Locate FM antenna for best reception Do not alter antenna wire 3 antennas sub level right speaker left speaker to receiver subwoofer subwoofer speaker speaker receiver sub level right speaker left speaker to receiver If you wish plug the appropriate video cable not ...

Page 9: ...40 60 GB Insert 7 iPod with video 30 GB Insert 9 iPod with video 60 GB Insert 10 iPod nano thin 20 30GB iPod photo thick 40 60GB iPod photo thin 30 GB iPod with video thick 60 GB iPod with video NOTE If you do not have an insert for your model iPod please visit an Apple store www ihomeaudio com or call iHome toll free at 800 288 2792 to purchase one ALWAYS USE AN INSERT TO DOCK YOUR iPod THIS UNIT...

Page 10: ...ton Dock Aux iPod Shuffle Button FM antenna Sync cable port S video Out Jack AM antenna Composite Video Out Jack Line in Jack DST Radio Button Play Pause Button Display Button Volume Button Volume Button Setting Clock EQ Dimmer Button Select Up FF Button Select Down REW Button cables not included ...

Page 11: ...ot alter antenna wire Connecting and setting up the speakers a You can configure your speakers horizontally or vertically with the included mounting stands Fit the stand to the back of the speaker with the small pin in the top hole of the stand mount and the thumbscrew in the bottom hole Tighten the thumbscrew b Press down on the red speaker terminal lever on the back of a speaker and insert the s...

Page 12: ... or REVERSE buttons to cycle through the EQ settings e Press Power On Off Button to turn the iH52 and iPod off Using your iPod Shuffle a To use your iPod shuffle gently dock it in the Shuffle Dock To listen to your iPod shuffle press the iPod Button until shuffle and the shuffle icon appear in the display then use controls on your shuffle When docked the shuffle will charge until fully charged whe...

Page 13: ...l scan to the next station with clear reception d To save a station as a preset tune in the desired station then hold the desired preset button for about two seconds until you hear two confirmation beeps You can save up to 12 presets 6 AM and 6 FM To change a preset follow the same steps for saving a preset e To listen to a preset station in radio mode press the Radio button to select the desired ...

Page 14: ... as a paperclip tip to move ONE of the switches on the base unit to a different position Do the same on the remote making sure to move the same switch to the same position so the switches on each match d Test performance If interference is still an issue adjust DIP switch settings again OPERATING THE REMOTE CONTROL The Remote Control controls basic functions on the iH52 and certain iPod functions ...

Page 15: ... matches the diagram in the battery compartment iPod does not respond to the unit iPod is not installed properly Remove your iPod from the dock and check for obstruction on the connectors in the dock and on your iPod Then reseat it in the dock Your iPod software is too old Upgrade software on your iPod For details visit http www apple com ipod download Power off the iPod then turn on again iPod is...

Page 16: ... is distorted If the iPod original sound source MP3 is of poor quality distortion and noise are easily noticed with high power speakers Try a different audio source such as a music CD If you are using an external sound source like older generation of iPod or other audio device try reducing the output volume on the device itself Remote Control didn t work Remote Control is out of range Move closer ...

Page 17: ...tro del encastre El ícono de batería baja está destellando Las baterías están gastadas Reemplace las baterías Las baterías no están instaladas correctamente Verifique que la polaridad de las baterías y se encuentren de acuerdo al diagrama del compartimiento de baterías El iPod no se comunica con la unidad El iPod no está instalado correctamente Quite el iPod del encastre y verifique posibles obstr...

Page 18: ...información El sonido sale distorsionado El volumen se encuentra muy alto Baje el volumen El sonido sale distorsionado de la unidad Si el sonido original de su iPod era de pobre calidad las distorsiones y ruidos se harán más notables con los parlantes de alta potencia Pruebe utilizar otra fuente de audio como un CD Si está utilizando un iPod de primeras generaciones o un Shuffle intente bajar el v...

Page 19: ...paid and insured to the Factory Service Center listed below Consumer Repair Department SDI Technologies Inc 1330 Goodyear Drive El Paso TX 79936 6420 Disclaimer of Warranty NOTE This warranty is valid only if the product is used for the purpose for which it was designed It does not cover i products which have been damaged by negligence or willful actions misuse or accident or which have been modif...

Reviews: