24
WARNING
PINCHING HAZARD
Failure to follow instructions can cause serious
injury.
Keep fingers and hands out of pinch points when
latching and unlatching the attachment quick
coupler.
◂
W-2541
6.
Turn the machine on.
7.
Release the parking brake.
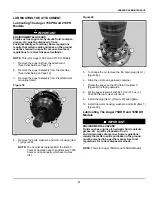
Figure 32
NA3447b
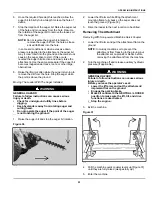
8.
Tilt the quick coupler forward and drive the machine
backward, away from the attachment [Figure 32].
Removing With Powered Machine Quick Coupler
For specific control location and operation of the
machines powered quick coupler, see the machine’s
Operation & Maintenance Manual.
1.
Lower the lift arms and put the attachment flat on the
ground. Lower or close the hydraulic equipment (if
equipped).
NOTE:
In muddy conditions or to prevent the
attachment from freezing to the ground, put
the attachment on planks or blocks before
removing the attachment from the machine.
Figure 33
NA3453A
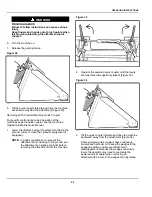
2.
Operate the powered quick coupler until the levers
are fully raised (wedges fully raised) [Figure 33].
Figure 34
NA3447b
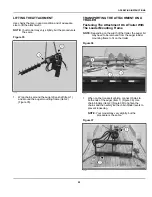
3.
Tilt the quick coupler forward and drive the machine
backward, away from the attachment [Figure 34].
Some powered quick couplers have continuous
pressurized hydraulic oil to keep the wedges in the
engaged position and prevent attachment
disengagement. Because the wedges can slowly
lower, the operator may need to reactivate the
powered quick coupler when removing an
attachment to be sure both wedges are fully raised.
Summary of Contents for Auger 75 DDH
Page 2: ......
Page 12: ...10 Figure 4 C221899a SAFETY AND TRAINING RESOURCES ...
Page 29: ......
Page 52: ...50 troubleshooting 29 W warranty 48 welding safety 7 ALPHABETICAL INDEX ...
Page 53: ......


