background image

www.igmtools.com

3

Operating manual 

  EN

- EN 2 -

11,55

 mm

S

workpiece  Y

wor

kpiec

e  X

wor

kpiec

e  Y

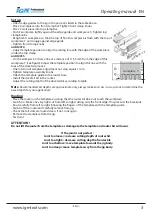
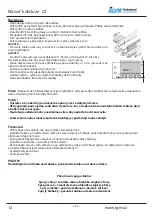
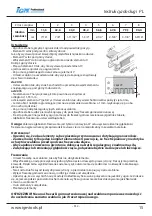
Set up

- Attach edge guides to the jig in the positions listed in the table above.

- Place X workpiece into front clamp bar. Tighten front clamp knobs.

- Place Y workpiece into top clamp bar.

- Push Y workpiece tightly against the edge guide and workpiece X. Tighten top 

clamp knobs.

- Retighten X workpiece, so that the top of front X workpiece is flush with the top of 

workpiece Y and snugly against edge guide.

- Tighten front clamp knobs .

until 2014

- Adjust template position to align the setting line with the edge of the workpiece 

under the top clamp. 

until 2015

- On the workpiece Y, draw a line at a distance of 11,55 mm from the edge of this 

workpiece Y (see figure). Adjust the template position to align this line with the 

tops of the dovetail grooves.

- One rotation of template adjustment nut stop equals 1 mm.

- Tighten template assembly knobs.

- Attach the template guide to the router base.

- Install the dovetail bit in the router.

- Adjust the cutting depth of the dovetail bit according to table.

Note

: Recommended bit depths are approximate only, always make test cuts in scrap stock to determine the 

exact depth for your application!

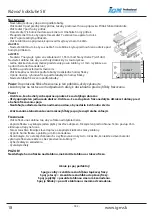
Routing

- Place the router on the template ensuring that the router bit does not touch the workpiece.

- Switch on. Make one very light cut from left to right cutting only the front edge. This prevents the breakout.

- Rout carefully from left to right following the fingers of the template with the template guide.

- Switch off the router and carefully remove from jig.

- Check that all slots are routed clean. If not, rout again.

- Remove the workpiece from the jig.

- Test joint.

ATTENTION !

Do not lift the router from the template as damage to the template and router bit will occur.

If the joint is not perfect :

Joint too loose= increase cutting depth of router bit.
Joint too tight= decrease cutting depth of router bit.

Joint too shallow= move template towards the jig body.

Joint too deep= move template away from the jig body.

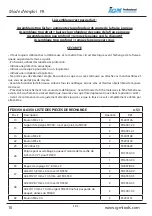
Summary of Contents for FD3350

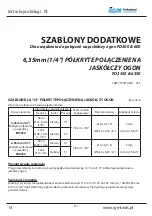
Page 1: ...mm 1 4 HALBVERDECKTE SCHWALBENSSCHWANZVERBINDUNG PEIGNES ADDITIONNEL pour GABARIT QUEUE D ARONDE FD300 600 ASSEMBLAGE A QUEUE D ARONDE DEMICACH DE 6 35 mm 1 4 P DAVN ABLONA pro CINKOVAC SPOJOVAC ZA ZE...

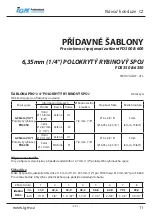
Page 2: ...1 7 8 mm 7 8 6 x 6 9 8 6 35 x 6 35 8 5 mm 6 mm 15 64 Face 28 7 mm 1 1 8 Green F2 6 35 mm 1 4 Half Blind FD6350 Top 20 1 mm Green U1 7 8 mm 7 8 6 x 6 9 8 6 35 x 6 35 8 5 mm 6 mm 15 64 Face 10 mm Silver...

Page 3: ...assembly knobs Attach the template guide to the router base Install the dovetail bit in the router Adjust the cutting depth of the dovetail bit according to table Note Recommended bit depths are appr...

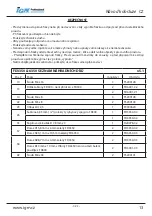
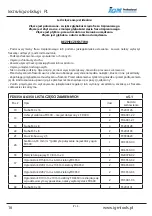
Page 4: ...it in verify the switch is in off position Before you make any adjustments wait till your router cutter completely stops FD3350 6350 SPARE PARTS LIST v 5 1 Pos Description quantity code 10 Screw M4 x...

Page 5: ...15 64 vorderer 28 7 mm 1 1 8 gr n F2 6 35 mm 1 4 halbverdeckte chwalbenschwanz FD6350 oberer 20 1 mm gr n U1 7 8 mm 7 8 6 x 6 9 8 6 35 x 6 35 8 5 mm 6 mm 15 64 vorderer 10 mm silbern F1 Vorbereitung d...

Page 6: ...Tabelle einstellen Achtung Die empfohlene Fr stiefe ist nur approximativ um eine genaue Fr stiefe zu erreichen immer einen Probeschnitt mit Testmaterial machen Achtung Versichern Sie sich dass beide...

Page 7: ...s Netz berpr fen ob sich der Schalter in Stellung aus befindet Vor jeder Einstellung abwarten bis der Fr ser von selber in Stillstand kommt FD3350 6350 ERSATZTEILLISTE v 5 1 Pos Beschreibung Menge Bes...

Page 8: ...6 35 8 5 mm 6 mm 15 64 Frontal 28 7 mm 1 1 8 Vert F2 6 35 mm 1 4 Queue d aronde demi cach FD6350 Sup rieur 20 1 mm Vert U1 7 8 mm 7 8 6 x 6 9 8 6 35 x 6 35 8 5 mm 6 mm 15 64 Frontal 10 mm Argent F1 P...

Page 9: ...e la fraise queue d aronde dans la d fonceuse selon la table respective Mettez au point la profondeur de fraisage selon la table respective Notice La profondeur de fraisage recommand e est seulement a...

Page 10: ...l s et d autres objets libres de l espace de travail Pr venez le branchement non voulu de la d fonceuse Avant d ins rer la fiche m le dans la fiche femelle au avant son branchement au circuit lectriqu...

Page 11: ...6 x 6 9 8 6 35 x 6 35 8 5 mm 6 mm 15 64 eln 28 7 mm 1 1 8 Zelen F2 6 35mm 1 4 Polokryt rybinov FD6350 Horn 20 1 mm Zelen U1 7 8 mm 7 8 6 x 6 9 8 6 35 x 6 35 8 5 mm 6 mm 15 64 eln 10 mm St brn F1 P pr...

Page 12: ...bka fr zov n je jen p ibli n v dy prove te zku ebn ez na testovac m odpadov m d lu k dosa en p esn hloubky fr zov n Pozor Ujist te se e oba d ly jsou bezpe n upnuty a e se dot kaj doraz V dy up nejte...

Page 13: ...suvky a p ed p ipojen m ke zdroji proudu se ujist te e vyp na je v poloze vypnuto Ne li zah j te jak koliv se izov n po kejte a se fr za sama pln zastav FD3350 6350 SEZNAM N HRADN CH D L v 5 1 Pos Pop...

Page 14: ...ryte po czenie na jask czy FD3350 Horn 15 8 mm 5 8 Zielony U1 7 8 mm 7 8 6 x 6 9 8 6 35 x 6 35 8 5 mm 6 mm 15 64 eln 28 7 mm 1 1 8 Zielony F2 6 35mm 1 4 P kryte po czenie na jask czy FD6350 Horn 20 1...

Page 15: ...entacyjna W celu uzyskania idealnej g boko ci frezowania najpierw nale y przeprowadzi testowe ci cie na niepotrzebnym kawa ku materia u Ostrze enie Upewnij si e oba elementy s bezpiecznie przymocowane...

Page 16: ...Zapobiegaj przypadkowemu w czeniu frezarki Przed w o eniem wtyczki do gniazdka i przed pod czeniem jej do r d a zasilania upewnij si e prze cznik nie znajduje si w pozycji w czony Zanim przyst pisz d...

Page 17: ...6 9 8 6 35 x 6 35 8 5 mm 6 mm 15 64 eln 28 7 mm 1 1 8 Zelen F2 6 35mm 1 4 Polokryt rybinov FD6350 Horn 20 1 mm Zelen U1 7 8 mm 7 8 6 x 6 9 8 6 35 x 6 35 8 5 mm 6 mm 15 64 eln 10 mm Strieborn F1 Pr pra...

Page 18: ...h bka fr zovania je len pribli n v dy vykonajte sk obn rez na testovacom odpadovom diely k dosiahnutiu presnej h bky fr zovania Pozor Uistite sa e oba diely s bezpe ne upnut a e sa dot kaj dorazov V...

Page 19: ...suvky a pred pripojen m k zdroju pr du sa uistite e vyp na je v polohe vypnut Ne za nete ak ko vek nastavovanie po kajte a sa fr za sama plne zastav FD3350 6350 SEZNAM N HRADN CH D L v 5 1 Pos Popis m...

Page 20: ...8 6 35 x 6 35 8 5 mm 6 mm 15 64 El ls 28 7 mm 1 1 8 Z ld F2 6 35 mm 1 4 F lig takart fecskefark FD6350 Fels 20 1 mm Z ld U1 7 8 mm 7 8 6 x 6 9 8 6 35 x 6 35 8 5 mm 6 mm 15 64 El ls 10 mm Ez st F1 Anya...

Page 21: ...szerint Vigy zat A mar s aj nlott m lys ge csak megk zel t leges mindig hajtson v gre pr bav g st hullad k darabon a pontos v g si m lys g be ll t s hoz Vigy zat Bizonyosodjon meg hogy mindk t darab b...

Page 22: ...tt konnektorba csatlakoztatja bizonyosodjon meg hogy a kapcsol kikapcsot poz ci ban van B rmilyen be ll t s el tt v rja meg m g a mar mag t l teljesen meg ll FD3350 6350 CSEREALKATR SZEK LIST JA v 5 1...

Page 23: ...www igmtools com 23...
Page 24: ...IGM n stroje a stroje s r o V Kn vce 201 Tuchom ice 252 67 Czech Republic E U T 420 220 950 910 www igm cz 2018 IGM n stroje a stroje s r o...

Reviews: