background image


Freestanding Assembly 


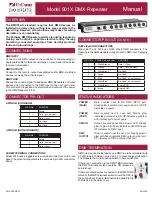
Guide to the Control Panel   


1.  Control Panel 


1   Power On/Off button 
2   Mechanical/automatic mode selector 
3   Mechanical/automatic mode timer setting. 
4   Confirm button 
5   Downwards adjustment 
6   Upwards adjustment 
7   High/low power selector 
8   Power indicator light 
9   Day 
10 Heating element indicator light 
11 Low power 
12 High power 
13 Negative ion function--This model without negative ion function  
14 Mechanical control 
15 Automatic control 
16 Timer 
17 Hours display 
18 Minutes display  
19 Real time temperature display 
20 Temperature unit display 

o


1.  Ensure that the heater is unplugged and 

that the power switches are off. 

2.  Turn the heater upside down. 
3.  Locate the four holes at each end of the 

base of the heater. 

4.  Secure the footplates to the base through 

the holes using the screws provided. 

5.  Turn the heater upright and plug into the 

mains power outlet. 


Foot Plate 

Affix foot plates and attach 

castors 

Summary of Contents for IG9101

Page 1: ...1 PANEL CONVECTOR HEATER WITH TIMER Model Number IG9101 IG9151 IG9220 INSTRUCTIONS FOR USE Thank you for purchasing this product Please read these instructions...

Page 2: ...void burns do not touch the hot surface Switch off and let the appliance cool before moving or touching Ensure that the heater is not positioned close to curtains or furniture as this may create a fir...

Page 3: ...eater by unscrewing the 2 locking screws located at the top of the wall mounting bracket 6 Position the bracket on the wall and drill holes as required 7 Secure the mounting bracket to the wall with t...

Page 4: ...n function This model without negative ion function 14 Mechanical control 15 Automatic control 16 Timer 17 Hours display 18 Minutes display 19 Real time temperature display 20 Temperature unit display...

Page 5: ...te and time Day When the power is on press the SET 3 and OK 4 at the same time for 3 seconds The day 9 will flash Then press the downwards adjustment 5 or upwards adjustment 6 to choose the right day...

Page 6: ...running time and press OK 4 for 3 seconds the Thursday to Sunday would be in the same running time but Monday and Tuesday could not copy the data After you have set the first day it can go onto the fo...

Page 7: ...3 seconds to unlock the control panel Overheat Protection This appliance is fitted with a safeguard that will automatically shut the power off should any part of the heater begin to overheat The heat...

Page 8: ...itch to manual setting Mains Plug Replacement To replace the plug 1 Cut off the existing fitted plug and dispose of it 2 The wires in the mains lead supplied with this appliance are coloured in accord...

Page 9: ...ct must have been used according to the instructions in the User Manual Any misuse of the product will result in the warranty being void Disclaimer Updates to hardware components are made regularly Th...

Page 10: ...10 View the range online at www igenix co uk Follow us on Twitter Igenix_Products...

Reviews: