Operating instructions
Electronic pressure sensor
PN701xPN703x
80285814 / 00
07 / 2019
UK
Page 1: ...Operating instructions Electronic pressure sensor PN701x PN703x 80285814 00 07 2019 UK...
Page 2: ...14 8 1 Menu structure main menu 14 8 2 Explanation of the menu 15 8 2 1 Explanation of menu level 1 15 8 2 2 Explanation of menu level 2 15 9 Parameter setting 16 9 1 Parameter setting in general 16...
Page 3: ...7 10 1 Read the set parameters 27 10 2 Self diagnostics fault indications 28 11 Technical data 29 11 1 Setting ranges 29 11 1 1 Setting ranges in operating mode 2 29 11 1 2 Setting ranges in operating...
Page 4: ...The product must be suitable for the corresponding applications and environmental conditions without any restrictions Only use the product for its intended purpose Functions and features Only use the...
Page 5: ...Use devices with a measuring range 2 5 MPa for gas applications 25 MPa Avoid static and dynamic overpressure exceeding the specified overload pressure by taking appropriate measures The indicated bur...
Page 6: ...nication So the following options are possible Remote display reading and displaying the current system pressure Remote parameter setting reading and changing the current parameter setting IO Link par...
Page 7: ...tatus see the labelling on the device BA xxxx PNxxxx Application Improved controllability via IO Link Highly granular setting of switch on and switch off points IODD designation E g PN7010 Status_B Hi...
Page 8: ...set point SPx is set then the reset point rPx The hysteresis defined remains even if SPx is changed again Window function normally open OUx Fno fig 2 Window function normally closed OUx Fnc fig 2 The...
Page 9: ...Link hardware and software can be found at www ifm com 4 4 2 Functions only available via IO Link communication HIPC number of overload processes 9 6 2 HIPS threshold for the overload counter 9 6 2 Fl...
Page 10: ...t be connected by a qualified electrician The national and international regulations for the installation of electrical equipment must be adhered to Voltage supply according to EN 50178 SELV PELV Disc...
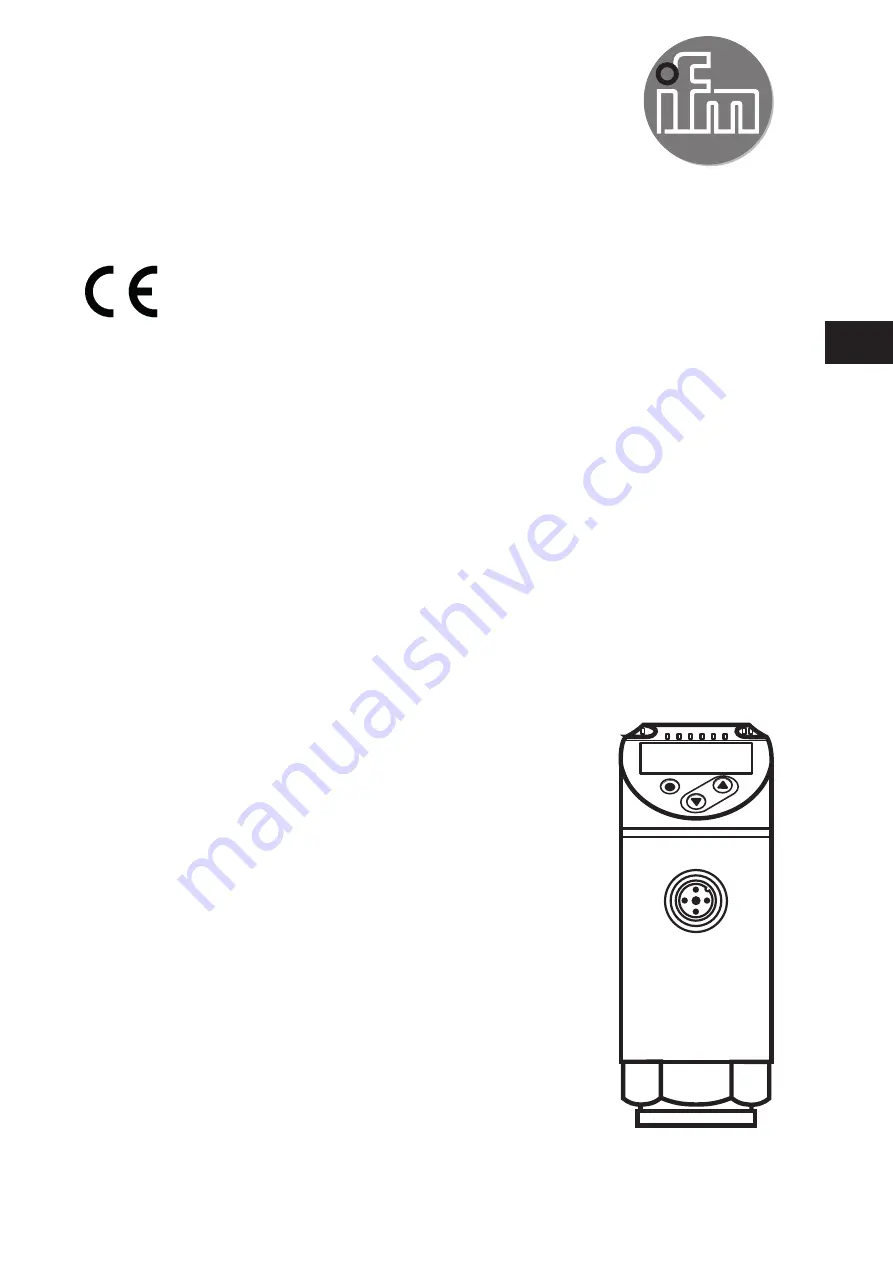
Page 11: ...ed LEDs 2 7 System pressure in the indicated unit of measurement 9 Enter button Selection of the parameters and acknowledgement of the parameter values 10 to 11 Arrow keys up and down Setting of the p...
Page 12: ...12 8 Menu 8 1 Menu structure main menu RUN 1 2 Menu items highlighted in grey e g FH1 are only active when assigned parameters have been selected...
Page 13: ...F either normally open no or normally closed nc Output off OFF function only available in operating mode 3 ou2 Output function for OUT2 Switching signal for the pressure limits hysteresis function H...
Page 14: ...ue Press to edit the selected parameter Press or for at least 1 s After 1 s setting value is changed incrementally by pressing the button once or continuously by keeping the button pressed Numerical v...
Page 15: ...2 Press to get to the menu Press or until EF is displayed Press The first parameter of the submenu is displayed here rES Change from menu level 1 to menu level 2 when a parameter setting software is...
Page 16: ...plying the settings Press simultaneously Return to the menu level Exit menu level To exit the menu level Press simultaneously Menu level 2 changes to level 1 or level 1 changes to display 9 2 Define t...
Page 17: ...tions Select ou1 and set the switching function Hno hysteresis function normally open Hnc hysteresis function normally closed Fno window function normally open Fnc window function normally closed OFF...
Page 18: ...the value for FHx 9 5 User settings optional 9 5 1 Set delay time for the switching outputs dS1 dS2 switching delay for OUT1 OUT2 dr1 dr2 reset delay for OUT1 OUT2 Select dS1 dS2 dr1 or dr2 and set a...
Page 19: ...Select P n and set PnP or nPn 9 5 3 Set damping for the switching signal Select dAP and set the damping constant in seconds T value 63 setting range 0 000 4 000 s Damping dAP affects the switch point...
Page 20: ...e measured value is between the limit values of OUT1 and OUT2 r cF display colour red when the measured value is between the freely definable limits cFL and cFH G cF display colour green when the meas...
Page 21: ...splay red Measured value switch point OUT1 OUT2 display green Display colour change for the parameters r1ou r2ou mode window function Display colour change for the parameters G1ou G2ou mode window fun...
Page 22: ...arameter r 12 mode window function Display colour change for the parameter G 12 mode window function 1 FL1 2 FH1 FL2 FH2 1 FL1 2 FH1 FL2 FH2 Measured value outside FL1 FH1 and FL2 FH2 display red Meas...
Page 23: ...2 cFH 1 cFL 2 cFH Measured value between cFL and cFH display red Measured value between cFL and cFH display green Colour change display green Colour change display red 1 Initial value of the measuring...
Page 24: ...5 ms HIPS Setting of the threshold for the overload counter The parameters HIPC and HIPS are only available via IO Link communication 10 Operation After power on the unit is in the Run mode normal op...
Page 25: ...hing output OUT1 Check switching output OUT1 for short circuit or excessive current remove the fault SC2 flashes flashes F Excessive current on switching output OUT2 Check switching output OUT2 for sh...
Page 26: ...ated as long as the excessive current short circuit continues 11 Technical data 11 1 Setting ranges The setting ranges depend on the operating mode 4 1 11 1 1 Setting ranges in operating mode 2 rP SP...
Page 27: ...0 2 0 40 0 2 0 1 PN7011 MPa 0 1 25 0 2 0 25 0 2 0 1 PN7032 MPa 0 03 10 0 05 0 10 0 05 0 01 PN7033 MPa 0 01 2 5 0 02 0 2 5 0 02 0 01 PN7034 MPa 0 097 1 0 005 0 1 1 0 005 0 001 PN7036 kPa 1 250 2 0 250...
Page 28: ...0 06 colr rEd diS d2 cFH VMR cFL MAW HIPS VMR CMPT 2 VMR final value of the measuring range MAW initial value of the measuring range The indicated percentage of the final value of the measuring range...
Page 29: ...29 UK More information at www ifm com...