background image


UPC-12A/GM45 Panel PC


Page 31 


Installation


Chapter 

4


Summary of Contents for UPC-12A/GM45

Page 1: ...ge i User Manual UPC 12A GM45 Panel PC MODEL UPC 12A GM45 Panel PC with Touch Screen and Intel Core 2 Duo or Celeron M CPU Gigabit Ethernet Six USB Audio RS 232 422 485 SATA RoHS Compliant IP 65 Protection Rev 2 10 9 July 2013 ...

Page 2: ...UPC 12A GM45 Panel PC Page ii Revision Date Version Changes 9 July 2013 2 10 Updated for latest version R21 R20 21 October 2011 2 00 Updated for latest version R20 R11 11 July 2011 1 00 Initial release ...

Page 3: ...s arising out of the use or inability to use the product or documentation even if advised of the possibility of such damages This document contains proprietary information protected by copyright All rights are reserved No part of this manual may be reproduced by any mechanical electronic or other means in any form without prior written permission of the manufacturer TRADEMARKS All registered trade...

Page 4: ...IONS 303H303H303H304H12 14H14H14H14H2 1 DIMENSIONS 304H304H304H305H13 15H15H15H15H2 2 INTEL PROCESSOR SUPPORT 305H305H305H306H14 16H16H16H16H2 3 MOTHERBOARD COMPONENTS 306H306H306H307H15 17H17H17H17H2 3 1 Memory Support 307H307H307H308H15 18H18H18H18H2 3 1 1 Installed Memory 308H308H308H309H15 19H19H19H19H2 3 1 2 Additional Memory 309H309H309H310H15 20H20H20H20H2 3 2 Storage Capacity 310H310H310H3...

Page 5: ...5H26 45H45H45H45H3 UNPACKING 335H335H335H336H27 46H46H46H46H3 1 UNPACKING 336H336H336H337H28 47H47H47H47H3 1 1 Packing List 337H337H337H338H29 48H48H48H48H4 INSTALLATION 338H338H338H339H31 49H49H49H49H4 1 ANTI STATIC PRECAUTIONS 339H339H339H340H32 50H50H50H50H4 2 INSTALLATION PRECAUTIONS 340H340H340H341H32 51H51H51H51H4 3 PREINSTALLED COMPONENTS 341H341H341H342H33 52H52H52H52H4 4 INSTALLATION AND ...

Page 6: ...77H77H77H77H5 2 ANTI STATIC PRECAUTIONS 367H367H367H368H57 78H78H78H78H5 3 TURN OFF THE POWER 368H368H368H369H58 79H79H79H79H5 4 REPLACING COMPONENTS 369H369H369H370H58 80H80H80H80H5 4 1 Hard Disk Drive Replacement 370H370H370H371H58 81H81H81H81H5 4 2 CF Card Replacement 371H371H371H372H58 82H82H82H82H5 4 3 Wireless Module Replacement 372H372H372H373H59 83H83H83H83H5 4 4 SO DIMM Module Replacement...

Page 7: ...H111H111H6 8 EXIT 401H401H401H402H97 112H112H112H112H7 BATTERY MONITORING AND REMOTE CONTROL 402H402H402H403H99 113H113H113H113H7 1 INTRODUCTION 403H403H403H404H100 114H114H114H114H7 2 MONITORING DC POWER AND SMART BATTERY 404H404H404H405H100 115H115H115H115H7 2 1 Application Installation 405H405H405H406H100 116H116H116H116H7 2 2 Status Information 406H406H406H407H103 117H117H117H117H7 2 2 1 DC De...

Page 8: ...Disposal 425H425H425H426H122 136H136H136H136HB 2 MAINTENANCE AND CLEANING PRECAUTIONS 426H426H426H427H122 137H137H137H137HB 2 1 Maintenance and Cleaning 427H427H427H428H122 138H138H138H138HB 2 2 Cleaning Tools 428H428H428H429H123 139H139H139H139HC BIOS CONFIGURATION OPTIONS 429H429H429H430H124 140H140H140H140HC 1 BIOS CONFIGURATION OPTIONS 430H430H430H431H125 141H141H141H141HD WATCHDOG TIMER 431H4...

Page 9: ...9 OSD Buttons 448H19 158HFigure 2 10 VGA Connector 449H20 159HFigure 2 11 Audio Connectors 450H20 160HFigure 2 12 Power Connectors 451H22 161HFigure 2 13 Lithium Battery Pack 452H22 162HFigure 2 14 AT ATX Mode Switch 453H23 163HFigure 2 15 UPS Battery Mode Switch 454H23 164HFigure 2 16 Wireless LAN PCIe Mini Card 455H26 165HFigure 4 1 CF Card Installation 456H34 166HFigure 4 2 HDD Battery Access P...

Page 10: ...9H54 189HFigure 4 25 VGA Connector 480H55 190HFigure 5 1 Rear Cover Retention Screws 481H59 191HFigure 5 2 Wireless Module Location 482H60 192HFigure 5 3 SO DIMM Socket Location 483H61 193HFigure 5 4 Installing a SO DIMM 484H61 194HFigure 5 5 Gasket Replacement 485H62 195HFigure 7 1 Welcome Screen 486H100 196HFigure 7 2 Select Installation Folder 487H101 197HFigure 7 3 Ready to Install the Program...

Page 11: ...7 18 IEI REMOTE AP IP Address 503H111 213HFigure 7 19 Remote Management Web Interface Status 504H111 214HFigure 7 20 Remote Management Web Interface H W Monitor 505H112 215HFigure 7 21 Remote Management Web Interface Send Email 506H113 216HFigure 7 22 Enter User Name and Password 507H113 217HFigure 7 23 Board Configuration 508H114 ...

Page 12: ...4HTable 2 4 Buzzer Alarm 513H513H513H515H26 224H224H224H225HTable 4 1 Jumpers 514H514H514H516H39 225H225H225H226HTable 4 2 Preconfigured Jumpers 515H515H515H517H40 226H226H226H227HTable 4 3 CF Voltage Select Jumper Settings 516H516H516H518H41 227H227H227H228HTable 4 4 CF Card Setup Jumper Settings 517H517H517H519H41 228H228H228H229HTable 4 5 COM4 Function Select Jumper Settings JP4 518H518H518H520...

Page 13: ...UPC 12A GM45 Panel PC Page 1 1 Introduction Chapter 1 ...

Page 14: ...n Intel ICH9M input output controller hub ensures optimal memory graphics and peripheral I O support The system comes with 1GB or 2GB of preinstalled DDR2 SDRAM and supports a maximum of 4 0 GB of DDR2 SDRAM ensuring smooth data throughputs with reduced bottlenecks and fast system access Four serial ports and six external USB 2 0 ports ensure simplified connectivity to a variety of external periph...

Page 15: ...o P8400 1300cd m2 2GB DDR2 Yes T94 R 2G R20 2 53GHz Intel Core 2 Duo T9400 1300cd m2 2GB DDR2 Yes Table 1 1 Model Variations 1 1 2 Features All the UPC 12A GM45 models feature the following Intel Core 2 Duo or Intel Celeron M processor Intel GM45 chipset DDR2 SDRAM preinstalled Three standard RS 232 connectors and one RS 232 422 485 connector Six standard USB 2 0 ports Watchdog timer that triggers...

Page 16: ... also be accessed through the rear panel The bottom panel provides access to external interface connectors that include LAN USB 2 0 VGA audio jack serial port connectors and PCI expansion card slot 1 2 1 Front Panel The front side of the UPC 12A GM45 is a flat panel TFT LCD screen surrounded by an aluminum frame The bottom of the front panel features two USB ports protected by the waterproof cover...

Page 17: ...peripheral device connectors on the UPC 12A GM45 2 x Audio jacks 3 x RS 232 serial port COM1 COM2 and COM3 connectors 1 x RS 232 422 485 serial port COM4 connector 1 x VGA connector 4 x USB 2 0 connectors 2 x RJ 45 GbE connectors 1 x Remote monitor RJ 45 connector 1 x Remote COM port by RJ 45 connector 1 x CompactFlash slot 1 x PCI expansion card slot 1 x 12 V DC power input connector 1 x 9 V 28 V...

Page 18: ...UPC 12A GM45 Panel PC Page 6 1 x Clear CMOS button 1 x Reset button Figure 1 3 UPC 12A GM45 Bottom View ...

Page 19: ... inside the side panels and can be accessed for maintenance by removing the side panels 524H524H524H524H524H524H524H526HFigure 1 4 Figure 1 4 UPC 12A GM45 Side View 1 2 4 Rear Panel The rear panel has retention screw holes that support a wall mounting bracket The rear panel also provides access to the 2 5 HDD bay and the backup battery slot Figure 1 5 UPC 12A GM45 Rear View ...

Page 20: ...een 1 x Inverter 1 x Wireless LAN module 1 x DDR2 memory module 2 x System fans 2 x Stereo speakers The following section lists the system specifications The technical specifications for some other preinstalled components are shown in the Appendix A 1 3 2 System Specifications The technical specifications for the UPC 12A GM45 system are listed in 525H525H525H525H525H525H525H527HTable 1 3 Specifica...

Page 21: ...or 2 00 GHz Intel Celeron M 575 processor Chipsets Intel GM45 ICH9M Memory One 1 0 GB DDR2 SDRAM SO DIMM pre installed Two 200 pin SO DIMM sockets support up to 4 0 GB 400 533 MHz DDR2 memory SSD CF Type II Watchdog Timer Software Programmable supports 1 sec 255 sec system reset Battery Capacity 14 8 V 3800 mAH P8400 CPU 40 minutes 40 minutes T9400 CPU 40 minutes 40 minutes UPS Run time 575 CPU 50...

Page 22: ...ge Temperature 20ºC 70ºC Dimensions W x H x D mm 335 0 x 280 0 x 119 0 Weight Net Gross 5 8kg 6 9 kg IP level front panel IP 65 EMC CE CCC and FCC Safety CB Touch Screen Resistive Type 5 wire touch controller IC is on board 150 W Input 90 VAC 264 VAC 50 Hz 60 Hz Power Adapter Output 12 VDC at 12 5 A P8400 CPU 63 W 73 W T9400 CPU 65 W 74 W Power Consumption 575 CPU 60 W 70 W 1 x 12 V DC In connecto...

Page 23: ...x RS 232 422 485 port COM4 6 x USB 2 0 connectors four on the bottom and two on the front 2 x GbE connectors 1 x Remote monitor RJ 45 connector 1 x Remote COM port by RJ 45 connector 2 x Audio jacks 1 x VGA connector 1 x Remote power switch connector Table 1 3 UPC 12A GM45 System Specifications ...

Page 24: ...UPC 12A GM45 Panel PC Page 12 2 Detailed Specifications Chapter 2 ...

Page 25: ...l PC Page 13 2 1 Dimensions The dimensions of the UPC 12A GM45 are shown in 526H526H526H526H526H526H526H528HFigure 2 1 and listed below Width 335 0 mm Height 280 0 mm Depth 118 5 mm Figure 2 1 UPC 12A GM45 Dimensions mm ...

Page 26: ...below Processor Number 575 P8400 T9400 CPU Speed 2 GHz 2 26 GHz 2 53 GHz Bus Speed 667 MHz 1066 MHz 1066 MHz Bus Core Ratio 12 0 8 5 9 4 L2 Cache Size 1 MB 3 MB 6 MB L2 Cache Speed 2 GHz 2 26 GHz 2 53 GHz Technology 65 nm 45 nm 45 nm Table 2 1 UPC 12A GM45 Series CPU Specifications The processor is protected by the dust proof heat sink shown in 528H528H528H528H528H528H528H530HFigure 2 2 below Figu...

Page 27: ...2 Additional Memory The Intel GM45 is capable of supporting two 200 pin 2 0 GB max 667 MHz or 800 MHz DDR2 SDRAM SO DIMM system max 4 0 GB If additional memory is required please contact an IEI sales representative and discuss the necessary system requirement Figure 2 3 Memory Module and Memory Socket 2 3 2 Storage Capacity The UPC 12A GM45 comes with one hard disk drive bay for a 2 5 SATA HDD 529...

Page 28: ...al Peripheral Interface Connectors The following section describes the external peripheral interface connectors on the real panel and the bottom panel of the panel PC 2 4 1 Serial Port Connectors The UPC 12A GM45 has four serial ports COM1 COM2 COM3 and COM4 on the bottom panel Three of these ports COM1 COM2 and COM3 are RS 232 only ports The COM4 serial port can be configured as a RS 232 RS 422 o...

Page 29: ... and COM4 are connected to the ICH9M LPC bus through a Fintek serial port controller 2 4 2 LAN Connectivity Two of the PCI Express PCIe x1 lanes from the ICH9M Southbridge are interfaced to two Realtek RTL8111CP PCIe gigabit Ethernet GbE controllers The RTL8111CP controllers are then connected directly to two RJ 45 connectors on the bottom panel and provides external PCIe GbE connectivity Figure 2...

Page 30: ...nt with USB specification Revision 2 0 and USB specification Revision 1 1 and can be interfaced to both USB 1 1 and USB 2 0 compliant devices Figure 2 8 External Standard USB Ports 2 5 UPC 12A GM45 Front Side 2 5 1 Monitor A 12 1 LCD screen is installed in the monitor of the UPC 12A GM45 panel PC 2 5 2 Touch Screen Module A controller for the 5 wire resistive touch screen is connected to the mothe...

Page 31: ...is button to turn the LCD monitor on or off Brightness Increase Button Press this button to increase the LCD brightness Brightness Decrease Button Press this button to decrease the LCD brightness Volume Increase Button Press this button to increase the audio volume Volume Decrease Button Press this button to decrease the audio volume Auto Dimming Button Press this button to enable or disable auto ...

Page 32: ...2 10 VGA Connector 2 6 2 Dual Display The system supports dual display capabilities The second display device can be connected to the UPC 12A GM45 through the VGA connector described above 2 7 Audio The integrated audio controller on the Intel ICH9M Southbridge is integrated to a RealTek ALC888 High Definition Audio codec The RealTek ALC888 is a 7 1 2 channel audio codec providing 10 DAC channels ...

Page 33: ... 8 1 2 ATX Power Mode With the ATX mode selected the UPC 12A GM45 panel PC goes in a standby mode when it is turned off The panel PC can be easily turned on via network or a power switch in standby mode Remote power control is perfect for the applications that the panel PC needs to be set individually and controlled remotely 2 8 2 Power Adapter The system is shipped with a 90 V to 264 V AC power a...

Page 34: ...ttery function please install and connect the battery to the system refer to Section 533H533H533H533H533H533H533H535H4 7 Once the battery is connected to the system the battery starts discharging even when the system power is off Users can use the AUPS to monitor the battery status refer to Chapter 534H534H534H534H534H534H534H536H7 To charge the battery connect the power adapter to the system Figu...

Page 35: ...er mode or the ATX power mode The power mode switch is shown in 535H535H535H535H535H535H535H537HFigure 2 14 Figure 2 14 AT ATX Mode Switch The UPC 12A GM45 is also has an UPS Battery mode switch shown in 536H536H536H536H536H536H536H538HFigure 2 15 Figure 2 15 UPS Battery Mode Switch ...

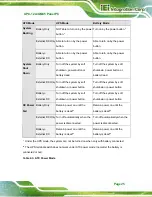
Page 36: ...isconnected System Shut Down Battery External DC Turn off automatically when the power is disconnected Turn off automatically when the power is disconnected Battery Only N A N A External DC Only Turn off automatically when the power is disconnected Turn off automatically when the power is disconnected DC Power Fail Battery External DC Remain power on until the battery is dead Remain power on until...

Page 37: ...tton Turn off the system by soft shutdown or power button System Shut Down Battery External DC Turn off the system by soft shutdown or power button Turn off the system by soft shutdown or power button Battery Only Remain power on until the battery is dead Remain power on until the battery is dead External DC Only Turn off automatically when the power is disconnected Turn off automatically when the...

Page 38: ...10 or the battery temperature is higher than 60 C Battery Fail Continued beeps Alarm when battery fails Table 2 4 Buzzer Alarm 2 9 Wireless Ethernet An 802 11 b g n wireless LAN module and PIFA antenna on the UPC 12A GM45 ensures an uninterrupted wireless connection PIFA antennas can receive high quality uniform signals in any location from all directions without any signal degradation or impedanc...

Page 39: ...UPC 12A GM45 Panel PC Page 27 3 Unpacking Chapter 3 ...

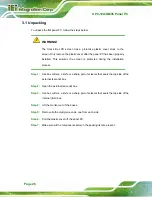
Page 40: ...he installation process Step 1 Use box cutters a knife or a sharp pair of scissors that seals the top side of the external second box Step 2 Open the external second box Step 3 Use box cutters a knife or a sharp pair of scissors that seals the top side of the internal first box Step 4 Lift the monitor out of the boxes Step 5 Remove both polystyrene ends one from each side Step 6 Pull the plastic c...

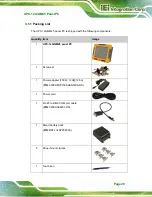
Page 41: ...d with the following components Quantity Item Image 1 UPC 12A GM45 panel PC 1 Screw set 1 Power adapter 150 W 12V 12 5A P N 63000 FSP150AHAN1808 RS 1 Power cord 1 RJ 45 to DB 9 COM port cable P N 32000 089201 RS 1 Smart battery pack P N BAT LI 4S2P3800A 6 Panel mount clamps 1 Touch pen ...

Page 42: ...UPC 12A GM45 Panel PC Page 30 1 User manual CD and driver CD If any of these items are missing or damaged contact the distributor or sales representative immediately ...

Page 43: ...UPC 12A GM45 Panel PC Page 31 4 Installation Chapter 4 ...

Page 44: ...elp to prevent ESD from damaging the board Self grounding Before handling the board touch any grounded conducting material During the time the board is handled frequently touch any conducting materials that are connected to the ground Use an anti static pad When configuring the UPC 12A GM45 place it on an antic static pad This reduces the possibility of ESD damaging the UPC 12A GM45 Only handle th...

Page 45: ...reo speakers Preinstalled OEM customizations may include the following Different DDR2 memory module Hard disk drive CF card Component installation is described in the following sections 4 4 Installation and Configuration Steps The following installation steps must be followed Step 1 Unpack the panel PC Step 2 Install the HDD Step 3 Install the battery Step 4 Install the PCIe Mini wireless card Ste...

Page 46: ...CF card into the socket See 537H537H537H537H537H537H537H539HFigure 4 1 Figure 4 1 CF Card Installation Step 3 To remove the CF card push the eject button on the side of the CF card socket Step 0 4 6 HDD Installation The UPC 12A GM45 has one HDD slot inside the bottom panel for one 2 5 SATA HDD To install the HDD follow the instructions below Step 1 Remove the HDD battery access panel The HDD batte...

Page 47: ...D bracket is secured to the aluminum chassis by four retention screws 538H538H538H538H538H538H538H540HFigure 4 3 To remove the HDD bracket please remove the four retention screws Figure 4 3 HDD Bracket Retention Screws Step 4 Place one 2 5 SATA HDD onto the HDD bracket as shown in 539H539H539H539H539H539H539H541HFigure 4 4 Connect the HDD to the SATA cable connector ...

Page 48: ...o secure the HDD to the HDD bracket See 540H540H540H540H540H540H540H542HFigure 4 4 Figure 4 4 Secure the HDD with the HDD Bracket Step 6 Install the HDD Correctly align the four retention screw holes on the HDD bracket with the retention screw holes on the aluminum chassis Insert four previously removed retention screws to secure the HDD bracket to the chassis See 541H541H541H541H541H541H541H543HF...

Page 49: ...r system backup power To install the battery follow the steps below Step 1 Remove the HDD battery access panel The HDD battery access panel is secured to the rear panel with eight retention screws Remove the retention screws to remove the HDD battery access panel Figure 4 6 HDD Battery Access Panel Retention Screws Step 2 Connect the battery to the battery connector Step 3 Secure the battery to th...

Page 50: ...n The UPC 12A GM45 has one slot on the bottom panel for PCI card expansion To install the PCI card follow the instructions below Step 1 Remove the rear cover Refer to Section 542H542H542H542H542H542H542H544H5 4 3 Step 1 2 Step 2 Remove the PCI slot cover by removing the PCI slot cover retention screw Figure 4 8 PCI Card Slot Cover Retention Screws ...

Page 51: ...pins to connect them To CLOSE SHORT a jumper means connecting the pins of the jumper with the plastic clip and to OPEN a jumper means removing the plastic clip from a jumper Figure 4 9 Jumper Locations The following jumpers can be found on the motherboard installed in the UPC 12A GM45 Before the UPC 12A GM45 is installed the jumpers must be set in accordance with the desired configuration The jump...

Page 52: ...reconfigured for the UPC 12A GM45 Users should NOT change these jumpers Jumper Name Label Type LVDS voltage selection JP3 6 pin header Panel Type and Resolution JP1 8 pin header Table 4 2 Preconfigured Jumpers 4 9 3 CF Voltage Select Jumper Label JP7 Jumper Type 3 pin header Jumper Settings See 547H547H547H547H547H547H547H549HTable 4 3 Jumper Location See 548H548H548H548H548H548H548H550HFigure 4 1...

Page 53: ...shown in 550H550H550H550H550H550H550H552HFigure 4 10 Figure 4 10 CF Voltage Select Jumper Location 4 9 4 CF Card Setup Jumper Label JP8 Jumper Type 2 pin header Jumper Settings See 551H551H551H551H551H551H551H553HTable 4 4 Jumper Location See 552H552H552H552H552H552H552H554HFigure 4 11 CF Card Setup Description Short Master Open Slave Default Table 4 4 CF Card Setup Jumper Settings ...

Page 54: ...r Type Pin header Jumper Settings See 554H554H554H554H554H554H554H556HTable 4 5 and 555H555H555H555H555H555H555H557HTable 4 6 Jumper Location See 556H556H556H556H556H556H556H558HFigure 4 12 The COM 4 Function Select jumpers JP4 and JP5 set the communication protocol used by the COM4 serial communications port as RS 232 RS 422 or RS 485 The COM 4 Function Select settings are shown in 557H557H557H55...

Page 55: ...COM4 Function Select Jumper Settings JP4 JP5 Description Short 1 2 4 5 7 8 10 11 RS 232 Short 2 3 5 6 8 9 11 12 RS 422 or RS 485 Default Table 4 6 COM4 Function Select Jumper Settings JP5 The COM4 Function Select jumper locations are shown in 558H558H558H558H558H558H558H560HFigure 4 12 below Figure 4 12 COM4 Function Select Jumper Locations ...

Page 56: ...H559H559H559H561HFigure 4 13 If the UPC 12A GM45 fails to boot due to improper BIOS settings the clear CMOS button clears the CMOS data and resets the system BIOS information If the CMOS Settings Wrong message is displayed during the boot up process the fault may be corrected by pressing the F1 to enter the CMOS Setup menu Do one of the following Enter the correct CMOS setting Load Optimal Default...

Page 57: ...he flat panel PC does not fall down and get damaged The four methods of mounting the flat panel PC are listed below Wall mounting Panel mounting Arm mounting The four mounting methods are described below 4 10 1 Wall Mounting To mount the UPC 12A GM45 flat panel PC onto a wall please follow the steps below Step 1 Select the location on the wall for the wall mounting bracket Step 2 Carefully mark th...

Page 58: ...rt the four monitor mounting screws provided in the wall mounting kit into the four screw holes on the real panel of the monitor and tighten until the screw shank is secured against the rear panel 562H562H562H562H562H562H562H564HFigure 4 15 Step 7 Align the mounting screws on the monitor rear panel with the mounting holes on the bracket Step 8 Carefully insert the screws through the holes and gent...

Page 59: ...it first Then put the wall mounting kit on the top panel of the panel PC Carefully mark the location of the wall mounting kit screw holes on the wall Drill a pilot hole at the marked location on the wall Secure the wall mounting kit to the wall by inserting a retention screw into the pilot hole on the wall 564H564H564H564H564H564H564H566HFigure 4 16 This step is to avoid the panel PC being pushed ...

Page 60: ...in the panel to mount the panel PC Step 2 Cut out a section from the panel that corresponds to the dimensions of the flat panel PC chassis The panel section that is cut out must be smaller than the size of the aluminum frame that surrounds the TFT LCD panel but just large enough for the chassis to fit through Refer to 565H565H565H565H565H565H565H567HFigure 4 17 for the suggested cut out size ...

Page 61: ... flat panel should slide easily through the hole Only stop sliding the panel through the hole when the back of the front aluminum frame is flush against the panel Step 4 Insert the panel mounting clamps into the pre formed holes along the edges of the chassis behind the aluminum frame There are a total of 6 panel mounting clamps for UPC 12A GM45 Figure 4 18 Panel Mounting Clamp Slots Side View ...

Page 62: ...andards Association compliant and can be mounted on an arm with a 100 mm interface pad To mount the flat panel PC on an arm please follow the steps below Step 1 The arm is a separately purchased item Please correctly mount the arm onto the surface it uses as a base To do this refer to the installation documentation that came with the mounting arm NOTE When purchasing the arm please ensure that it ...

Page 63: ...ention Screw Holes Step 4 Secure the flat panel PC to the interface pad by inserting four retention screws through the bottom of the mounting arm interface pad and into the flat panel PC S t e p 0 4 11 Bottom Panel Switch and Connectors 4 11 1 AT ATX Mode Selection AT and ATX power modes can both be used on the EP series panel PC The selection is made through an AT ATX switch on the chassis rear p...

Page 64: ...enables connection to an external network To connect a LAN cable with an RJ 45 connector please follow the instructions below Step 1 Locate the RJ 45 connectors on the I O interface panel of the UPC 12A GM45 series Step 2 Align the connectors Align the RJ 45 connector on the LAN cable with one of the RJ 45 connectors on the I O interface panel of the UPC 12A GM45 series See 571H571H571H571H571H571...

Page 65: ...serial device to the UPC 12A GM45 series panel PC Step 1 Locate the DB 9 connector The location of the DB 9 connector is shown in Chapter 2 Step 2 Insert the serial connector Insert the DB 9 connector of a serial device into the DB 9 connector on the I O interface panel See 572H572H572H572H572H572H572H574HFigure 4 23 Figure 4 23 Serial Device Connector Step 3 Secure the connector Secure the serial...

Page 66: ...gn the connectors Align the USB device connector with one of the connectors on the I O interface panel See 573H573H573H573H573H573H573H575HFigure 4 24 Figure 4 24 USB Device Connection Step 3 Insert the device connector Once aligned gently insert the USB device connector into the onboard connector Step 0 4 11 5 VGA Monitor Connection The UPC 12A GM45 has a single female DB 15 connector on the bott...

Page 67: ... external peripheral interface Step 3 Insert the VGA connector Once the connectors are properly aligned with the insert the male connector from the VGA screen into the female connector on the UPC 12A GM45 See 574H574H574H574H574H574H574H576HFigure 4 25 Figure 4 25 VGA Connector Step 4 Secure the connector Secure the DB 15 VGA connector from the VGA monitor to the external interface by tightening t...

Page 68: ...UPC 12A GM45 Panel PC Page 56 5 System Maintenance Chapter 5 ...

Page 69: ... to the user Electrostatic discharge ESD can cause serious damage to electronic components including the EP series Dry climates are especially susceptible to ESD It is therefore critical that whenever the EP series is accessed internally or any other electrical component is handled the following anti static precautions are strictly adhered to Wear an anti static wristband Wearing a simple anti sta...

Page 70: ...teps below Step 1 Follow all anti static procedures See Section 575H575H575H575H575H575H575H577H5 2 Step 2 Turn off the power See Section 576H576H576H576H576H576H576H578H5 3 Step 3 Follow the steps described in Section 577H577H577H577H577H577H577H579H4 6 to replace the HDD Step 0 5 4 2 CF Card Replacement The UPC 12A GM45 has one CF Type II slot To replace the CF card follow the instructions below...

Page 71: ... rear cover is secured to the system with 11 retention screws To remove the rear cover remove the retention screws Figure 5 1 Rear Cover Retention Screws Step 4 Disconnect the system cables and lift the rear cover off the UPC 12A GM45 The system cables that need to be disconnected include SATA cable SATA power cable Battery connector PCN1 cable Two system fan cables FAN2 and FAN3 Two speaker cable...

Page 72: ...enna cables from the system to the wireless card Step 0 5 4 4 SO DIMM Module Replacement WARNING Using incorrectly specified SO DIMM may cause permanently damage the UPC 12A GM45 Please make sure the purchased SO DIMM complies with the memory specifications of the UPC 12A GM45 To replace the SO DIMM module please follow the steps below Step 1 Follow all anti static procedures See Section 584H584H5...

Page 73: ...e 5 3 Figure 5 3 SO DIMM Socket Location Step 5 Open the SO DIMM socket handles The SO DIMM socket has two handles that secure the SO DIMM into the socket Before the SO DIMM can be removed from the socket the handles must be opened Step 6 Align the SO DIMM with the socket Align the notch on the memory with the notch on the memory socket Step 7 Insert the SO DIMM Push the memory in at a 20º angle S...

Page 74: ...the gasket be replaced yearly NOTE If the monitor is mounted vertically first remove it and place it on a flat level surface with the display screen facing down before changing the gasket Step 1 Remove the old gasket from the sides of the monitor Step 2 Attach the new gasket to the monitor Make sure the gasket fits precisely into the groove along the edges of the monitor s front panel Step 0 Figur...

Page 75: ...e sure to check that the gasket is properly installed after changing it 5 4 6 Motherboard Replacement A user cannot replace a motherboard If the motherboard fails it must be shipped back to IEI to be replaced If the system motherboard has failed please contact the system vendor reseller or an IEI sales person directly ...

Page 76: ...UPC 12A GM45 Panel PC Page 64 6 AMI BIOS Setup Chapter 6 ...

Page 77: ...disappears before the DELETE key is pressed restart the computer and try again 6 1 2 Using Setup Use the arrow keys to highlight items press ENTER to select use the PageUp and PageDown keys to change entries press F1 for help and press ESC to quit Navigation keys are shown in Key Function Up arrow Move to previous item Down arrow Move to next item Left arrow Move to the item on the left hand side ...

Page 78: ... Reboot After Configuration Changes If the computer cannot boot after changes to the system configuration is made CMOS defaults Use the jumper described in Chapter 5 6 1 5 BIOS Menu Bar The menu bar on top of the BIOS screen has the following main items Main Changes the basic system configuration Advanced Changes the advanced system settings PCIPnP Changes the advanced PCI PnP Settings Boot Change...

Page 79: ...me ÅÆ Select Screen Select Item Enter Go to SubScreen F1 General Help F10 Save and Exit ESC Exit v02 61 Copyright 1985 2006 American Megatrends Inc BIOS Menu 1 Main Î System Overview The System Overview lists a brief summary of different system components The fields in System Overview cannot be changed The items shown in the system overview include AMI BIOS Displays auto detected BIOS information ...

Page 80: ...H591H591H591H593H6 3 3 AHCI Configuration see Section 593H593H593H593H592H592H592H594H6 3 4 Remote Access Configuration see Section 594H594H594H594H593H593H593H595H6 3 5 USB Configuration see Section 595H595H595H595H594H594H594H596H6 3 6 Power Configuration see Section 596H596H596H596H595H595H595H597H6 3 7 BIOS SETUP UTILITY Main Advanced PCIPNP Boot Security Chipset Exit Advanced Settings WARNING...

Page 81: ...er Go to SubScreen F1 General Help F10 Save and Exit ESC Exit v02 61 Copyright 1985 2006 American Megatrends Inc BIOS Menu 3 CPU Configuration The CPU Configuration menu 598H598H598H598H597H597H597H599HBIOS Menu 3 lists the following CPU details Manufacturer Lists the name of the CPU manufacturer Brand String Lists the brand name of the CPU being used Frequency Lists the CPU processing speed FSB S...

Page 82: ...Item Enter Go to SubScreen F1 General Help F10 Save and Exit ESC Exit v02 61 Copyright 1985 2006 American Megatrends Inc BIOS Menu 4 IDE Configuration Î SATA 1 Configuration Compatible Use the SATA 1 Configuration option to configure the ATA IDE controller Î Disabled Disables the on board ATA IDE controller Î Compatible DEFAULT Configures the on board ATA IDE controller to be in compatible mode In...

Page 83: ...ave Secondary IDE Master Secondary IDE Slave Third IDE Master Fourth IDE Master Fifth IDE Master Fifth IDE Slave The IDE Configuration menu 600H600H600H600H599H599H599H601HBIOS Menu 4 allows changes to the configurations for the IDE devices installed in the system If an IDE device is detected and one of the above listed four BIOS configuration options are selected the IDE configuration options sho...

Page 84: ...parameters are listed as follows Device Lists the device type e g hard disk CD ROM etc Type Indicates the type of devices a user can manually select Vendor Lists the device manufacturer Size List the storage capacity of the device LBA Mode Indicates whether the LBA Logical Block Addressing is a method of addressing data on a disk drive is supported or not Block Mode Block mode boosts IDE drive per...

Page 85: ...nnel Î CD DVD The CD DVD option specifies that an IDE CD ROM drive is attached to the specified IDE channel The BIOS does not attempt to search for other types of IDE disk drives on the specified channel Î ARMD This option specifies an ATAPI Removable Media Device These include but are not limited to ZIP LS 120 Î LBA Large Mode Auto Use the LBA Large Mode option to disable or enable BIOS to auto d...

Page 86: ...ogram timing cycles between the IDE drive and the programmable IDE controller As the PIO mode increases the cycle time decreases Î Auto DEFAULT BIOS auto detects the PIO mode Use this value if the IDE disk drive support cannot be determined Î 0 PIO mode 0 selected with a maximum transfer rate of 3 3 MB s Î 1 PIO mode 1 selected with a maximum transfer rate of 5 2 MB s Î 2 PIO mode 2 selected with ...

Page 87: ...MWDMA2 Multi Word DMA mode 2 selected with a maximum data transfer rate of 16 6 MB s Î UDMA0 Ultra DMA mode 0 selected with a maximum data transfer rate of 16 6 MB s Î UDMA1 Ultra DMA mode 1 selected with a maximum data transfer rate of 25 MB s Î UDMA2 Ultra DMA mode 2 selected with a maximum data transfer rate of 33 3 MB s Î UDMA3 Ultra DMA mode 3 selected with a maximum data transfer rate of 44 ...

Page 88: ...ption enables or disables this function Î Auto DEFAULT BIOS auto detects HDD SMART support Î Disabled Prevents BIOS from using the HDD SMART feature Î Enabled Allows BIOS to use the HDD SMART feature Î 32Bit Data Transfer Enabled Use the 32Bit Data Transfer BIOS option to enables or disable 32 bit data transfers Î Disabled Prevents the BIOS from using 32 bit data transfers Î Enabled DEFAULT Allows...

Page 89: ...ses ÅÆ Select Screen Select Item Enter Go to SubScreen F1 General Help F10 Save and Exit ESC Exit v02 61 Copyright 1985 2006 American Megatrends Inc BIOS Menu 6 Super IO Configuration Î Serial Port1 Address 3F8 IRQ4 Use the Serial Port1 Address option to select the Serial Port 1 base address Î Disabled No base address is assigned to Serial Port 1 Î 3F8 IRQ4 DEFAULT Serial Port 1 I O port address i...

Page 90: ...Î 3E8 DEFAULT Serial port 3 I O port address is 3E8 Î 2E8 Serial port 3 I O port address is 2E8 Î Serial Port3 IRQ 10 Use the Serial Port3 IRQ option to select the interrupt address for serial port 3 Î 10 DEFAULT Serial port 3 IRQ address is 10 Î Serial Port4 Address 2E8 Use the Serial Port4 IRQ option to select the interrupt address for serial port 4 Î Disabled No base address is assigned to seri...

Page 91: ...do not have master slave designation for SATA devices each device is treated as a master and hardware assisted native command queuing Use the AHCI Settings menu 603H603H603H603H602H602H602H604HBIOS Menu 7 to report on the auto detection of devices connected to the onboard SATA drive connectors BIOS SETUP UTILITY Main Advanced PCIPNP Boot Security Chipset Exit AHCI Settings AHCI Port0 Not Detected ...

Page 92: ...it AHCI Port0 Device Not Detected SATA Port0 Auto S M A R T Enabled Select the type of device connected to the system ÅÆ Select Screen Select Item Enter Go to SubScreen F1 General Help F10 Save and Exit ESC Exit v02 61 Copyright 1985 2006 American Megatrends Inc BIOS Menu 8 AHCI Port n Configuration Menu Î SATA Port n Auto Use the SATA Port n option to enable the system to auto detect the type of ...

Page 93: ...t running a terminal program to display and configure the BIOS settings BIOS SETUP UTILITY Main Advanced PCIPNP Boot Security Chipset Exit Configure Remote Access type and parameters Remote Access Disabled ÅÆ Select Screen Select Item Enter Go to SubScreen F1 General Help F10 Save and Exit ESC Exit v02 61 Copyright 1985 2006 American Megatrends Inc BIOS Menu 9 Remote Access Configuration Î Remote ...

Page 94: ...stem is remotely accessed through COM2 Î COM3 System is remotely accessed through COM3 Î COM4 System is remotely accessed through COM4 NOTE Make sure the selected COM port is enabled through the Super I O configuration menu Î Base Address IRQ 3F8h 4 The Base Address IRQ option cannot be configured and only shows the interrupt address of the serial port listed above Î Serial Port Mode 115200 8 n 1 ...

Page 95: ...sole redirection should occur Î Disabled The console is not redirected after POST Î Boot Loader Redirection is active during POST and during Boot Loader Î Always DEFAULT Redirection is always active Some OSes may not work if set to Always Î Terminal Type ANSI Use the Terminal Type BIOS option to specify the remote terminal type Î ANSI DEFAULT The target terminal type is ANSI Î VT100 The target ter...

Page 96: ...HiSpeed Enables USB host controllers ÅÆ Select Screen Select Item Enter Go to SubScreen F1 General Help F10 Save and Exit ESC Exit v02 61 Copyright 1985 2006 American Megatrends Inc BIOS Menu 10 USB Configuration Î USB Configuration The USB Configuration field shows the system USB configuration The items listed are Module Version x xxxxx xxxxx Î USB Devices Enabled The USB Devices Enabled field li...

Page 97: ...available until a USB compatible operating system is fully booted with all USB drivers loaded When this option is enabled any attached USB mouse or USB keyboard can control the system even when there is no USB driver loaded onto the system Î Disabled Legacy USB support disabled Î Enabled DEFAULT Legacy USB support enabled Î Auto Legacy USB support disabled if no USB devices are connected Î USB2 0 ...

Page 98: ...pyright 1985 2006 American Megatrends Inc BIOS Menu 12 Power Configuration Î Power Supply Mode AT Use the Power Supply Mode BIOS option to select the power supply that is connected to the system Î AT DEFAULT An AT power supply is connected to the system Î ATX An ATX power supply is connected to the system 6 4 PCI PnP Use the PCI PnP menu 607H607H607H607H606H606H606H608HBIOS Menu 13 to configure ad...

Page 99: ...lable DMA Channel 7 Available Available Specified IRQ is available to be use the PCI PnP devices Reserved Specified IRQ is reserved for use by legacy ISA devices ÅÆ Select Screen Select Item Enter Go to SubScreen F1 General Help F10 Save and Exit ESC Exit v02 61 Copyright 1985 2006 American Megatrends Inc BIOS Menu 13 PCI PnP Configuration Î IRQ Available Use the IRQ address to specify what IRQs c...

Page 100: ...rved for use by Legacy ISA devices Available DMA Channels are DM Channel 0 DM Channel 1 DM Channel 3 DM Channel 5 DM Channel 6 DM Channel 7 Î Reserved Memory Size Disabled Use the Reserved Memory Size BIOS option to specify the amount of memory that should be reserved for legacy ISA devices Î Disabled DEFAULT No memory block reserved for legacy ISA devices Î 16K 16 KB reserved for legacy ISA devic...

Page 101: ...ot Settings Configuration Use the Boot Settings Configuration menu 609H609H609H609H608H608H608H610HBIOS Menu 15 to configure advanced system boot options BIOS SETUP UTILITY Main Advanced PCIPNP Boot Security Chipset Exit Boot Settings Configuration Quick Boot Enabled Quiet Boot Enabled AddOn ROM Display Mode Force BIOS Bootup Num Lock On RTL8111CP LAN Boot Disabled Allows BIOS to skip certain test...

Page 102: ... ROM Display Mode Force BIOS Use the AddOn ROM Display Mode option to allow add on ROM read only memory messages to be displayed Î Force BIOS DEFAULT The system forces third party BIOS to display during system boot Î Keep Current The system displays normal information during system boot Î Bootup Num Lock On Use the Bootup Num Lock BIOS option to specify if the number lock setting must be modified ...

Page 103: ...ote system Î Enabled Can be booted from a remote system through the LAN Î Disabled DEFAULT Cannot be booted from a remote system through the LAN 6 6 Security Use the Security menu 610H610H610H610H609H609H609H611HBIOS Menu 16 to set system and user passwords BIOS SETUP UTILITY Main Advanced PCIPNP Boot Security Chipset Exit Security Settings Supervisor Password Not Installed User Password Not Insta...

Page 104: ...Change User Password Use the Change User Password to set or change a user password The default for this option is Not Installed If a user password must be installed select this field and enter the password After the password has been added Install appears next to Change User Password 6 7 Chipset Use the Chipset menu 611H611H611H611H610H610H610H612HBIOS Menu 17 to access the Northbridge and Southbr...

Page 105: ...bridge Configuration Use the Northbridge Chipset Configuration menu 612H612H612H612H611H611H611H613HBIOS Menu 18 to configure the Northbridge chipset BIOS SETUP UTILITY Main Advanced PCIPNP Boot Security Chipset Exit North Bridge Chipset Configuration Memory Hole Disabled Boots Graphic Adapter Priority IGD Internal Graphics Mode Select Enabled 32MB Boot Display Device Auto Flat Panel Type BY HARDW...

Page 106: ...s Adapter Priority IGD Use the Boots Graphics Adapter Priority option to select the graphics controller used as the primary boot device Select either an integrated graphics controller IGD or a combination of PCI graphics controller a PCI express PEG controller or an IGD Configuration options are listed below IGD DEFAULT PCI IGD Î Internal Graphics Mode Select Enabled 32MB Use the Internal Graphic ...

Page 107: ...w Auto DEFAULT CRT LVDS Î Flat Panel Type BY HARDWARE Use the Flat Panel Type to determine the LCD panel resolution Configuration options are listed below 640 x 480 18bit 800 x 600 18bit 1024 x 768 18bit 1024 x 768 24bit 1280 x 1024 48bit 1600 x 1200 48bit BY HARDWARE DEFAULT 6 7 2 Southbridge Configuration The Southbridge Configuration menu 613H613H613H613H612H612H612H614HBIOS Menu 19 the Southbr...

Page 108: ...nable or disable the High Definition Audio controller Î Enabled DEFAULT The onboard HD audio controller is enabled Î Disabled The onboard HD audio controller is disabled Î Spread Spectrum Mode Disabled Use the Spread Spectrum Mode option to reduce the EMI Excess EMI is generated when the system clock generator pulses have extreme values Spreading the pulse spectrum modulates changes in the extreme...

Page 109: ...al Help F10 Save and Exit ESC Exit v02 61 Copyright 1985 2006 American Megatrends Inc BIOS Menu 20 Exit Î Save Changes and Exit Use the Save Changes and Exit option to save the changes made to the BIOS options and to exit the BIOS configuration setup program Î Discard Changes and Exit Use the Discard Changes and Exit option to exit the BIOS configuration setup program without saving the changes ma...

Page 110: ... 12A GM45 Panel PC Page 98 Î Load Failsafe Defaults Use the Load Failsafe Defaults option to load failsafe default values for each of the parameters on the Setup menus F8 key can be used for this operation ...

Page 111: ...UPC 12A GM45 Panel PC Page 99 7 Battery Monitoring and Remote Control Chapter 7 ...

Page 112: ...plication Installation Follow the steps below to install the AUPS Battery Status Monitor application Step 1 Insert the driver CD into the system Open the x AUPS Aups_setup_v1 9 directory Double click the Setup exe icon Step 2 A welcome screen appears 615H615H615H615H614H614H614H616HFigure 7 1 To continue the installation process click NEXT Figure 7 1 Welcome Screen Step 3 The Select Installation F...

Page 113: ...T and the Installshield Wizard is ready to install the program 617H617H617H617H616H616H616H618HFigure 7 3 Figure 7 3 Ready to Install the Program Step 5 Click NEXT to continue The Installing AUPS_Setup screen appears as the program is installed 618H618H618H618H617H617H617H619HFigure 7 4 ...

Page 114: ...mplete window appears 619H619H619H619H618H618H618H620HFigure 7 5 Click Close to exit Figure 7 5 Installation Complete Step 7 To launch the application double click the shortcut 620H620H620H620H619H619H619H621HFigure 7 6 on the desktop Figure 7 6 AUPS Battery Status Monitor Application ...

Page 115: ...1H621H621H621H620H620H620H622HFigure 7 7 The following sections describe the status information in details Figure 7 7 Status Information 7 2 2 1 DC Detection When the DC power is connected to the AUPS series power module the AUPS Battery Status Monitor detects and shows it in the screen as 622H622H622H622H621H621H621H623HFigure 7 8 Figure 7 8 DC Detection ...

Page 116: ...ected Figure 7 9 Battery Detection The battery is connected to the AUPS series Off The battery is not connected to the AUPS series Full The battery is fully charged Low The battery is low Using The battery is being used Charging The battery is being charged Standby The battery is fully charged and ready to be used anytime 60 C The battery temperature is above 60 C 60 C The battery temperature is b...

Page 117: ...emperature charging rate discharging rate and battery status 625H625H625H625H624H624H624H626HFigure 7 11 The values listed are updated per second Figure 7 11 Battery Information 7 2 4 LAN Setting The LAN Setting page is where to configure the Remote LAN settings for power on off remote control and battery monitoring To save the modified parameters of this page click the button To load the default ...

Page 118: ...name and password for remote monitoring To change the user name and password click button Enter the new user name and password 626H626H626H626H625H625H625H627HFigure 7 13 Click button to save the settings The default user name and password for the LAN setting page are User name admin Password IEI ...

Page 119: ... GM45 Panel PC Page 107 Figure 7 13 LAN Setting Change Password 7 2 5 Setting Click on the SETTING tab to select the COM port enable disable buzzer LAN and DC output 627H627H627H627H626H626H626H628HFigure 7 14 ...

Page 120: ... COM1 COM16 and shows the valid COM port 628H628H628H628H627H627H627H629HFigure 7 15 shows the AUPS application is communicating with UPC 12A GM45 through COM 6 To change the serial port select a proper port number from the list and click Connect Before changing please make sure the selected serial port is not used by other devices Figure 7 15 COM Port Status ...

Page 121: ... the system will shut down automatically when the battery capacity is below 5 7 3 Remote Control and Monitoring The UPC 12A GM45 can be controlled power on off and monitored the battery status through a remote computer located in the same subnet with the UPC 12A GM45 To control and monitor the UPC 12A GM45 remotely follow the steps below Step 1 Connect the RJ 45 remote LAN connector on the bottom ...

Page 122: ...Redist20 exe is located in the same directory of the driver CD Step 3 The IEI REMOTE AP tool appears 630H630H630H630H629H629H629H631HFigure 7 17 All the UPC 12A GM45 panel PCs in the same subnet with this remote computer are shown in the list on the right Click the function buttons on the left to control the UPC 12A GM45 Figure 7 17 IEI REMOTE AP Step 4 To access the web interface for advanced mon...

Page 123: ...ep 5 632H632H632H632H631H631H631H633HFigure 7 19 shows in a web browser Figure 7 19 Remote Management Web Interface Status Step 6 To monitor the hardware health online click H W Monitor button on the left The hardware health information shows on the right 634HFigure 7 20 ...

Page 124: ...Web Interface H W Monitor Step 7 To send an email to an administrator through the SMTP server click Send E mail button on the left Fill out the information as indicated in 633H633H633H633H632H632H632H635HFigure 7 21 Click the Send Message button to send the email ...

Page 125: ...ation button on the left Step 9 A window prompts for the user name and password The default user name and password for the LAN setting page are User name admin Password IEI If the user name and password has been change as described in Section 634H634H634H634H633H633H633H636H7 2 4 enter the new user name and password Figure 7 22 Enter User Name and Password ...

Page 126: ...d Configuration window appears Configure the network settings and click the Save Config button Incorrect settings may cause the board to lose network connectivity Recovery options are provided on the next page Step 0 Figure 7 23 Board Configuration ...

Page 127: ...UPC 12A GM45 Panel PC Page 115 A External Connector Pinouts Appendix A ...

Page 128: ... Connector The UPC 12A GM45 has two RJ 45 GbE connectors PIN NO DESCRIPTION 1 TX_D1 2 TX_D1 3 RX_D2 4 BI_D3 5 BI_D3 6 RX_D2 7 BI_D4 8 BI_D4 RJ 45 GbE Connector Pinouts A 3 RJ 45 for MCU UART Connector The UPC 12A GM45 has one RJ 45 MCU s UART connector PIN NO DESCRIPTION 1 NC 2 NC 3 CTS 4 TX 5 RTS 6 RX 7 NC 8 NC RJ 45 MCU s UART Connector Pinouts ...

Page 129: ...IN NO DESCRIPTION 1 uP_LAN_TX 2 uP_LAN_TX 3 uP_LAN_RX 4 GND 5 GND 6 uP_LAN_RX 7 GND 8 GND RJ 45 MCU s LAN Connector Pinouts A 5 Remote Power Button Connector The 2 pin remote power button terminal block connects to an external power button PIN NO DESCRIPTION 1 EX_PWRBTN 2 GND External Power Button Connector Pinouts ...

Page 130: ...C 12A GM45 has a single 15 pin female connector for connectivity to standard display devices PIN DESCRIPTION PIN DESCRIPTION 1 RED 2 GREEN 3 BLUE 4 NC 5 GND 6 GND 7 GND 8 GND 9 VCC 5V 10 GND 11 NC 12 DDC DAT 13 HSYNC 14 VSYNC 15 DDCCLK VGA Connector Pinouts ...

Page 131: ...UPC 12A GM45 Panel PC Page 119 B Safety Precautions Appendix B ...

Page 132: ...nnected whenever the EP series is being installed moved or modified Do not apply voltage levels that exceed the specified voltage range Doing so may cause fire and or an electrical shock Electric shocks can occur if the EP series chassis is opened when the EP series is running Do not drop or insert any objects into the ventilation openings of the EP series If considerable amounts of dust water or ...

Page 133: ...ing anti static precautions are strictly adhered to Wear an anti static wristband Wearing a simple anti static wristband can help to prevent ESD from damaging any electrical component Self grounding Before handling any electrical component touch any grounded conducting material During the time the electrical component is handled frequently touch any conducting materials that are connected to the g...

Page 134: ...rical and electronic products carrying the mark left must be disposed of separately from normal household waste This includes monitors and electrical accessories such as signal cables or power cords When you need to dispose of your display products please follow the guidance of your local authority or ask the shop where you purchased the product The mark on electrical and electronic products only ...

Page 135: ...aned using a product specifically designed for the purpose In such case the product will be explicitly mentioned in the cleaning tips Below is a list of items to use when cleaning the EP series Cloth Although paper towels or tissues can be used a soft clean piece of cloth is recommended when cleaning the EP series Water or rubbing alcohol A cloth moistened with water or rubbing alcohol can be used...

Page 136: ...UPC 12A GM45 Panel PC Page 124 C BIOS Configuration Options Appendix C ...

Page 137: ...4 647H647H647H650H77 246H246H246H247H Serial Port2 Address 2F8 IRQ3 648H648H648H651H77 247H247H247H248H Serial Port3 Address 3E8 649H649H649H652H78 248H248H248H249H Serial Port3 IRQ 10 650H650H650H653H78 249H249H249H250H Serial Port4 Address 2E8 651H651H651H654H78 250H250H250H251H Serial Port4 IRQ 10 652H652H652H655H78 251H251H251H252H Select RS232 or RS422 RS485 BY HARDWARE 653H653H653H656H79 252...

Page 138: ...L8111CP LAN Boot Disabled 677H677H677H680H91 276H276H276H277H Change Supervisor Password 678H678H678H681H92 277H277H277H278H Change User Password 679H679H679H682H92 278H278H278H279H Memory Hole Disabled 680H680H680H683H94 279H279H279H280H Boots Graphics Adapter Priority IGD 681H681H681H684H94 280H280H280H281H Internal Graphics Mode Select Enabled 32MB 682H682H682H685H94 281H281H281H282H Boot Displ...

Page 139: ...UPC 12A GM45 Panel PC Page 127 D Watchdog Timer Appendix D ...

Page 140: ...IOS function call INT 15H is used to control the Watchdog Timer INT 15H AH 6FH Sub function AL 2 Sets the Watchdog Timer s period BL Time out value Its unit second is dependent on the item Watchdog Timer unit select in CMOS setup Table D 1 AH 6FH Sub function Call sub function 2 to set the time out period of Watchdog Timer first If the time out value is not zero the Watchdog Timer starts counting ...

Page 141: ... system resets Example program INITIAL TIMER PERIOD COUNTER W_LOOP MOV AX 6F02H setting the time out value MOV BX 05 time out value is 5 seconds INT 15H ADD THE APPLICATION PROGRAM HERE CMP EXIT_AP 1 is the application over JNE W_LOOP No restart the application MOV AX 6F02H disable Watchdog Timer MOV BX 0 INT 15H EXIT ...

Page 142: ...UPC 12A GM45 Panel PC Page 130 E Hazardous Materials Disclosure Appendix E ...

Page 143: ... presences of small quantities of certain materials in the product and is applicable to China RoHS only A label will be placed on each product to indicate the estimated Environmentally Friendly Use Period EFUP This is an estimate of the number of years that these substances would not leak out or undergo abrupt change This product may contain replaceable sub assemblies components which have a short...

Page 144: ...it Board X O O O O X Metal Fasteners X O O O O O Cable Assembly X O O O O X Fan Assembly X O O O O X Power Supply Assemblies X O O O O X Battery O O O O O O O This toxic or hazardous substance is contained in all of the homogeneous materials for the part is below the limit requirement in SJ T11363 2006 X This toxic or hazardous substance is contained in at least one of the homogeneous materials fo...

Page 145: ...包含有较短的环境友好使用期限的可替换元件 像是电池或灯管 这些 元件将会单独标示出来 有毒有害物质或元素 部件名称 铅 Pb 汞 Hg 镉 Cd 六价铬 CR VI 多溴联苯 PBB 多溴二苯醚 PBDE 壳体 X O O O O X 显示 X O O O O X 印刷电路板 X O O O O X 金属螺帽 X O O O O O 电缆组装 X O O O O X 风扇组装 X O O O O X 电力供应组装 X O O O O X 电池 O O O O O O O 表示该有毒有害物质在该部件所有物质材料中的含量均在 SJ T11363 2006 标准规定的限量要求以下 X 表示该有毒有害物质至少在该部件的某一均质材料中的含量超出 SJ T11363 2006 标准规定的限量要求 ...

Reviews: