TANK-760 Em b e d d e d S ys te m
P a g e 19
S te p 4:
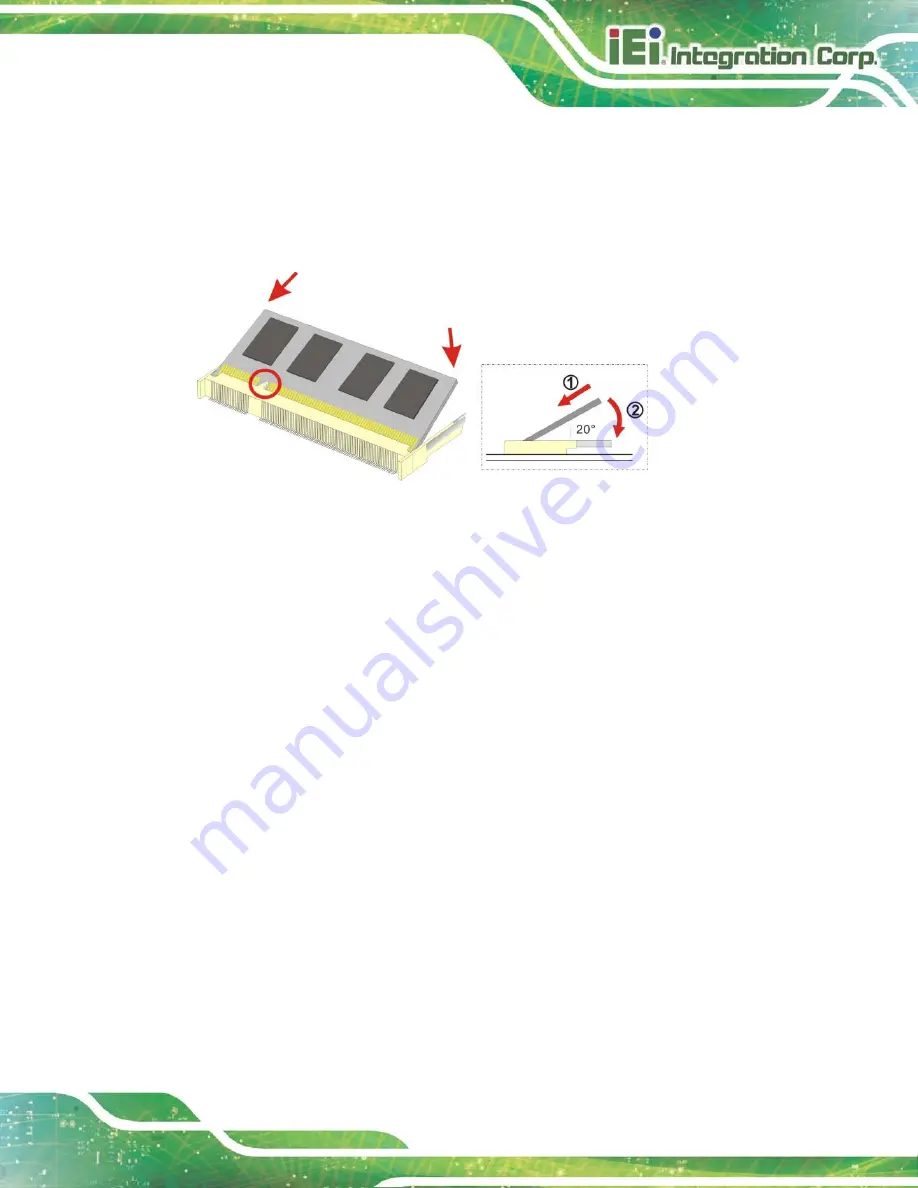
Align the SO-DIMM with the socket. The SO-DIMM must be oriented in such a
way that the notch in the middle of the SO-DIMM must be aligned with the
plastic bridge in the socket (
S te p 5:
Push the SO-DIMM into the socket at an angle (
Figure 3-6: SO-DIMM Installation
S te p 6:
Gently pull the arms of the SO-DIMM socket out and push the rear of the
SO-DIMM down (
S te p 7:
Release the arms on the SO-DIMM socket. They clip into place and secure the
SO-DIMM in the socket.
S te p 8:
Install the bracket that was previously removed in the same position it was
before.
S te p 9:
Reinstall the bottom panel to the TANK-760.
3.4
P lu g g a b le DC-In Te rm in a l Blo c k In s ta lla tio n
To install the pluggable DC-in terminal block, please follow the steps below:
S te p 1:
Locate the DC-in terminal block connector. The location of the connector is
shown in
S te p 2:
Align the pluggable DC-in terminal block with the DC-in terminal block connector
on the TANK-760.
Summary of Contents for TANK-760
Page 8: ...TANK 760 Embedded Sys tem Page viii Figure 3 26 Power Button 35 ...
Page 10: ...TANK 760 Embedded Sys tem Page 1 Chapter 1 1 Introduction ...
Page 19: ...TANK 760 Embedded Sys tem Page 10 Chapter 2 2 Unpacking ...
Page 23: ...TANK 760 Embedded Sys tem Page 14 Chapter 3 3 Ins tallation ...
Page 45: ...TANK 760 Embedded Sys tem Page 36 Chapter 4 4 BIOS ...
Page 81: ...TANK 760 Embedded Sys tem Page 72 Appendix A A Safety Precautions ...
Page 86: ...TANK 760 Embedded Sys tem Page 77 Appendix B B Hazardous Materials Dis clos ure ...


