background image


PUZZLE-IN005 

Page 64 


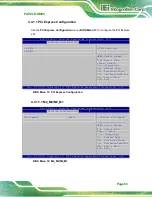
PCIe Speed [Auto] 

Use this option to select the support type of the PCI Express slots. The following options 

are available: 


Auto   

Default


Gen1   


Gen2 


Gen3 

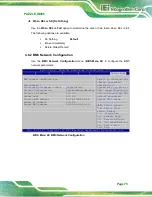
4.4.1.2 PCH SATA Configuration 

Use the 

PCH  SATA  Configuration

  menu (

BIOS Menu 15

) to change and/or set the 

configuration of the SATA devices installed in the system. 

Aptio Setup – American Megatrends International, LLC. 


Platform Configuration


PCH SATA Configuration


--------------------------------------------------- 

 
SATA Controller 

[Enable] 

Configure SATA as 

[AHCI] 

 
SATA Port 0 

[Not Installed] 

  Hot Plug 

[Enable] 

SATA Port 1 

[Not Installed] 

  Hot Plug 

[Enable] 

SATA Port 2 

[Not Installed] 

  Hot Plug 

[Enable] 

SATA Port 3 

[Not Installed] 

  Hot Plug 

[Enable] 


Enable or Disable SATA 
Controller. 


--------------------- 



: Select Screen 


: Select Item 

Enter:  Select 
+/-:  Change  Opt. 
F1:  General Help 
F2:  Previous Values 
F3:  Optimized Defaults 
F4:  Save & Exit 
ESC: Exit 

Ver. 2.21.1277 Copyright (C) 2020 American Megatrends International, LLC. 

BIOS Menu 15: PCH SATA Configuration


SATA Controller [Enable] 

Use the 

SATA Controller

 option to configure the SATA controller. 


Disable 


Disables the on-board SATA controller. 


Enable 

D

EFAULT


Enables the on-board SATA controller. 

Summary of Contents for PUZZLE-IN005

Page 1: ...PUZZLE IN005 2U Network Appliance with LGA 4189 Intel Xeon Scalable Processor DDR4 up to 1280GB PCIe 4 0 x8 GbE with NCSI IEI Networking Module Slots M 2 U 2 SSD Console Redundant PSU Rack Mount and R...

Page 2: ...PUZZLE IN005 Page 2 Revision Date Version Changes January 13 2021 1 00 Initial release...

Page 3: ...ing out of the use or inability to use the product or documentation even if advised of the possibility of such damages This document contains proprietary information protected by copyright All rights...

Page 4: ...y Warnings should be taken seriously CAUTION Cautionary messages should be heeded to help reduce the chance of losing data or damaging the product NOTE These messages inform the reader of essential bu...

Page 5: ...STALLATION 21 3 1 INSTALLATION PRECAUTIONS 22 3 2 TOP COVER REMOVAL 23 3 3 DIMM INSTALLATION 24 3 4 PCIE EXPANSION CARD INSTALLATION 25 3 5 M 2 MODULE INSTALLATION 26 3 6 SSD INSTALLATION 27 3 7 IEI N...

Page 6: ...d Computing 52 4 3 2 iWDD H W Monitor 53 4 3 2 1 Smart Fan Mode Configuration 55 4 3 3 IT8528 Super IO Configuration 56 4 3 3 1 Serial Port 1 Configuration 57 4 3 4 Serial Port Console Redirection 57...

Page 7: ...PU_FAN1 2 85 5 2 6 System Fan Connectors SYS_FAN1 2 3 4 5 85 5 2 7 LCM Connector LCM1 86 5 2 8 M 2 M key Slot M2_M1 M2_M2 86 5 2 9 Power Button Connector PWR_BTN1 87 5 2 10 Power Connector I O Card IO...

Page 8: ...1 3 Product Disposal 100 B 2 MAINTENANCE AND CLEANING PRECAUTIONS 101 B 2 1 Maintenance and Cleaning 101 B 2 2 Cleaning Tools 101 C ERROR BEEP CODE 102 C 1 PEI BEEP CODES 103 C 2 DXE BEEP CODES 103 D...

Page 9: ...ndle 27 Figure 3 6 Drive Tray Removal 27 Figure 3 7 SSD Retention Screws 28 Figure 3 8 SSD Installation 28 Figure 3 9 Networking Module Slot Cover Screws 29 Figure 3 10 Networking Module Installation...

Page 10: ...inouts 85 Table 5 7 System Fan Connectors SYS_FAN1 2 3 4 5 Pinouts 85 Table 5 8 LCM Connector LCM1 Pinouts 86 Table 5 9 M 2 M key Slot M2_M1 M2_M2 Pinouts 87 Table 5 10 Power Button Connector PWR_BTN1...

Page 11: ...PUZZLE IN005 Page 11 Chapter 1 1 Introduction...

Page 12: ...ng modules Multiple storage interfaces for fast and stable data transmission are offered through four U 2 SSD bays that also support SATA SSD 1 2 Features The PUZZLE IN005 features are listed below Po...

Page 13: ...t panel is shown in Figure 1 2 Figure 1 2 PUZZLE IN005 Front Panel The states of the LED indicators located on the front panel are listed below Power LED Off The system is turned off Blue The system i...

Page 14: ...med Ice Lake Chipset Intel C627A Memory 20 x 288 pin 3200 MHz DDR4 ECC RDIMM LRDIMM slots system max 1280 GB Networking 1 x 1GbE LAN port with NCSI support via Intel I210 AT 1 x 1GbE LAN port via Inte...

Page 15: ...panel Reset button front panel TPM 1 x TPM 2 0 2x10 pin header IPMI iRIS 2400 module pre installed Power Power Input 100 V 240 V Type Watt 1200 W redundant power 90 V 264 V AC Thermal Solution 5 x Sm...

Page 16: ...PUZZLE IN005 Page 16 1 6 Dimensions The physical dimensions are shown below Figure 1 4 Physical Dimensions millimeters...

Page 17: ...PUZZLE IN005 Page 17 Chapter 2 2 Unpacking...

Page 18: ...and Wearing a simple anti static wristband can help to prevent ESD from damaging the board Self grounding Before handling the board touch any grounded conducting material During the time the board is...

Page 19: ...IN005 from or contact an IEI sales representative directly To contact an IEI sales representative please send an email to sales ieiworld com The PUZZLE IN005 is shipped with the following components...

Page 20: ...able 2 4 Optional Items The following table lists the optional items that can be purchased separately Optional Item Image Sliding rails for rack mount P N RAIL A03 57 USB to console cable P N 32013 00...

Page 21: ...PUZZLE IN005 Page 21 Chapter 3 3 Installation...

Page 22: ...and or damage to the system Qualified Personnel The PUZZLE IN005 must be installed and operated only by trained and qualified personnel Maintenance upgrades or repairs may only be carried out by qual...

Page 23: ...e internal components the top cover must be removed from the PUZZLE IN005 Follow the steps below to complete the task Step 1 Remove the four retention screws on the top panel see Figure 3 1 Figure 3 1...

Page 24: ...stall the DIMM module please follow the steps below Step 1 Remove the top cover from the PUZZLE IN005 Please follow the instruction described in Section 3 2 Step 2 Locate the DIMM slots on the motherb...

Page 25: ...llows installation of one PCIe x8 card To install a PCIe expansion card please follow the steps below Step 1 Remove the top cover from the PUZZLE IN005 refer to Section 3 2 Step 2 Remove the blank bra...

Page 26: ...w the steps below Step 1 Remove the top cover from the PUZZLE IN005 See Section 3 2 Step 2 Locate the M 2 slot on the motherboard Step 3 Remove the on board retention screw Step 4 Line up the notch on...

Page 27: ...stalled into the removable hard drive trays on the front panel To install the SSD into the system please follow the steps below Step 1 Press the button to release the handle Figure 3 5 Press to Releas...

Page 28: ...D Figure 3 7 Figure 3 7 SSD Retention Screws Step 4 Carefully insert the SSD into the slot on the front panel Make sure the SATA connector on the SSD is securely connected to the SATA connector inside...

Page 29: ...all or replace the networking module the power supply must be fully disconnected before installation Step 2 Loosen the two screws indicated below Grab the screws and pull the slot cover all the way ou...

Page 30: ...way until it is completely out of the system Lifting up the module before completely sliding out may cause the components on the module to be damaged Figure 3 10 Networking Module Installation 3 8 LA...

Page 31: ...ctivity Orange 1 Gbps connection Table 3 2 RJ 45 Ethernet Connector LEDs 3 9 RJ 45 Console Connection The PUZZLE IN005 has one RJ 45 serial device connector on the front panel The RJ 45 connector for...

Page 32: ...Step 1 Use the console cable shipped with the product to connect the RJ 45 console port of the PUZZLE IN005 with your PC Step 2 In your PC go to Windows Device Manager and check for the serial line o...

Page 33: ...the information shown match the followings Unit Description Serial Console Service Service ExecStart sbin getty L 115200 ttyS0 vt102 Restart always Install WantedBy multi user target Step 8 Run the fo...

Page 34: ...s Using only the rack mount brackets to mount the system on a rack may cause damage to the system Step 1 Install the rack mount brackets to the sides of the PUZZLE IN005 by inserting four provided ret...

Page 35: ...g to the instruction came with the sliding rails Note The sliding rails must be purchased separately Step 4 Slide the PUZZLE IN005 all the way into the rack enclosure Step 5 Secure the front of the ra...

Page 36: ...to connect the power cord to a socket outlet with earthing connection To power on the PUZZLE IN005 please follow the steps below Step 1 Connect the power source to the power inlets on the rear panel...

Page 37: ...enter https download ieiworld com Type PUZZLE IN005 and press Enter to find all the relevant software utilities and documentation Figure 3 15 IEI Resource Download Center NOTE To install software from...

Page 38: ...IN005 and press Enter Step 2 All product related software utilities and documentation will be listed You can choose Driver to filter the result Step 3 Click the driver file name on the page and you w...

Page 39: ...rough the pre installed iRIS 2400 module Follow the steps below to setup IPMI 3 13 1 Managed System Hardware Setup The hardware configuration of the managed system PUZZLE IN005 is described below Step...

Page 40: ...sh drive d Enter the following command ipmitool 20 30 02 01 03 00 00 there is a space between each two digit number e A serial of number shows The last four two digit hexadecimal numbers are the IP ad...

Page 41: ...17 IEI iMAN Web GUI NOTE To understand how to use the IEI iMAN Web GUI please refer to the iRIS 2400 Web GUI user manual which can be downloaded from https download ieiworld com The user manual descr...

Page 42: ...rn off the PUZZLE IN005 disconnect the power cords network cable s and also remove any other device cable that is attached to the server Take Anti Static precautions whenever maintenance is being carr...

Page 43: ...IN005 Disconnect the power cords network cable s and any other connectors or cables from the PUZZLE IN005 Step 2 Firmly press and hold the blue button on back of PSU inwards Pull out power supply by p...

Page 44: ...ils to boot due to improper BIOS settings the clear CMOS button clears the CMOS data and resets the system BIOS information To do this push the clear CMOS button for a few seconds If the CMOS Settings...

Page 45: ...verride jumper J_FLASH1 allows users to enable or disable the ME firmware update Refer to Figure 3 19 and Table 3 4 for the jumper location and settings Setting Description Short 1 2 Disabled default...

Page 46: ...system power short pin 2 3 of the jumper Step 2 Update the BIOS and ME firmware and then turn off the system power Step 3 Remove the metal clip on the jumper or return to its default setting short pin...

Page 47: ...PUZZLE IN005 Page 47 Chapter 4 4 BIOS...

Page 48: ...DEL or F2 key as soon as the system is turned on or 2 Press the DEL or F2 key when the Press DEL or F2 to enter SETUP message appears on the screen If the message disappears before the DEL or F2 key i...

Page 49: ...ghted item appears To exit the Help Window press ESC or the F1 key again 4 1 4 Unable to Reboot after Configuration Changes If the computer cannot boot after changes to the system configuration is mad...

Page 50: ...ild Date and Time 08 14 2020 22 53 52 iWDD Vendor iEi iWDD Version Z626ER11 bin IPMI Module iRIS 2400 Platform Information Platform TypeWilsonCityRP Processor 606A4 ICX L0 PCH LBG QS PRQ C627A RC Revi...

Page 51: ...ompatible with the hardware Aptio Setup American Megatrends International LLC Main Advanced Platform Configuration Socket Configuration Server Mgmt Restore AC Power Loss Last State Trusted Computing i...

Page 52: ...mputing menu BIOS Menu 3 to configure settings related to the Trusted Computing Group TCG Trusted Platform Module TPM Aptio Setup American Megatrends International LLC Advanced Configuration Security...

Page 53: ...System temperature1 44 C System temperature2 39 C System temperature3 41 C Environment temperature 38 C Environment temperature 33 C CPU_FAN1 Speed 4702 RPM CPU_FAN2 Speed 4885 RPM SYS_FAN1 Speed 902...

Page 54: ...meters and values are shown The system parameters that are monitored are System Temperatures o CPU Temperature o System Temperature o Environment Temperature Fan Speeds o CPU Fan Speed o System Fan Sp...

Page 55: ...t Select Screen Select Item Enter Select Change Opt F1 General Help F2 Previous Values F3 Optimized Defaults F4 Save Exit ESC Exit Ver 2 21 1277 Copyright C 2020 American Megatrends International LLC...

Page 56: ...mode increases with respect to an increase in temperature Use the or key to change the value or enter a decimal number between 1 and 8 4 3 3 IT8528 Super IO Configuration Use the IT8528 Super IO Confi...

Page 57: ...F3 Optimized Defaults F4 Save Exit ESC Exit Ver 2 21 1277 Copyright C 2020 American Megatrends International LLC BIOS Menu 7 Serial Port 1 Configuration Menu Serial Port Enabled Use the Serial Port o...

Page 58: ...OS Menu 8 Serial Port Console Redirection Console Redirection Enabled Use Console Redirection option to enable or disable the console redirection function Disabled Disabled the console redirection fun...

Page 59: ...115200 Data Bits 8 Use the Data Bits option to specify the number of data bits 7 Sets the data bits at 7 8 DEFAULT Sets the data bits at 8 Parity None Use the Parity option to specify the parity bit t...

Page 60: ...ced Legacy Console Redirection Settings Redirection COM Port COM1 Select a COM port to display redirection of Legacy OS and Legacy OPROM Messages Select Screen Select Item Enter Select Change Opt F1 G...

Page 61: ...rmation Aptio Setup American Megatrends International LLC Advanced NVMe Configuration No NVME Device Found Select Screen Select Item Enter Select Change Opt F1 General Help F2 Previous Values F3 Optim...

Page 62: ...ESC Exit Ver 2 21 1277 Copyright C 2020 American Megatrends International LLC BIOS Menu 11 Platform Configuration 4 4 1 PCH Configuration Use the PCH Configuration menu BIOS Menu 12 to change and or s...

Page 63: ...us Values F3 Optimized Defaults F4 Save Exit ESC Exit Ver 2 21 1277 Copyright C 2020 American Megatrends International LLC BIOS Menu 13 PCI Express Configuration 4 4 1 1 1 M2_M2 M2_M1 Aptio Setup Amer...

Page 64: ...ble Configure SATA as AHCI SATA Port 0 Not Installed Hot Plug Enable SATA Port 1 Not Installed Hot Plug Enable SATA Port 2 Not Installed Hot Plug Enable SATA Port 3 Not Installed Hot Plug Enable Enabl...

Page 65: ...e the PCH sSATA Configuration menu BIOS Menu 12 to change and or set the configuration of the SATA devices installed in the system Aptio Setup American Megatrends International LLC Platform Configurat...

Page 66: ...device Configure sSATA as AHCI Use the Configure sSATA as option to configure how the SATA controller s operate AHCI DEFAULT Configures SATA devices as AHCI device RAID Configures SATA devices as RAI...

Page 67: ...Platform Configuration Socket Configuration Server Mgmt Processor Configuration IIO Configuration Displays and provides option to change the Processor Settings Select Screen Select Item Enter Select C...

Page 68: ...Version Genuine Intel R CPU Hyper Threading ALL Enable Enable Intel R TXT Disable VMX Enable Enable Hyper Threading Software Method to Enable Disable Logical Processor threads Select Screen Select Ite...

Page 69: ...logy 4 5 2 IIO Configuration The IIO Configuration menu BIOS Menu 19 configures Intel Virtualization Technology functions Aptio Setup American Megatrends International LLC Socket Configuration IIO Con...

Page 70: ...SC Exit Ver 2 21 1277 Copyright C 2020 American Megatrends International LLC BIOS Menu 20 Socket0 Configuration 4 5 2 1 Socket1 Configuration Use the Socket1 Configuration menu BIOS Menu 21 to view th...

Page 71: ...ble Intel Virtualization Technology for Directed I O VT d by reporting the I O device assignment to VMM through DMAR ACPI Tables Select Screen Select Item Enter Select Change Opt F1 General Help F2 Pr...

Page 72: ...VMD for Volume Management Device on Select Screen Select Item Enter Select Change Opt F1 General Help F2 Previous Values F3 Optimized Defaults F4 Save Exit ESC Exit Ver 2 21 1277 Copyright C 2020 Ame...

Page 73: ...figuration Socket Configuration Server Mgmt BMC Self Test Status FAILED BMC Firmware Revision Unknown System Event Log BMC network configuration Press Enter to change the SEL event log configuration S...

Page 74: ...isable all features of System Event Logging during boot Select Screen Select Item Enter Select Change Opt F1 General Help F2 Previous Values F3 Optimized Defaults F4 Save Exit ESC Exit Ver 2 21 1277 C...

Page 75: ...channel 1 Configuration Address source Unspecified Current Configuration DynamicAddressBmcDhcp Station IP address 0 0 0 0 Subnet mask 0 0 0 0 Station MAC address 00 18 7D BF 01 2E Router IP address 0...

Page 76: ...modify any BMC network parameters during BIOS phase Static Manually sets the BMC network parameters If this option is selected the following items will be configurable Station IP address Subnet mask S...

Page 77: ...t be entered to boot or enter Setup In Setup the User will have Administrator rights The password length must be Minimum length 3 Maximum length 20 Administrator Password User Password Set Administrat...

Page 78: ...American Megatrends International LLC BIOS Menu 28 Boot Bootup NumLock State On Use the Bootup NumLock State BIOS option to specify if the number lock setting must be modified during boot up On DEFAUL...

Page 79: ...m the UEFI devices Enabled Boot from UEFI devices is enabled Disabled DEFAULT Boot from UEFI devices is disabled Launch PXE OpROM Disabled Use the Launch PXE OpROM option to enable or disable boot opt...

Page 80: ...020 American Megatrends International LLC BIOS Menu 29 Save Exit Save Changes and Reset Use the Save Changes and Reset option to save the changes made to the BIOS options and reset the system Discard...

Page 81: ...PUZZLE IN005 Page 81 Chapter 5 5 Interface Connectors...

Page 82: ...sections 5 2 Internal Peripheral Connectors Internal peripheral connectors on the motherboard are only accessible when the motherboard is outside of the chassis The table below shows a list of the con...

Page 83: ...connector I O card 6 pin wafer IO_PWR1 Power connector networking card 6 pin connector HDD_PWR2 Power connector riser card 4 pin connector RISER_PWR1 SATA RAID key connector 4 pin wafer CON11 SMBus co...

Page 84: ...CPLD_TDI 4 NC 5 NC 6 CPLD_TMS 7 GND 8 CPLD_TCK Table 5 3 CPLD Programmer Connector J1 Pinouts 5 2 3 Debug Port Connector DBG_PORT1 Pin Description Pin Description 1 NA 2 3V 3 GND 4 SERIRQ 5 LAD3 6 LAD...

Page 85: ...3 KS12 14 KSI1 15 KSO11 16 KSI2 17 KSI3 18 GND 19 GND 20 GND Table 5 5 EC Debug Connector CON2 Pinouts 5 2 5 CPU Fan Connectors CPU_FAN1 2 PIN NO DESCRIPTION 1 GND 2 12V 3 FANIO 4 PWM Table 5 6 CPU Fa...

Page 86: ...Pinouts 5 2 8 M 2 M key Slot M2_M1 M2_M2 PIN NO DESCRIPTION PIN NO DESCRIPTION 1 GND 2 3 3V 3 GND 4 3 3V 5 PCIE_RXN3 6 N C 7 PCIE_RXP3 8 N C 9 GND 10 DAS DSS 11 PCIE_TXN3 12 3 3V 13 PCIE_TXP3 14 3 3V...

Page 87: ...52 CLKREQ 53 REFCLKN 54 PEWAKE 55 REFCLKP 56 N C 57 GND 58 N C 59 Module Key 60 Module Key 61 Module Key 62 Module Key 63 Module Key 64 Module Key 65 Module Key 66 Module Key 67 N C 68 SUSCLK 69 PEDET...

Page 88: ...ector I O Card IO_PWR1 Pinouts 5 2 11 Power Connector Networking Card HDD_PWR2 PIN NO DESCRIPTION 1 5V 2 5V 3 GND 4 12V 5 12V 6 GND Table 5 12 Power Connector Networking Card HDD_PWR2 Pinouts 5 2 12 P...

Page 89: ...CON11 Pinouts 5 2 14 SMBus Connector SMB1 PIN NO DESCRIPTION 1 GND 2 SMBUS I2C CLK 3 SMBUS I2C DATA 4 5V Table 5 15 SMBus Connector SMB1 Pinouts 5 2 15 CPU SMBus Connector CPU_SMB1 PIN NO DESCRIPTION...

Page 90: ...SPI1 Pinouts 5 2 17 SPI Flash Connector EC JSPI2 PIN NO DESCRIPTION 1 3 3V 2 SPI_CS 0_CN_EC 3 SPI_SO_SW_EC 4 SPI_CLK_SW_EC 5 SPI_SI_SW_EC 6 GND Table 5 18 SPI Flash Connector EC JSPI2 Pinouts 5 2 18 T...

Page 91: ...5 2 19 USB DOM Connector USB_DOM1 PIN NO DESCRIPTION PIN NO DESCRIPTION 1 VCC 2 NC 3 USB_DATA 4 NC 5 USB_DATA 6 NC 7 GND 8 NC Table 5 20 USB DOM Connector USB_DOM1 Pinouts 5 2 20 VGA Connector VGA1 P...

Page 92: ...PUZZLE IN005 Page 92 Appendix A A Regulatory Compliance...

Page 93: ...equirements and other relevant provisions of Directive 1999 5 EC Bulgarian IEI Integration Corp 1999 5 esky Czech IEI Integration Corp t mto prohla uje e tento za zen je ve shod se z kladn mi po adavk...

Page 94: ...uvi Lithuanian IEI Integration Corp deklaruoja kad is ranga atitinka esminius reikalavimus ir kitas 1999 5 EB Direktyvos nuostatas Nederlands Dutch IEI Integration Corp dat het toestel toestel in over...

Page 95: ...direktive 1999 5 ES Slovensky Slovak IEI Integration Corp t mto vyhlasuje e zariadenia sp a z kladn po iadavky a v etky pr slu n ustanovenia Smernice 1999 5 ES Suomi Finnish IEI Integration Corp vaku...

Page 96: ...in accordance with the instruction manual may cause harmful interference to radio communications Operation of this equipment in a residential area is likely to cause harmful interference in which cas...

Page 97: ...PUZZLE IN005 Page 97 Appendix B B Safety Precautions...

Page 98: ...d when moving installing or modifying the system Do not apply voltage levels that exceed the specified voltage range Doing so may cause fire and or an electrical shock Electric shocks can occur if ope...

Page 99: ...wing anti static precautions are strictly adhered to Wear an anti static wristband Wearing a simple anti static wristband can help to prevent ESD from damaging any electrical component Self grounding...

Page 100: ...o instructions and local regulations Outside the European Union If you wish to dispose of used electrical and electronic products outside the European Union please contact your local authority so as t...

Page 101: ...ts in the PUZZLE IN005 may only be cleaned using a product specifically designed for the purpose In such case the product will be explicitly mentioned in the cleaning tips Below is a list of items to...

Page 102: ...PUZZLE IN005 Page 102 Appendix C C Error Beep Code...

Page 103: ...ound 4 Recovery failed 4 S3 Resume failed 7 Reset PPI is not available C 2 DXE Beep Codes Number of Beeps Description 1 Invalid password 4 Some of the Architectural Protocols are not available 5 No Co...

Page 104: ...PUZZLE IN005 Page 104 Appendix D D Hazardous Materials Disclosure...

Page 105: ...iphenyl Ethers PBDE Bis 2 ethylhexyl phthalate DEHP Butyl benzyl phthalate BBP Dibutyl phthalate DBP Diisobutyl phthalate DIBP Housing O O O O O O O O O O Display O O O O O O O O O O Printed Circuit B...

Page 106: ...ge 106 D 2 China RoHS RoHS RoHS Pb Hg Cd CR VI PBB PBDE O O O O O O O O O O O O O O O O O O O O O O O O O O O O O O O O O O O O O O O O O O O O O O O O O SJ T11364 2014 GB T26572 2011 X SJ T11364 2014...

Reviews: