


14
3.
Click the pencil button to begin recording your pattern.
4.
Use the green on-screen controls and the
Iris
/
Focus
buttons to create a pattern.
5.
Click the pencil button again to stop recording the pattern. You can review it by clicking
the eye button.
6.
Use the
ABC
button to assign your pattern a name.
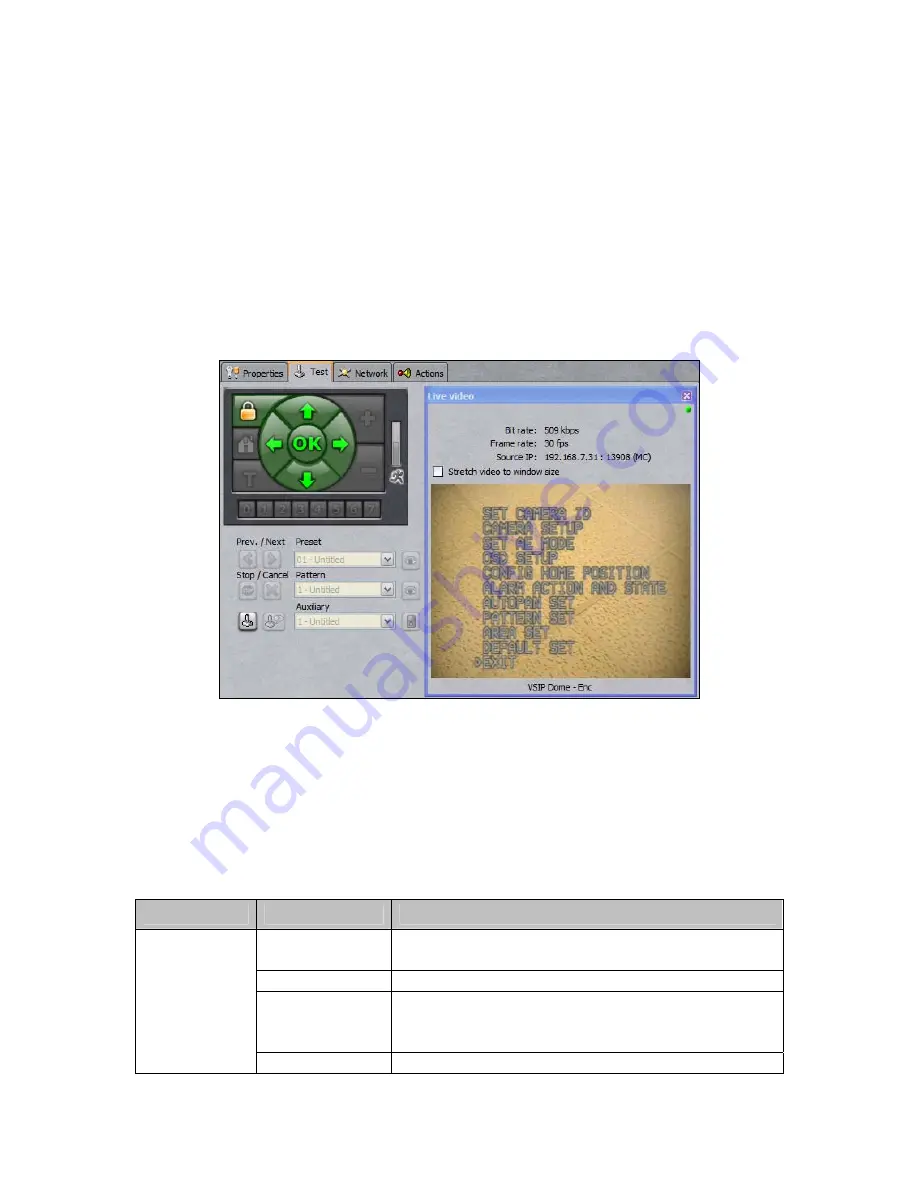
Dome Menu Setup
The dome menu can be accessed through the same PTZ Configuration Pane used to create
presets and patterns. To access the menu, click the
Live video
button and then the “menu”
button, which is located below the
Focus
buttons.
Figure 20 - Accessing the PTZ Dome’s Menu
To navigate the menu and make changes, use the green PTZ on-screen controls.
Use the right
arrow button to make a selection and the left arrow button to return to the previous level of the menu. To
change setting, use the up and down arrows to toggle between options or, for numerical inputs, between digits.
The latter method is also used to enter a password, if access to the menu has been restricted.
Camera Information Setup
Sub-Menu
Option
Function
Current/Input
S/N
Displays the dome’s serial number, and allows users
to change it, respectively.
Camera ID
Displays the camera ID.
Password Set,
Confirm/Enable
Allows users to change the menu access password.
By default, password protection is
disabled
and the
password is
00000000000
.
Set Camera ID
Version
Display’s the dome’s current firmware version.