


Part 1 - Getting Started
24
Live Mode
Live Menu
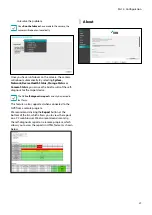
Placing the mouse pointer near the top portion of the screen displays the Live menu.
1
2
3
4
5 6 7
8 9
0 !
@
1
Login/Logout
2
Layout
3
Previous Group,
Next Group
4
Display
5
Freeze
6
Panic Recording
7
Sequence
8
Select Camera
9
Search Mode
0
Setup
!
Wizard
@
Status Indication
1
Login/Logout
Log into and out from accounts. If in the logged in state, the account ID is shown. If in the logged out state, the
login icon is shown.
2
Layout
Used to change the screen layout to single screen, 1x2, corridor format(1x3), 2x2,1+5, 1+7 or 3x3.
•
Corridor Format
: Divides the screen into 3 panes. This format displays vertically and is set to display the
optimized video of the camera when using the camera’s pivot feature. This is particularly effective when
monitoring hallways, passages, and other confined spaces.
•
1+5, 1+7 and 3x3 screen format are supported only on 8-channel model.
3
Previous/Next Group
Loads the previous/next screen group.
4
Display
●
OSD
(On Screen Display): Enables/disables the
OSD
feature.
●
Full
: Displays the video in full screen mode.
●
Aspect Ratio
: Select whether to enable the original aspect ratio of video transmitted from the camera.
5
Freeze
Freezes the screen. Select
Freeze
again to unfreeze.
6
Panic Recording
Activates/deactivates Panic Recording.
7
Sequence
Selecting the Sequence icon
1
#
4
3
2
5 6 78
9 0
! @
while in Live mode changes to the sequence mode. To exit, select Sequence icon
1
#
4
3
2
5 6 78
9 0
! @
once more. The
icon is displayed on the upper right part of the screen while Sequence is in progress.


