background image


51

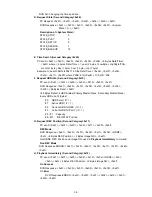
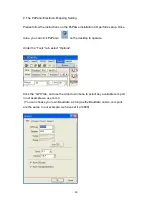
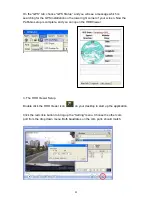
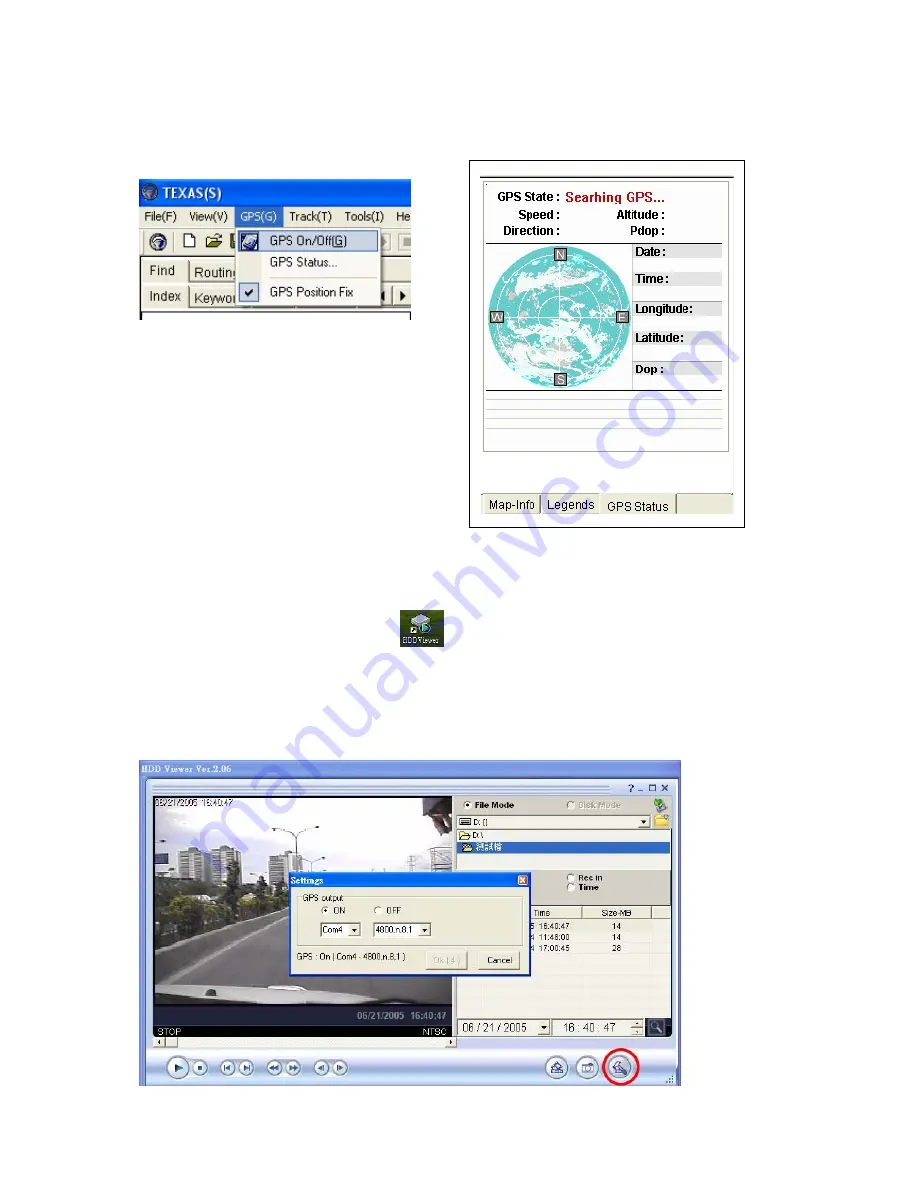
On the “GPS” tab, choose “GPS Status,” and you will see a message which is 
searching for the GPS installation on the lower right corner of your screen. Now the 
PaPaGo setup is complete, and you can open the HDD Viewer. 


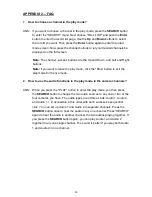
3. The HDD Viewer Setup. 

Double click the HDD Viewer icon 

  on your desktop to start up the application. 

 
Click the red circle button to bring up the “Setting” menu. Choose the other com 
port from the drop down menu. Both baudrates on the com ports should match. 


Summary of Contents for IV-480MORT

Page 1: ...Mobile Vehicle Video Recorder...

Page 2: ...expense WARNING To reduce the risk of fire or electric shock do not expose this appliance to rain or moisture Do not block ventilation openings Do not place anything on top of the unit that might spil...

Page 3: ...ck Operations 24 3 3 1 Normal Playback 24 3 3 2 Fast Forward Backward 24 3 3 3 Slow Forward Reverse 24 3 3 4 Play back picture by picture 25 3 4 Search Operations 25 3 4 1 FULL LIST Search 25 3 4 2 AL...

Page 4: ...rds the information from the GPS and uses the eMap software to show the exact route of your vehicle at any given time 4 Provides clearer and more accurate video records 5 Easy to connect to a PC via a...

Page 5: ...portable enough to carry anywhere you want and link up with PCs and TV monitors for direct display The IV 480MORT includes the Global Position System GPS which helps disclose a vehicle s location info...

Page 6: ...temperature Standard HDD 0 45 32 113 Industrial HDD 0 60 32 140 z Dimensions 178 x 173 x 50 mm z Time lapse and real time recording z Refresh rate up to 30 IPS 25 IPS for PAL z Image quality selectab...

Page 7: ...fessional CCTV cameras User Manual and CD x 1 Adapter 5V x 1 Shockproof unit x 1 Mini USB cable x 1 Mini Din Splitter x 4 User Manual and CD x 1 Adapter 5V x 1 The optional accessories contain the fol...

Page 8: ...n the recorded speed in the play mode 4 PLAY button Press to play back a recorded video from the hard disk A light glows green in the PLAY mode 5 PAUSE button In a playback display press this to freez...

Page 9: ...ideo 11 DISPLAY button Press to show the system operation status on the screen 12 Enter Quad button Press to enter a selected item and save the setting in the menu setup mode In the live play mode use...

Page 10: ...sources 4 5 Camera In connector There are four connectors here to connect the Video Audio In from a camera Please refer to the section 1 5 5 CAMERA IN CONNECTOR 6 RS 232 port This communication port f...

Page 11: ...nks up with the outer casing 3 Audio Connector Connect here to hear the audio s sound when you play the inner host case outside the outer case 4 Video Connector Connect here to play the video when you...

Page 12: ...O PIN Assignment 1 Ground 2 Ground 3 Video In 4 12V DC 5 Not Connected Mirror 6 Audio In Note The maximum electric current provided for 4 mobile cameras is 1 ampere 1A in total 1 5 6 Power Delay Conne...

Page 13: ...on key In the above diagram pin 1 is connected to the vehicle battery minus pin 3 to the battery plus and pin 4 to the vehicle ignition key Pin connections without the ignition key In the above diagra...

Page 14: ...ally Closed 2 I O IN2 INPUT same as above 3 I O IN3 INPUT same as above 4 I O IN4 INPUT same as above 5 GND Ground Contact 6 GND Ground Contact 7 I O OUT1 OUTPUT This is an alarm output trigger Connec...

Page 15: ...3 and connect to external devices like buzzers or lights and pin 8 is N A not applicable VEHICLE SIGNAL In the MAIN MENU page click ALARM to enter the ALARM page In this page go to the I O CONNECTION...

Page 16: ...0 volts the DVR will power off at once without beeping If the car battery is powered between 14 5 and 15 0 volts the DVR will beep twice in 60 seconds and then run smoothly If the power is between 15...

Page 17: ...vant details of driving For example all information regarding the driving speed engine RPM wheel turning angles driving time periods brakings signal lights and the GPS position can be retrieved from t...

Page 18: ...critical incidents relating to your vehicle Inside the outer case of the DVR is the inner recording host You can take out this light portable host whenever you like and take it with you wherever you w...

Page 19: ...Capacity Rotation Size WD400VE 40GB IDE 5400 RPM 2 5 WD600VE 60GB IDE 5400 RPM 2 5 WD800VE 80GB IDE 5400 RPM 2 5 WD1000VE 100GB IDE 5400 RPM 2 5 Western Digital WD1200VE 120GB IDE 5400 RPM 2 5 ST9381...

Page 20: ...the Display button again the unit will not display any OSD message Press the button one more time to go back to the default display Figure 3 3 A HD1 39G Total capacity of installed hard disk 39 GB 10...

Page 21: ...onds to process 5 The DVR displays the message PLEASE REMOVE SD CARD The process is complete Please remove the SD card and the DVR will restart automatically If you have already followed procedures 1...

Page 22: ...e of a 20GB hard disk drive NOTE 1 Recording times are estimated in the tables below For the actual available recording time of a recording configuration please refer to the system information of the...

Page 23: ...1147 8 1718 9 2290 0 Refresh Rate Frame Sec 25 12 5 8 3 5 2 7 1 4 0 76 0 44 1 8 1 12 1 16 REC Time Mode 3 hr 6 hr 9 hr 12 hr 24 hr 48 hr 96 hr 168 hr 480 hr 720 hr 960 hr PAL Audio ON Possible Recordi...

Page 24: ...2 for more details 1 Press the SETUP button to enter the MAIN MENU 2 Select ALARM and press the Enter button to enter ALARM 3 Set the desired REC RATE REC QUALITY ALM TYPE and ALM DURATION for use If...

Page 25: ...or 3 sec PLAY Once playback reaches the end of an HDD s recorded data the DVR will show the ending message use the SEARCH functions or rewind to replay the file if required 3 3 2 Fast Forward Backward...

Page 26: ...on 1 Press the SEARCH button to enter the search mode 2 Select the FULL LIST and press the Enter button to access the complete list of recorded video 3 Highlight the specific recorded video of your re...

Page 27: ...h mode 2 Select THUMBNAIL and press the Enter button to access the thumbnail page 3 Set the date you wish to search for the recorded video 4 Press the Enter button to start searching for and displayin...

Page 28: ...ou need another image please return to the SD card JPG file list page and repeat steps 3 and 4 for another search NOTE To delete a JPG file in the SD card please return to the SD CARD JPG FILE list pa...

Page 29: ...o an SD Card Please take the following steps to archive a critical video in an SD card 1 Press the SETUP button to enter the setup mode and select the DISK 2 Highlight DISK and press the 12 Enter butt...

Page 30: ...er the system setting info of the DVR to another DVR z Insert the SD card which has stored the system setting information into the DVR z Press the SETUP button to enter the setup mode and select SYSTE...

Page 31: ...s you to continue recording when the disk is full AUTO START REC This item offers automatic recording with two options ON Activates the automatic recording OFF Deactivates the automatic recording REC...

Page 32: ...s the duration of the recording after the ACC is off There are six options here you can select from OFF 1 MIN 5 MIN 10 MIN 1 HR and NON STOP OFF The recording will stop automatically when the vehicle...

Page 33: ...isk when an alarm input is activated For an NTSC unit there are 5 different record speeds you can select from 30F S 30 fields per second 15F S 10F S 6F S and REMAIN For a PAL unit there are 5 differen...

Page 34: ...nnection ALARM This item connects you with an alarm sensor Set the 4 inputs of the I O connection as ALM1 ALM2 ALM3 RESET The Alarm signals are used to trigger the alarm recording VEHICLE SIGNAL Set t...

Page 35: ...COMM ID This is the Communication ID for the RS232 communication After the DVR receives a RS232 command it checks if the Dest ID within the code is the same as the COMM ID in which case the particular...

Page 36: ...ng 300 images for every file You can stop recording whenever you want and if you don t recording will automatically stop at the optimum of 300 images NOTE To save images please refer to section 3 5 1...

Page 37: ...HDD Backup operation complete Timer activated deactivated Recording switching between HDD PASSWORD This option allows you to set a password to prevent any unauthorized re formatting of the hard disk...

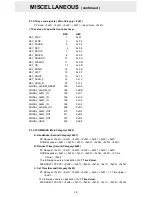
Page 38: ...different speeds can be used 2400 baud per second 4800 baud 9600 baud 19200 baud 28800 baud 38400 baud 57600 baud and 115200 baud The default setting is 9600 baud per second 5 1 2 The Communication Pr...

Page 39: ...LARM_OU 209 0x D1 SIGNAL_ALM2_OUT 210 0x D2 SIGNAL_ALM3_OUT 211 0x D3 SIGNAL_ALM4_OUT 212 0x D4 SIGNAL_HELP 239 0x EF 5 1 2 2 COMMAND Main Category 0x02 A Handshake Second Category 0x01 PC Request 0x4...

Page 40: ...onse 0x41 0x20 0x01 0x02 0x10 0x32 0x00 0x00 48 Bytes Data 0x4f 48 Bytes Data 4 HDD Status Primary Master Slave Secondary Master Slave Every HDD use 12 Bytes 0 HDD Exist if 1 1 Active HDD if 1 2 Curre...

Page 41: ...SETTING MAIN PAGE HD1 BUILD JPEG OFF START OPERATION LOG MENU BACKGND BUZZER PASSWORD SETUP PWD DEFAULT SD SETUP VERSION SYSTEM MAIN PAGE ENTER 2 OFF SET OFF LOAD SAVE ENTER RECORD ALARM CLOCK TITLE C...

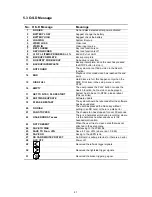
Page 42: ...he PLAY button or uses the Search function but no video can be played 17 SET TO NTSC PLS RESTART System has to be set to NTSC please reboot PAL is similar 18 SOFTWARE UPDATE Software update 19 PLEASE...

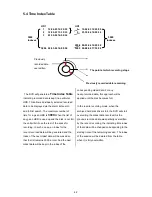
Page 43: ...index for the recent recorded data will be generated and the index of the next oldest data will be erased so that the list remains 3000 in total And the next oldest data will be kept in the index of t...

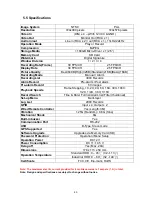
Page 44: ...s Frame Stepping 1X 2X 4X 8X 16X 30X 100X 1 2X 1 4X 1 8X 1 16X Record Search Time Date Full list Alarm list Filter thumbnail Set up Menu Multi layer Log List 2000 Records GPIO Input x 4 Output x 2 Wir...

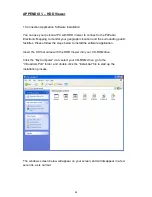
Page 45: ...ng public facilities Please follow the steps below to install the software application Insert the CD that came with the HDD Viewer into your CD ROM drive Click the My Computer icon select your CD ROM...

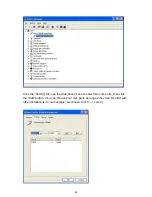
Page 46: ...omputer icon select Properties click the Hardware tab and then click the Device Manager Now Virtual Serial Ports will appear as a new category Click the sign to expand right click Virtual bus for VrSe...

Page 47: ...he Setting tab use the drop down menu to select two com ports then click the Add button You can choose your com ports as long as they don t conflict with other installations In our example we choose c...

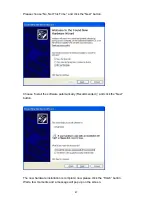
Page 48: ...click the Next button Choose Install the software automatically Recommended and click the Next button The new hardware installation is complete now please click the Finish button Wait a few moments an...

Page 49: ...48 Choose Install the software automatically Recommended then click the Next button The newly added hardware installation is complete now click Finish...

Page 50: ...49 Go to the Device Manager to make sure the driver is installed...

Page 51: ...ce done you can click PaPaGo on the desktop to operate Under the Tools tab select Options Click the GPS tab and use the drop down menu to select any available com port in our example we use com 3 You...

Page 52: ...of your screen Now the PaPaGo setup is complete and you can open the HDD Viewer 3 The HDD Viewer Setup Double click the HDD Viewer icon on your desktop to start up the application Click the red circl...

Page 53: ...52 4 The Working Screen The user can now see both the camera screen and the electronic map on the PC...

Page 54: ...o exit the play mode for the live mode 2 How to use the audio functions in the play mode in the camera channels ANS When you press the PLAY button to enter the play mode you then press the SEARCH butt...

Page 55: ...7850 1 4 internal image sensor Horizontal resolution 320 TV lines With 2 0 lux F2 0 Min Illumination Lens mount board lens 1 9mm F2 0 Lens view angle 98 H 73 V Electronic shutter up to 1 60 1 120 000...

Reviews: