background image


Vortex86SX-6124-V2    

                    Vortex86SX

  Half-Size CPU Module                


32

C.    LVDS Flat Panel Support List 

If you would like to use LVDS Flat Panel with Vortex86SX / Vortex86DX series, please contact 
our regional sales to get ICOP-0096 information or visit ICOP website:


http://www.icop.com.tw/pddetail.aspx?id=65&pid=4


ICOP–0096

: 18-bit TFT to LVDS converter and Cable-LVDS-30: LVDS Cable 30cm 


Approved LVDS Flat Panel List 

Size 

Brand 

Resolution 

Model No. 

3.5” PVI 

640x480 

PD035VL1 

5” PVI 

640x480 

PD050VL1 

6.5” AUO 

640x480 

G065VN01 

8.4” AUO 

800x600 

G084SN03 

8.9” AUO 

1024x600 

A089SW01 

8.9” CPT 

1024x600  CLAA089NA0ACW 

10.4” AUO 

800x600 

G104SN02 

12.1” AUO 

800x600 

G121SN01 

15” AUO 

1024x768 

G150XG01 


Summary of Contents for VSX-6124-V2

Page 1: ...Full 16 bit ISA Bus VSX 6124 V2 DM P Vortex86SX 300MHz Half Size CPU Module with 4S 4USB VGA LCD LAN GPIO 128MB DDR2 Onboard User s Manual Revision 1 0A...

Page 2: ...this manual may be reproduced copied translated or transmitted in whole or in part in any form or by any means without the prior written permission of the ICOP Technology Inc Copyright 2007 ICOP Tech...

Page 3: ...rs Location 7 2 3 Connectors Jumpers Summary 9 2 4 Pin Assignments Jumper Settings 11 2 5 System Mapping 22 2 6 Watchdog Timer 25 2 7 GPIO 26 2 8 SPI flash 27 C h a p t e r 3 Driver Installation 28 Ap...

Page 4: ...a p t e r 1 Introduction 1 1 Packing List Product Name Package VSX 6124 V2 Embedded Vortex86SX CPU All in One Board Manual Drivers CD x 1 RS232 cable x 3 PRINT cable x1 IDE cable x 1 USB cable x 2 USB...

Page 5: ...ing temperature range of 20 C to 70 C The VSX 6124 V2 Half Size family of embedded controller is designed with backward compatibility in mind to provide migration path for projects facing end of life...

Page 6: ...S 232 422 485 port x1 RS485 Auto Direction Parallel port x1 USB port 2 0 x4 16 bit GPIO port x1 10 100Mbps Ethernet port x1 Connectors 2 54 mm 26 pin box header for Print x1 2 54 mm 10 pin box header...

Page 7: ...rd 2MB SPI Flash Disk Driver A 44 pin IDE Flash Disk EmbedDisk 16MB or above Compact Flash Type I II SRAM support 512KB Optional Power Requirement Single Voltage 5V 700mA Dimension 184mm X 122mm 7 24...

Page 8: ...Vortex86SX 6124 V2 Vortex86SX Half Size CPU Module 5 1 4 Board Dimension...

Page 9: ...Installation 2 1 Board Outline Note1 COM2 RS232 422 485 is selected by BIOS setting Note2 J39 Default setting of JTAG Has to be Disable Pin 1 Pin 2 short Note3 PCI 104 connector is optional VI O sett...

Page 10: ...Vortex86SX 6124 V2 Vortex86SX Half Size CPU Module 7 2 2 Connectors Jumpers Location Connectors...

Page 11: ...Vortex86SX 6124 V2 Vortex86SX Half Size CPU Module 8 Jumpers LEDs...

Page 12: ...eader 2 54 3x1 3 pin J17 Power Connector Box Header 5 0 Molex 4 pin J18 Power Connector Terminal Block 5 0 2x1 2 pin J19 COM3 Box Header 2 54 5x2 10 pin J20 PRINT Box Header 2 54 13x2 26 pin J21 COM4...

Page 13: ...CPU Module 10 J41 Console Redirection Optional Pin Header 2 54 1x2 2 pin PWR L ED Power Active LED Red LED SMD IDE LED IDE Active LED Green LED SMD MTBF LED MTBF Out Orange LED SMD CF1 Compact Flash T...

Page 14: ...GGND Pin Signal Name Pin Signal Name 1 IDERST 2 GND 3 IDED7 4 IDED8 5 IDED6 6 IDED9 7 IDED5 8 IDED10 9 IDED4 10 IDED11 11 IDED3 12 IDED12 13 IDED2 14 IDED13 15 IDED1 16 IDED14 17 IDED0 18 IDED15 19 GN...

Page 15: ...ND 8 GND 9 GGND 10 GGND J4 JTAG Pin Signal Name Pin Signal Name 1 VCC 2 GND 3 TCK 4 TDO 5 TDI 6 TMS J5 RESET Pin Signal Name Pin Signal Name 1 Reset 2 GND J6 Redundancy Optional Pin Signal Name Pin Si...

Page 16: ...MSDAT 6 VCC 7 GND 8 GND 9 GND J9 COM 1 Optional TTL Pin Signal Name Pin Signal Name 1 DCD1 2 RXD1 3 TXD1 4 DTR1 5 GND 6 DSR1 7 RTS1 8 CTS1 9 RI1 10 GND 11 GND J10 COM2 RS232 RS422 RS485 Optional TTL...

Page 17: ...J17 Power Connector 4 pin Header P4 Molex 5mm Pin Signal Name 1 5V 2 GND 3 GND 4 12V Pin Signal Name Pin Signal Name 1 GND 2 VCC 3 GP00 4 GP10 5 GP01 6 GP11 7 GP02 8 GP12 9 GP03 10 GP13 11 GP04 12 GP1...

Page 18: ...3 TXD3 4 DTR3 5 GND 6 DSR3 7 RTS3 8 CTS3 9 RI3 10 NC J20 PRINT Pin Signal Name Pin Signal Name 1 STB 14 AFD 2 PD0 15 ERR 3 PD1 16 INIT 4 PD2 17 SLIN 5 PD3 18 GND 6 PD4 19 GND 7 PD5 20 GND 8 PD6 21 GND...

Page 19: ...SD2 14 12V 15 SD1 16 OWS 17 SD0 18 12V 19 IOCHRDY 20 GND 21 AEN 22 SMEMW 23 SA19 24 SMEMR 25 SA18 26 IOW 27 SA17 28 IOR 29 SA16 30 DACK3 31 SA15 32 DRQ3 33 SA14 34 DACK1 35 SA13 36 DRQ1 37 SA12 38 RE...

Page 20: ...V 4 GND Pin Signal Name Pin Signal Name 1 GND 2 GND 3 MEMCS16 4 SBHE 5 IOCS16 6 SA23 7 IRQ10 8 SA22 9 IRQ11 10 SA21 11 IRQ12 12 SA20 13 IRQ15 14 SA19 15 IRQ14 16 SA18 17 DACK0 18 SA17 19 DRQ0 20 MEMR...

Page 21: ...D12 8 3 3V C BE1 AD15 3 3V 9 SERR GND NC PAR 10 GND PERR 3 3V NC 11 STOP 3 3V LOCK GND 12 3 3V TRDY GND DEVSEL 13 FRAME GND IRDY 3 3V 14 GND AD16 3 3V C BE2 15 AD18 3 3V AD17 GND 16 AD21 AD20 GND AD19...

Page 22: ...DCCLK J29 LCD Connector Pin Signal Name Pin Signal Name 1 3 3V 2 3 3V 3 LG2 4 LG3 5 LG4 6 LG5 7 NC 8 NC 9 LR0 10 LR1 11 LR2 12 LR3 13 LR4 14 LR5 15 GND 16 NC 17 NC 18 NC 19 NC 20 GND 21 NC 22 NC 23 LB...

Page 23: ...ctor Pin Signal Name 1 VCC 2 GPIOA J30 3 GND 1 VCC 2 GPIOB J31 3 GND 1 VCC 2 GPIOC J32 3 GND 1 VCC 2 GPIOD J33 3 GND 1 VCC 2 GPIOE J34 3 GND 1 VCC 2 GPIOF J35 3 GND Please refer to Appendix D for Disp...

Page 24: ...TR 2 GND 3 GND 4 LOUTL J38 MIC IN Optional Pin Signal Name 1 MICVREF 2 GND 3 GND 4 MIC IN J39 JTAG Disable Default setting Pin 1 Pin 2 short Pin Signal Name Pin Signal Name 1 GND 2 JTAG Disable J41 Co...

Page 25: ...Vortex86SX 6124 V2 Vortex86SX Half Size CPU Module 22 2 5 System Mapping...

Page 26: ...Vortex86SX 6124 V2 Vortex86SX Half Size CPU Module 23...

Page 27: ...Vortex86SX 6124 V2 Vortex86SX Half Size CPU Module 24...

Page 28: ...s compatible with M6117D watchdog timer and the other is new The M6117D compatible watchdog timer is called WDT0 and new one is called WDT1 We also provide DOS Linux and WinCE example for your referen...

Page 29: ...X for general usage in the system All GPIO pins are independent and can be configured as inputs or outputs with or without pull up pull down resistors We also offer DOS Linux and WinCE example for you...

Page 30: ...witching noise less power consumption and lower system cost Many of users may consider using a formatted SPI flash to boot for the system or emulate SPI flash as Floppy A Driver or B Driver Then you m...

Page 31: ...ur 10 100Mbps Ethernet based Local Area Network for full interaction with local servers wide area networks such as the Internet The controller supports Half Full Duplex Ethernet function to double cha...

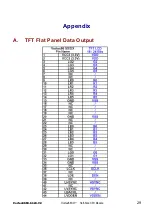
Page 32: ...Vortex86SX 6124 V2 Vortex86SX Half Size CPU Module 29 Appendix A TFT Flat Panel Data Output...

Page 33: ...ge 640x480 FG050710DSSWJG01 DG01 5 7 Ampire 640x480 AM 640480GTMQW T00H 5 7 URT 640x480 UMSH 8004MD T 5 7 Sharp 640x480 LQ057V3DG01 5 7 CPT 640x480 CLAA057VA01 6 4 PVI 640x480 V16C6448AC 6 4 LG PHILIP...

Page 34: ...TFT 24bits A080SN01 V0 8 4 Sharp 800x600 LQ084S3DG01 10 4 PVI 640x480 PD104VT1 VT2 10 4 NEC 640x480 NL6448AC33 18 10 4 NEC 640x480 NL6448AC33 29 10 4 NEC 640x480 NL6448BC33 59 10 4 Sharp 640x480 LQ104...

Page 35: ...it ICOP website http www icop com tw pddetail aspx id 65 pid 4 ICOP 0096 18 bit TFT to LVDS converter and Cable LVDS 30 LVDS Cable 30cm Approved LVDS Flat Panel List Size Brand Resolution Model No 3 5...

Page 36: ...The Vortex86SX 6124 V2 offers the Hardware setting for the various TFT LCD Flat Panels support and please make sure the jumper setting J30 J35 before you connect the LCD Display type setup Connector...

Page 37: ...make sure that the input Voltage of LCD is 3 3V or Not BIOS Please contact or e mail our regional sales to get the special BIOS for any TFT LCD Flat Panels Wiring LCD Cable Please refer to Page 19 J2...

Page 38: ...asily and save development time With a utility MakeROM programmer also can make a ROM image to fit their application those examples can be seen in the following Application systems Mity Mite Serial Se...

Page 39: ...em cannot be booted after BIOS changes are made Please follow below procedures in order to restore the CMOS as default setting Press End Key when the power on Press Del to enter the AMI BIOS setup Pre...

Page 40: ...amaged by misuse modifications accident or disaster Vendor assumes no liability for any damages lost profits lost savings or any other incidental or consequential damage resulting from the use misuse...

Reviews: