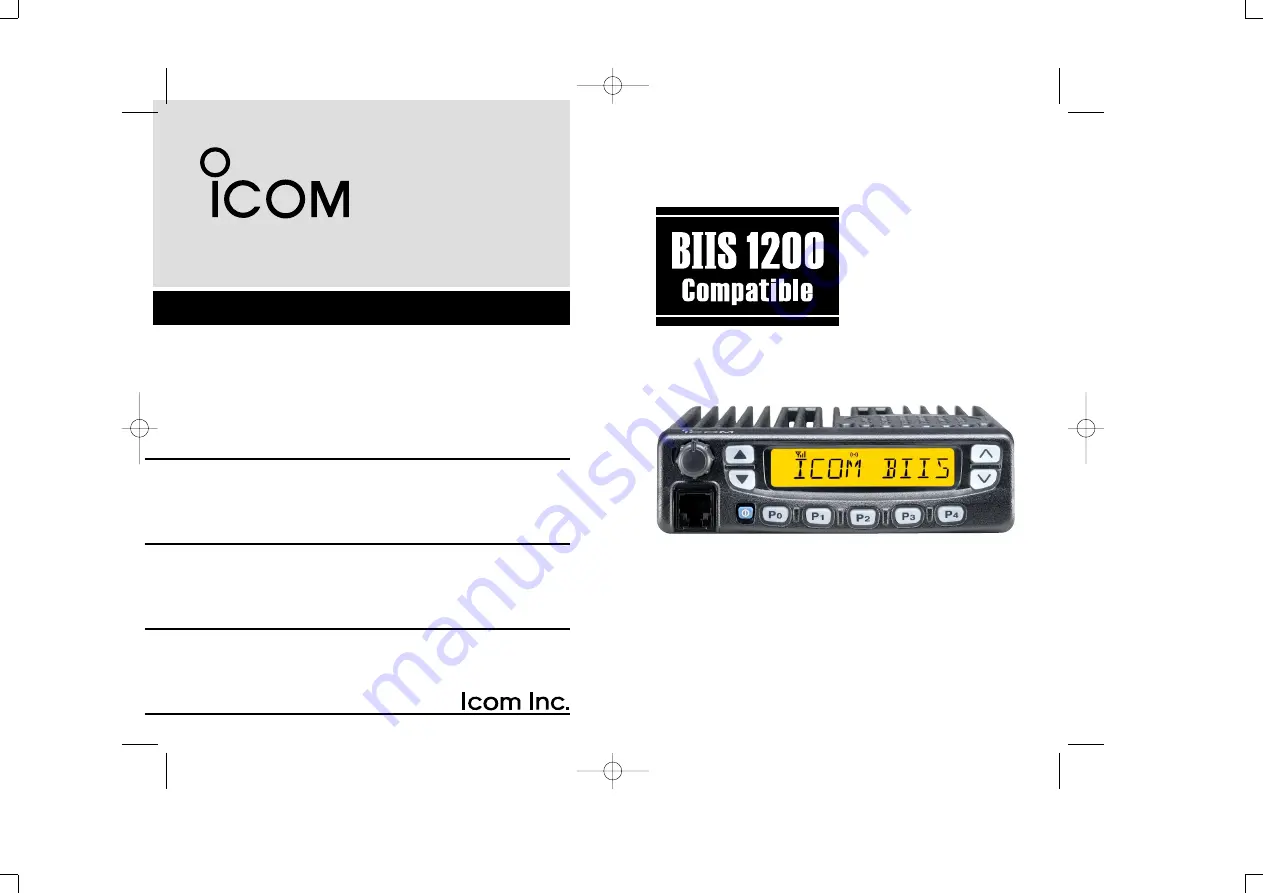
INSTRUCTION MANUAL
New2001
iF610
UHF TRANSCEIVER
iF510
VHF TRANSCEIVER
IC-F510 Series_BIIS-2.qxd 06.7.13 1:31 PM Page 1 (1,1)
Page 1: ...INSTRUCTION MANUAL New2001 iF610 UHF TRANSCEIVER iF510 VHF TRANSCEIVER IC F510 Series_BIIS 2 qxd 06 7 13 1 31 PM Page 1 1 1...
Page 2: ...only Other microphones have different pin assignments and may damage the trans ceiver i New2001 IMPORTANT READ ALL INSTRUCTIONS carefully and completely before using the transceiver SAVE THIS INSTRUCT...
Page 3: ...Icom dealer or distributor TABLE OF CONTENTS IMPORTANT i EXPLICIT DEFINITIONS i PRECAUTION i TABLE OF CONTENTS ii 1 PANEL DESCRIPTION 1 7 Front panel 1 Function display 3 Programmable function keys 4...
Page 4: ...layed push to scroll the message manually eFUNCTION DISPLAY p 3 Displays a variety of information such as an operating channel number name code status message NOTE The above functions depend on pre pr...
Page 5: ...after communication is finished to send a reset code Push after communication is finished to send a clear down code during BIIS operation on an MSK channel NOTE The unmute condition audible condition...
Page 6: ...ler function is activated Optional UT 109 110 is required iBELL INDICATOR Appears blinks when the specific 5 tone BIIS code is re ceived according to the programming oCALL CODE MEMORY INDICATOR Appear...
Page 7: ...A Rewrite PRIO B PRIORITY CHANNEL KEYS Select Priority A or Priority B channel with each push Push and hold Prio A Rewrite to program the pri ority channel MR CH1 MR CH2 MR CH3 MR CH4 OPERATING CHANNE...
Page 8: ...Push this key then speak into the microphone while pushing the PTT switch The CH UP CH DN keys allow you to set the audio output level from minimum to maximum W N WIDE NARROW KEY Push W N to toggle th...
Page 9: ...P CH DN keys Push to select a TX code channel using the CH UP CH DN keys after pushing this key Push and hold to enter the code TX CODE CH Up TX CODE CH Down TX CODE CHANNEL UP DOWN KEYS Push to selec...
Page 10: ...a status number When a received SDM is displayed push to cancel the automatic scroll and scroll the message manually When an SDM that contains more than 10 characters is displayed push to scroll the m...
Page 11: ...y be incorrect Turn power off and start over in this case Channel selection Several types of channel selections are available Methods may differ according to your system set up NON BANK TYPE Push CH U...
Page 12: ...level D Transmitting notes Transmit inhibit function The transceiver has several inhibit functions which restrict transmission under the following conditions The channel is in mute condition Inaudibl...
Page 13: ...rs e Push SCRM to turn the function OFF D D User set mode User set mode is accessed at power ON and allows you to set seldom changed settings In this case you can cus tomize transceiver operation to s...
Page 14: ...transmit SDM is selected edit the SDM CH Up Down During standby condition selects the oper ating channel After pushing DIGITAL or TX Code se lects call list or TX code memory channel respectively Rec...
Page 15: ...s displayed for 2 sec approx disappears and the transceiver return to standby condition D D Displaying the received call record Queue indication The transceiver memorizes the calling station IDs for r...
Page 16: ...ever an error beep sounds and is displayed when no answer back is received after the calls rPush PTT to transmit release to receive tPush MONI P4 to clear down D D Calling back from the queue channel...
Page 17: ...digit stops blinking rPush CALL P0 or PTT to call PTT call can be made only when PTT call capability is permitted NOTE When no answer back is received the trans ceiver repeats the call 3 times defaul...
Page 18: ...e is displayed alternately when the scroll timer is set to OFF In this case push Z to display the status message D D Receiving an SDM qWhen a status message is received Beeps sound appears The calling...
Page 19: ...ntarily Displays message memory ePush to select the desired message When selecting the SDM that includes more than 10 characters S is displayed Push Y Z to scroll the message manually rPush DIGITAL P1...
Page 20: ...tandby condition push DIGITAL P1 then push to select the desired station group code wPush DIGITAL P1 again then push to select the desired status message Or push Y or Z to select the desired status me...
Page 21: ...ng D D Transmitting an SDM qDuring standby condition push DIGITAL P1 then push to select the desired station group code wPush DIGITAL P1 again then push to select the desired SDM ePush CALL P0 or PTT...
Page 22: ...he available characters Pushing also enters space pushing deletes the se lected character rPush to move the cursor to the right push to move the cursor to the left tRepeat steps e and r to set the des...
Page 23: ...ergency is enabled Printer connection When the optional OPC 822 INTERFACE CABLE is connected to the transceiver a printer can be connected to printed out the received SDM content and the ID of the sta...
Page 24: ...transceiver switches to the passcode required condition Entering of the passcode via the keypad is necessary to operate the transceiver again in this case BIIS indication The following indications ar...
Page 25: ...when Clear down signal is received transmitted Set the Move to PrioA CH item as Clear Down Turning the power ON The Priority A channel is selected each time the trans ceiver power is turned ON Status...
Page 26: ...y not be available in your system Contact your Dealer for details D D Placing a telephone call Enter the phone number followed by 1 A high pitched beep indicates that the number is accepted When the c...
Page 27: ...beep indicates successful programming Memories A D are used for the Turbo SpeeDial D System busy indication If all channels are busy three low beeps sound after you initi ate a call Try the call agai...
Page 28: ...ns Optional speaker SP 22 q Antenna r t Optional cable OPC 617 822 e 12 V Battery Black _ Red w Crimp Solder NOTE Use the ter minals for the cable connection NEVER connect to a 24 V battery This could...
Page 29: ...or OPC 822 Connects an external modem unit GPS receiver printer PC LCD backlight control audio amplifier for the public address function etc according to the installed cable type Supplied accessories...
Page 30: ...panel and main unit as shown in the following diagram r Invert the transceiver 180 degrees clockwise as below t Re attach the Front panel to the transceiver y Tighten the 2 screws CAUTION NEVER rotat...
Page 31: ...s are available Contact your Icom dealer or distributor Optional unit installation D D UT 105 UT 117 installation Install the optional unit UT 105 or UT 117 provides SmarTrunk II or SmarTrunk 3G funct...
Page 32: ...i agram below rInstall the scrambler unit as described in page 28 tAttach the bottom cover and screws to their original posi tion then connect the DC power cable NOTE Be sure to re solder above print...
Page 33: ...possible and replace the damaged fuse with a new rated one Cleaning If the transceiver becomes dusty or dirty wipe it clean with a soft dry cloth AVOID the use of solvents such as benzene or al cohol...
Page 34: ...easy to install Same as that supplied with some ver sions Input impedance 4 Max input power 5 W HM 152 HM 152T HM 148 HAND MICROPHONE HM 152 Hand microphone The same as that supplied with the transce...
Page 35: ...hat this equipment complies with the essential requirements of the Radio and Telecommunications Terminal Equipment Directive 1999 5 EC and that any applicable Essential Test Suite measurements have be...
Page 36: ...u Osaka 547 0003 Japan A 6249D 1EU w Printed in Japan 2003 2006 Icom Inc New2001 Intended Country of Use GER AUT GBR IRL NOR FRA NED BEL LUX ESP POR ITA GRE SWE DEN FIN SUI IC F510 Series_BIIS 2 qxd 0...