background image

Program Overview

The SC3801 programmable thermostat has four periods (MORN, DAY, EVE, NITE) that are customizable 

for each day of the week. Each period will have a start time, heat temperature, cool temperature and 

programmable fan. The SC3801 monitors the day and time, while maintaining the specific conditions you 

have chosen for each period in your program.

1.  Verify thermostat is in non-programmable mode  

(use the   button to exit prog mode).

2.  Press and release the   button until OFF mode displays.
3.  Press the   button for 6 seconds.
4.  Press the   button twice.

• Day is displayed (1-7) 

5.  Press the   or   button to change the day you want to program 

(1=Monday, 2=Tuesday, etc).

6.  Press the   button to advance to the next screen.


Note:

 You can always press the   button to return to the 

previous screen.

• Period is displayed (MORN, DAY, EVE, NITE)

7.  Press the   or   button to change period of day. 
8.  Press the   button to advance to the next screen.

Programming

Operating Mode (continued)

Program Mode

In this mode, the program function is on, and the thermostat will automatically be 

controlled by the set program. Program mode can function with Heat mode, Cool 

mode, Cool and Heat mode or OFF mode (for Programmable fan option only).

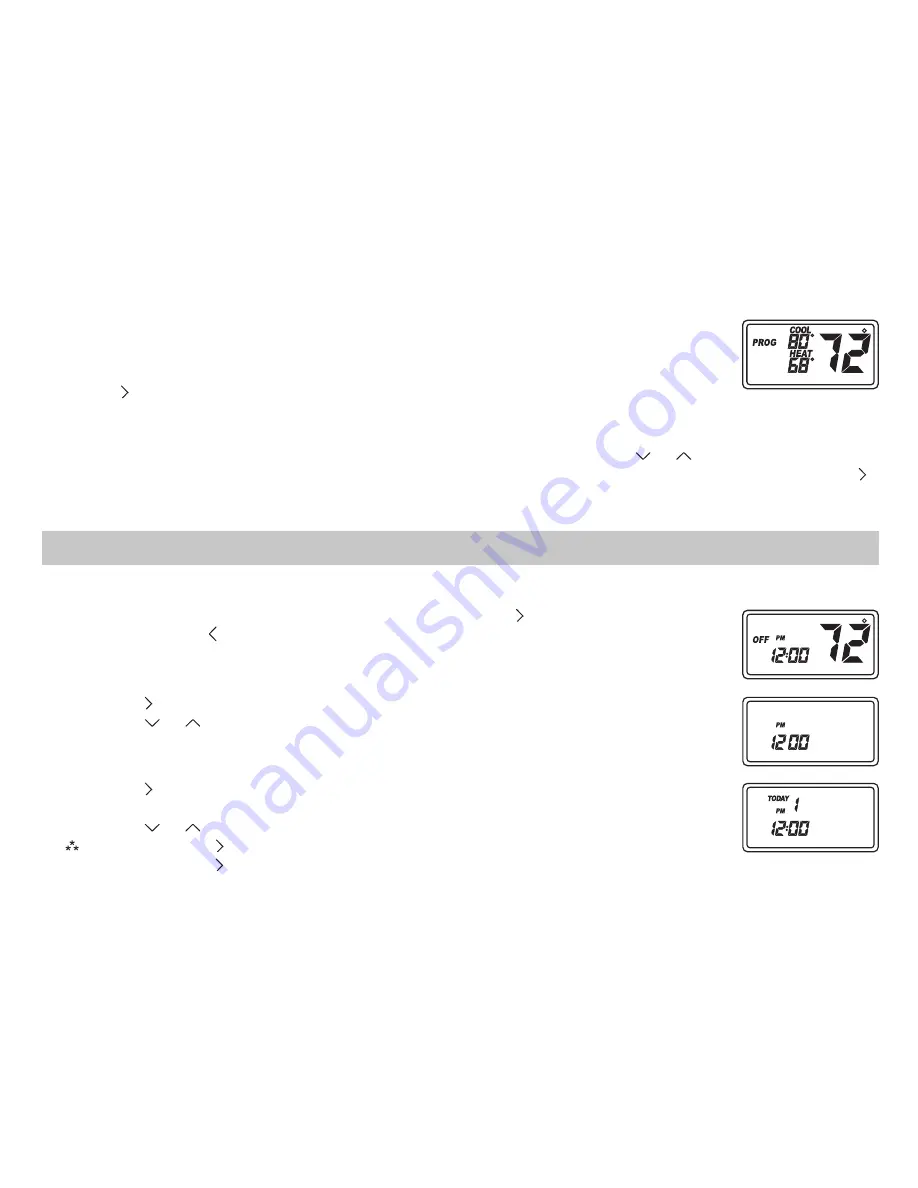
Press the   button to enter and exit program mode. PROG displays when in program  

mode.

Program Mode Hold

The program schedule can be overridden by changing the set temperature (  or  ). After 2 hours, the 
program schedule will automatically be resumed. To return to the program schedule manually, press the   
button twice.

The time and day of the week must be set for your program schedule to operate correctly.

1.  Verify thermostat is in non-programmable mode (use the   button to exit prog mode).
2.  Press and release   button until OFF mode displays.

3.  Press the   button in for 6 seconds.
4.  Press the   or   button to adjust the time.

5.  Press the   button while the time is displayed. The display shows the day  

currently set on the thermostat (1=Monday, 2=Tuesday, etc).

6.  Press the   or   button to set the correct day of the week that today is.


Note:

 Press the   button in for 5 seconds to lock values into memory or 

press the   button once to enter programming.   

Setting the Time and Day of the Week

Summary of Contents for SC 3801

Page 1: ...Changeover Simpleset 7 Day Programming Compatible with Gas Oil or Electric Title 24 Compliant No Batteries Required Relay Outputs minimum voltage drop in thermostat Ideally Suited for Residential New...

Page 2: ...erature decreases The thermostat will not let the compressor come on for four minutes after it turns off This protects your compressor The SC3801 has the following operating modes OFF Heat Emergency H...

Page 3: ...e delay for your compressor to restart after it has turned off Heat Mode In this mode the thermostat controls the heating system Note For heat pumps there is a four minute delay for your compressor to...

Page 4: ...return to the program schedule manually press the button twice The time and day of the week must be set for your program schedule to operate correctly 1 Verify thermostat is in non programmable mode u...

Page 5: ...ify thermostat is in non programmable mode use the button to exit prog mode 2 Press and release the button until OFF mode displays 3 Press the button for 6 seconds 4 Press the button twice Day is disp...

Page 6: ...3 Press the or button to adjust cool set temperature 14 Press the button to advance to the next screen Programmable fan is displayed 15 Press the or button to turn ON OFF continuous indoor fan for tha...

Page 7: ...day and make any changes you require This feature speeds up the programming of the standard weekday weekend schedule 3 Press button for 5 seconds to exit Program mode and return to the OFF mode Simple...

Page 8: ...85 F COOL 78 F COOL 82 F FAN ON OFF FAN ON OFF FAN ON OFF FAN ON OFF MONDAY thru SUNDAY Programmable fan option Factory Preprogramming Use the following personal program schedule to record your setti...

Page 9: ...L COOL FAN ON OFF FAN ON OFF FAN ON OFF FAN ON OFF TUESDAY 2 MORN DAY EVE NITE HEAT HEAT HEAT HEAT COOL COOL COOL COOL FAN ON OFF FAN ON OFF FAN ON OFF FAN ON OFF WEDNESDAY 3 MORN DAY EVE NITE HEAT HE...

Page 10: ...COOL COOL FAN ON OFF FAN ON OFF FAN ON OFF FAN ON OFF FRIDAY 5 MORN DAY EVE NITE HEAT HEAT HEAT HEAT COOL COOL COOL COOL FAN ON OFF FAN ON OFF FAN ON OFF FAN ON OFF SATURDAY 6 MORN DAY EVE NITE HEAT H...

Page 11: ...n Mode Page 19 in the Installation Operation and Application Guide Room temperature is not correct Verify wall hole is plugged with putty or insulation check wiring and location for remote sensor if u...

Page 12: ...r to permit the Seller to properly administer the warranty the Buyer shall 1 Notify the Seller promptly of any claim submitting date code information or any other pertinent data as requested by the Se...

Reviews: