background image


44


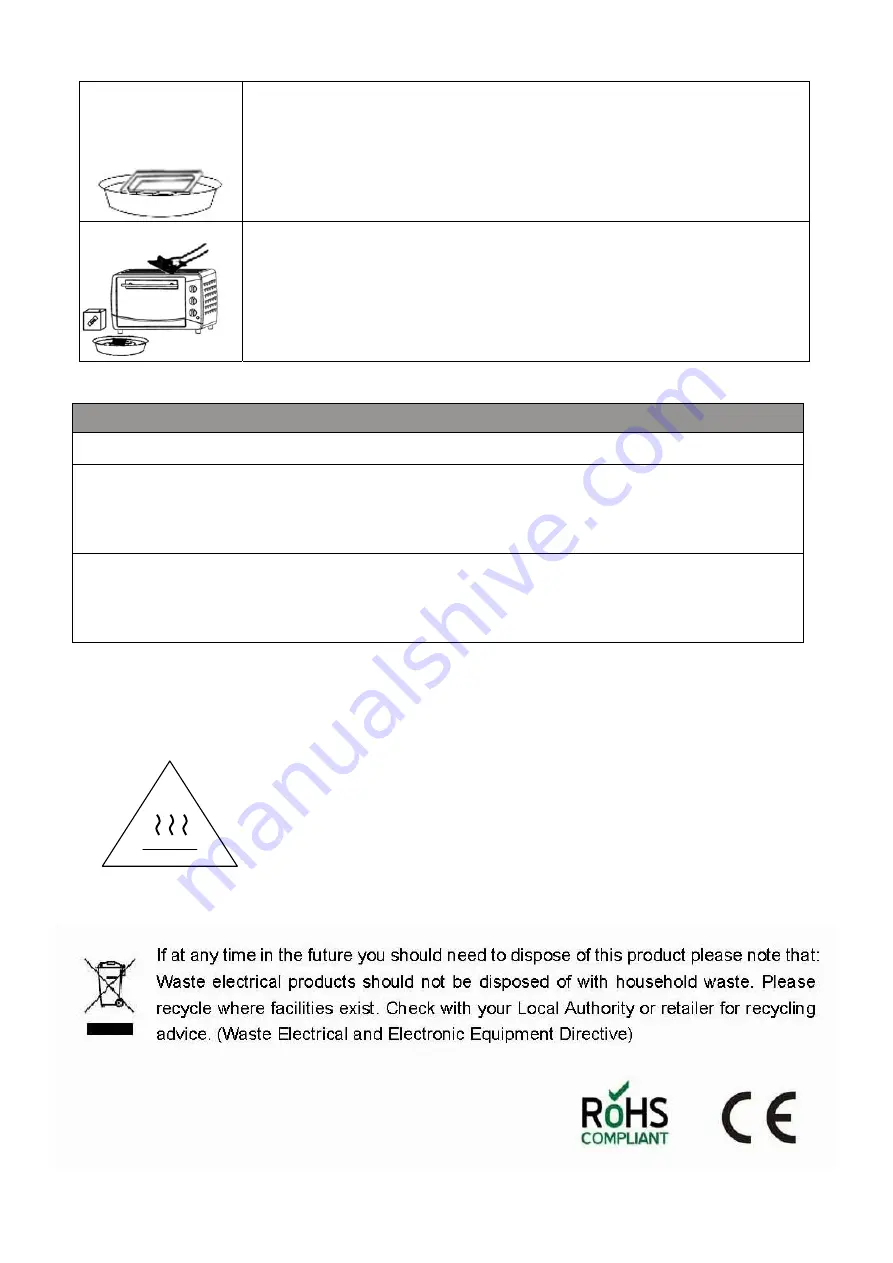
Take out the baking tray, put the mild cleaner or 
kitchen lotion to water, soak the baking tray into 
water, and then use the soft sponge for cleaning. 
Lastly, rinse thoroughly with clean water and dry it 
before storage. 


Put the cleaning cloth into the clean water, take out 
and dry the cloth, then begin to use it to clean the 
outer and inner (including the window and heating 
element) of the unit. Lastly, dry the unit with a clean 
cloth. 


SPECIAL WARNING                                             


Caution: The temperature of the accessible 

surface may be high when the 
appliance is operation. 


WARNING


  Use only recommended attachments. 

  If this product stops working unexpectedly, switch off and unplug 

      the product immediately. Seek professional advice before   
   attempting to re-use the product. 

  To avoid the risk of electrical shocks, DO NOT disassemble or   

    attempt to repair appliance, but return it to your retailer or to one 
    of our authorized service centres for examination and or repair. 

Summary of Contents for IEO-28LCR30

Page 1: ...le N IEO 28LCR30 Nous vous remercions d avoir achet ce four lectrique Veuillez attentivement lire ce manuel d utilisation et observer les consignes de s curit Conservez ce manuel d utilisation pour po...

Page 2: ...iments et ustensiles adapt s la cuisson au four f Le four doit tre pos sur une surface plate et stable Le four doit tre suffisamment a r Maintenez un espace minimal de 30 cm au dessus du four un espac...

Page 3: ...fonctionnement survenant lorsque la fiche est ins r e dans la prise de courant peut provoquer un incendie Lorsque vous d branchez le cordon d alimentation tenez la fiche et non le cordon proprement di...

Page 4: ...re les claboussures d huile Placez une feuille sur chaque plaque L huile s coulera ensuite entre les deux feuilles de papier aluminium Ne posez rien au dessus proximit des r sistances sup rieures et i...

Page 5: ...8 T moin de fonctionnement 3 Thermostat 6 Porte en verre ACCESSOIRES Tournebroche Fourches Poign e de r tissoire Plaque de cuisson Poign e Grille MODE OP RATOIRE 1 Ins rez la fiche d alimentation dans...

Page 6: ...ction Convection 5 Positionnez le Minutier sur la dur e de votre choix minutes Le four est d sormais activ m fiez vous des surfaces chaudes n ouvrez pas la porte en verre pendant la cuisson R sistance...

Page 7: ...et Grille Aliment indiqu titre de r f rence Mode op ratoire de la poign e Plaque de cuisson Il est recommand de l utiliser comme plateau ramasse miettes Ailes de poulet r ties steaks de Hambourg grat...

Page 8: ...e r tissoire Installez les crochets de r tissoire dans les orifices pr vus placez ensuite le tout sur l emplacement de r tissoire Utilisez la poign e de r tissoire pour retirer les crochets de r tisso...

Page 9: ...condes 25 35 Poisson 250g secondes 10 15 Poulet canard 220 250 secondes 30 45 Pancakes 16g0 Haut 7 10 B uf 250g secondes 8 15 ufs cacahu te s 125 150 secondes 6 10 Hot dog 200g secondes 6 10 Hamburger...

Page 10: ...ique tel que l essence la poudre abrasive et les solvants Retirez la grille versez le d tergent doux ou le nettoyant de cuisine dans l eau faites tremper la grille dans l eau puis utilisez une ponge d...

Page 11: ...cant Si ce produit s arr te de fonctionner de mani re inattendue teignez puis d branchez imm diatement le produit Cognsultez un professionnel avant toute nouvelle utilisation du produit Afin de pr ven...

Page 12: ...EKTRISCHE OVEN Handleiding Modelnummer IEO 28LCR30 Bedankt voor de aanschaf van deze elektrische oven Lees deze handleiding zorgvuldig en volg de instructies Bewaar deze handleiding voor toekomstig ge...

Page 13: ...en nageleefd Controleer v r gebruik of het keukengerei en de voedingsmiddelen geschikt zijn voor gebruik in ovens De oven moet op een vlakke stabiele ondergrond worden geplaatst Zorg voor voldoende lu...

Page 14: ...stekkers aan op hetzelfde stopcontact Dompel het snoer of de stekker niet onder in water Maak het netsnoer niet nat en gebruik het apparaat niet met natte handen Haal de stekker altijd uit het stopcon...

Page 15: ...at er geen water op de glazen deur komt als deze warm is Dit kan leiden tot het breken van het glas Bij het bereiden van gerechten waarbij olie kan spatten zoals gebraden kip wordt aangeraden om 2 vel...

Page 16: ...alle andere brandbare gassen ver uit de buurt van het operationele apparaat Dit kan leiden tot brand en explosie IDENTIFICATIE ONDERDELEN 1 Verwarmingselement 4 Functieknop 7 Handvat deur 2 Geleiders...

Page 17: ...te selecteren 4 Stel de Functieknop in door de knop met de klok mee te draaien en de geschikte verwarmfunctie te selecteren OFF geeft geen functie aan Temperatuurregeling Functieknop Boven onder verwa...

Page 18: ...eerd wordt achtergelaten Laat de oven afkoelen v r het reinigen Bakplaat en rooster Voedsel Alleen ter Ref Hoe de handgreep te gebruiken Bakplaat Aanbevolen om te gebruiken als kruimelplaat Voor geroo...

Page 19: ...emde gaten en schuif de bakplaat in de oven Gebruik de handgreep voor de draaispies om de draaispies uit de oven te halen LET OP Pas op voor HETE druppende olie Gebruik altijd de handgreep voor de dra...

Page 20: ...Eend 220 250 Tweede 30 45 Pannenkoek 160 Bovenste 7 10 Rundvlees 250 Tweede 8 15 Ei Pinda 125 150 Tweede 6 10 Hot Dog 200 Tweede 6 10 Hamburger 240 Tweede 10 14 De geleiders voor het rooster en de ba...

Page 21: ...nde schoonmaakmiddelen zoals benzine schuurpoeder oplosmiddelen Haal het rooster uit de oven en zet het in een sopje met mild reinigingsmiddel Gebruik een zachte spons voor het reinigen Spoel het roos...

Page 22: ...niet meer werkt schakel het onmiddellijk uit en haal de stekker uit het stopcontact Neem contact op met onderhoudspersoneel voordat u het product opnieuw probeert te gebruiken Om het risico van elektr...

Page 23: ...dellnr IEO 28LCR30 Vielen Dank f r den Kauf dieses elektrischen Ofens Bitte lesen Sie sich diese Anleitung sorgf ltig durch und folgen Sie allen darin enthaltenen Anweisungen Bewahren Sie die Gebrauch...

Page 24: ...herheitshinweise eingehalten werden berpr fen Sie vor jedem Gebrauch bitte ob alle zur Verwendung vorgesehenen Utensilien und Lebensmittel f r den Einsatz in fen geeignet sind Der Ofen muss auf einer...

Page 25: ...em Licht Benutzen Sie das Ger t niemals zusammen mit anderen Ger ten an einer Steckdose Tauchen Sie das Netzkabel oder den Netzstecker nicht in Wasser ein Ber hren Sie das Ger t niemals mit nassen H n...

Page 26: ...darauf beim ffnen und Schlie en der T r keine dieser Teile zu ber hren WARNUNG Verwenden Sie immer die Blechgriff beim Einlegen oder Herausnehmen des Backblechs Direktes Ber hren kann zu schweren Verb...

Page 27: ...vermeiden dass Lebensmittels fte oder Kr mel auf das Heizelement fallen Verwenden Sie keine leicht entz ndlichen Stoffe im Bereich von sich im Betrieb befindlichen Elektroger ten Stellen Sie Druckbeh...

Page 28: ...cker fest in eine geeignete Steckdose 2 Legen Sie Ihre Lebensmittel auf das Gitterrost das Backblech oder die Grillspie e und schlie en Sie danach die Glast r 3 W hlen Sie die zum Kochen ben tigte Tem...

Page 29: ...Ober Unterhitze Umluft Grillfunktion 6 Der Ofen wird automatisch ausgeschaltet sobald die eingestellte Zeit erreicht wird Bitte nehmen Sie die Speisen vorsichtig heraus und genie en Sie sie 7 Ziehen...

Page 30: ...Fisch etc WARNUNG Gehen Sie beim Herausnehmen von hei en Fl ssigkeiten vorsichtig vor Grillfunktion Benutzung mit den Grillspie gabeln Einsetzen der Grillspie gabeln Mit dieser Funktion k nnen Sie ei...

Page 31: ...ht und f r ein besseren Garen sorgt Der Originalgeschmack bleibt dabei wesentlich besser erhalten WARNUNG Gehen Sie beim Herausnehmen von hei en Fl ssigkeiten vorsichtig vor Bei der Inbetriebnahme kan...

Page 32: ...undezweite H henstufe 30 45 Pfannkuchen 160 Oben 7 10 Rindfleisch 250 zweite H henstufe 8 15 Eier Erdn sse 125 150 zweite H henstufe 6 10 Hot Dog 200 zweite H henstufe 6 10 Hacksteak 240 zweite H hens...

Page 33: ...en Sie es in ein mildes Reinigungsmittel und warmes Wasser um Lebensmittelreste einzuweichen Verwenden Sie dann einen weichen Schwamm zur Reinigung Sp len Sie es dann gr ndlich mit klarem Wasser ab un...

Page 34: ...et nicht mehr funktioniert schalten Sie das Produkt umgehen aus Suchen Sie professionellen Rat bevor Sie das Ger t weiter verwenden Um die Gefahr eines elektrischen Schocks zu vermeiden zerlegen Sie d...

Page 35: ...OVEN Instruction Manual Model IEO 28LCR30 Thank you purchasing this electric oven Please read this instruction manual carefully and follow the instructions Please keep this instruction manual for futu...

Page 36: ...at whether the utensils and foods are suitable for use in ovens The oven must be placed on a flat stable surface The oven must have sufficient air flow Allow 30cm of space on the top of oven 10cm at b...

Page 37: ...attended A malfunction could cause a fire while the plug is inserted into the outlet When unplugging the cord always take hold of the plug itself Never pull on the cord Doing so could break the wires...

Page 38: ...ray in order to diminish oil splashing Put one sheet on a tray Then oil will drip to a gap between foils Do not put anything on top close to the heating elements Upper and Lower the food will scorch A...

Page 39: ...imer 8 Indicator Light 3 Temperature Control 6 Glass Door ACCESSORIES Rotisserie Forks Rotisserie Handle Bake Tray Tray Handle Wire Rack BRIEF INSTRUCTION 1 Well inserted the plug to the correct Socke...

Page 40: ...to the number which indicates the cooking time minutes Now the oven is working beware of the HOT surface and DO NOT open the glass door during cooking Upper Heating Convection Function Upper Lower Hea...

Page 41: ...urg steak Gratin Cake almost all other oven cooked foods Wire Rack Baked potatoes Dry food Bake Tray and Wire Rack For food which will drip e g boiled fish etc WARNING Be careful when removing the hot...

Page 42: ...out the Rotisserie Forks Convection Function Featured with a special convection function strong and absolute cycling airflow by making the heating more complete Original flavor can be kept WARNING Be...

Page 43: ...urface tray grid and food fork with soft cotton or sponge with neutral cleaner when cleaning Then wash with clean water Do not use hard brush or any others to wash so as not to scrape the interior sur...

Page 44: ...eating element of the unit Lastly dry the unit with a clean cloth SPECIAL WARNING Caution The temperature of the accessible surface may be high when the appliance is operation WARNING Use only recomme...

Reviews: