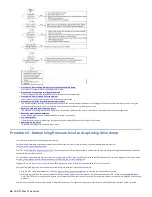
3. Press Unload once per second until appears in the SCD.
To test the SAS interface on the drive,
Index through the Maintenance mode options until appears in the SCD.
Press and hold Unload for 3 seconds to select Function code .
After Function code is selected, the SCD displays option - .
Press Unload within 5 seconds to make a different selection. If no other selection is made, the drive completes option - .
4. Continue to press Unload once per second to cycle through the following functions:
- : test the primary SAS port
- : test the secondary SAS port
2
- : test both primary and secondary SAS ports at the same time (requires a wrap plug in both ports)
2
- : exit
5. Press and hold Unload for 3 or more seconds, then release it to select one of the functions. The drive automatically starts the test. If you cycle past the
wanted code, press Unload once per second until the code reappears.
6. The SCD displays a flashing during the test.
If no error is detected, the diagnostic test loops and begin again. To stop the loop, press Unload for 1 second and release. When the loop ends,
temporarily displays in the SCD, and the tape drive exits Maintenance mode.
If an error is detected, the Fault light flashes and the drive posts an error code to the SCD. To determine the error, locate the code in
Table 1
. To clear
the error either turn the power off and then on again, or reboot the drive by pressing and holding Unload for 10 seconds.
Note:
1
Not supported on the USB port.
2
Not supported on the SAS/USB drive.
Function code 7: Run RS-422 wrap test
Note: This function is described here for information only. It is not supported on the IBM® TS2260, TS2270, or the TS2280 tape drive.
This test causes the drive to process a check of the circuitry and connector for the RS-422 interface. This connector supports the Library Drive Interface (LDI) and
the Automation Drive Interface (ADI).
Before this function is selected, attach an LDI or RS-422 wrap plug to the drive 's LDI or RS-422 connector (in place of the LDI or RS-422 cable).
1. Make sure that no cartridge is in the drive, and the appropriate wrap plug is attached to the RS-422 connector.
2. Place the drive in Maintenance mode. For instructions, see
.
3. Press Unload once per second until appears in the Single-character Display (SCD). If you cycle past , continue to press Unload until the code is
displayed again.
4. To select the function, press and hold Unload for 3 seconds. After you select the function, flashes and the drive automatically starts the test.
If no error is detected, the diagnostic test loops and begin again. To stop the loop, press Unload for 1 second and release. When the loop ends,
temporarily displays in the SCD, and the tape drive exits Maintenance mode.
If an error is detected, the Fault light flashes and the drive posts an error code to the SCD. To determine the error, locate the code in
Table 1
. To clear
the error either turn the power off and then on again, or reboot the drive by pressing and holding Unload for 10 seconds.
Function code 8: Unmake FMR tape
Function code erases the field microcode replacement (FMR) data and rewrites the cartridge memory on the tape. This action converts the cartridge into a valid
scratch (blank) data cartridge.
1. Place the drive in Maintenance mode. For instructions, see
.
2. Press Unload once per second until appears in the SCD. (If you cycle past the wanted code, press Unload once per second until the code reappears.)
3. Press and hold Unload for 3 or more seconds, then release it to select function . The SCD changes to a flashing , requesting a cartridge.
4. Insert the FMR data cartridge (or the tape drive exits Maintenance mode). The SCD changes to a flashing . The tape drive erases the firmware on the tape
and rewrites the header in the cartridge memory to change the cartridge to a valid scratch (blank) data cartridge: The drive then ejects the cartridge and
exits Maintenance mode.
Note: If you inserted an invalid tape cartridge, error code or appears in the SCD. If you inserted a write-protected cartridge, or the media has read-only
compatibility, error code appears in the SCD. In either case, the tape drive unloads the cartridge and exits Maintenance mode after the cartridge is
removed.
If the tape drive creates the scratch tape successfully, it rewinds and unloads the new tape, exits Maintenance mode, and the tape is ready to use.
If the tape drive fails to create the scratch tape, it displays an error code. To determine the error, see
Table 1
. The tape drive then unloads the FMR
tape, and exits Maintenance mode after the cartridge is removed.
Function code 9: Display error code log
Function code displays the last 10 error codes, one at a time (the codes are ordered; the most recent is presented first and the oldest is presented last). If there
are no errors in the log, function code displays in the Single-character Display (SCD) and exits Maintenance mode.
1. Place the drive in Maintenance mode. For instructions, see
.
2. Press Unload once per second until appears in the SCD. (If you cycle past the wanted code, press Unload once per second until the code reappears.)
IBM TS22xx Tape Drives
21
Summary of Contents for TS22 Series
Page 1: ...IBM TS22xx Tape Drives IBM...


