4.
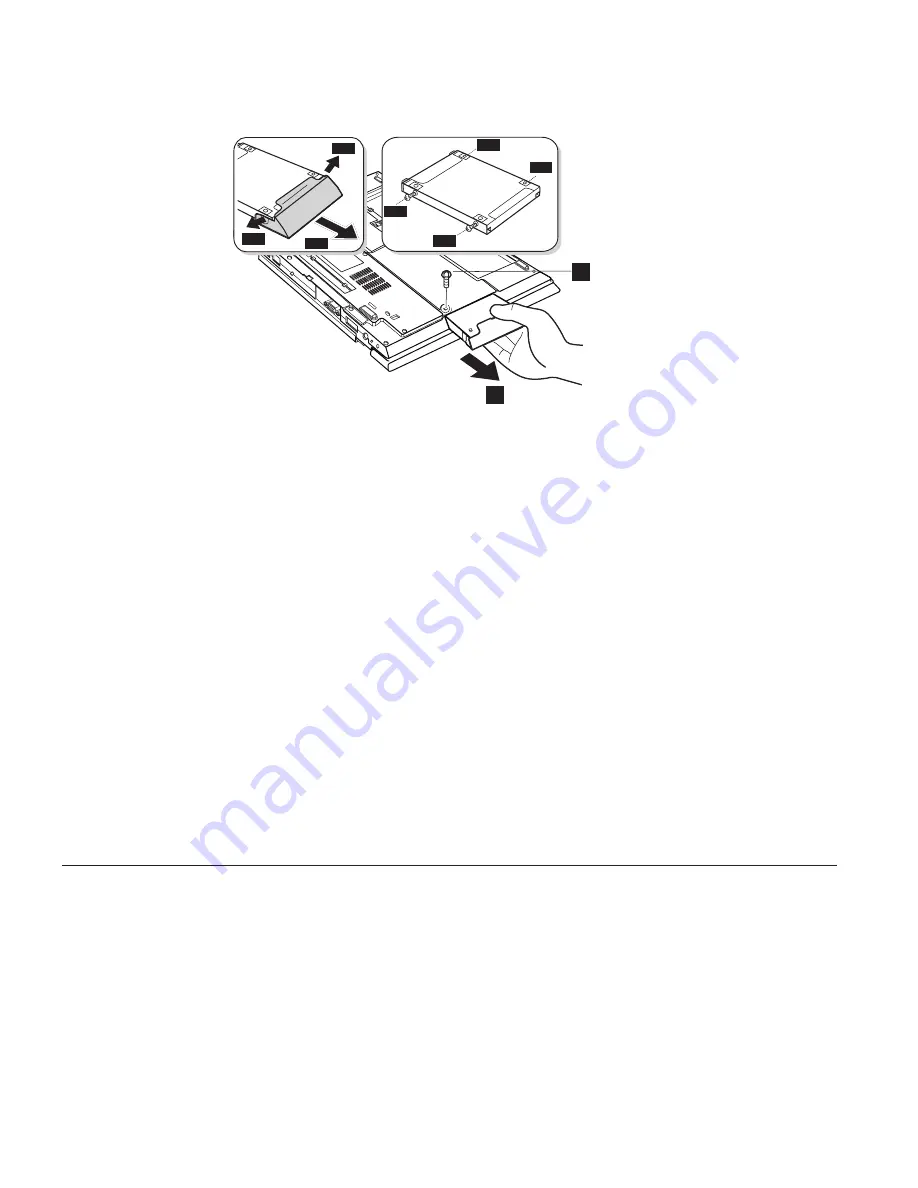
Remove the screw that secures the hard disk drive
(1)
.
2
3-1
3-1
3-1
3-2
3-2
3-2
3-2
1
5.
Remove the hard-disk drive by pulling the cover away from the
computer
(2)
.
6.
Detach the hard disk drive cover
(3–1)
.
7.
Remove the screws and detach the old hard disk drive from the plate
hard disk
(3–2)
.
8.
Replace the new hard disk drive to the plate hard disk and reinstall the
screws.
9.
Attach the cover to the new hard disk drive.
10.
Insert the new hard disk drive and its cover into the hard disk drive bay;
then secure it firmly into place.
Note:
Make sure that the label on the hard disk drive is facing the
bottom of the computer.
11.
Reinstall the screw that secures the hard disk drive.
12.
Reinstall the battery pack.
13.
Turn the computer right side up. Connect the ac adapter and cables to
the computer.
Using the BIOS Setup Utility
Your computer provides a program, called IBM BIOS Setup Utility, that
enables you to configure your computer. The windows in this utility are as
follows:
v
Config:
Set the configuration of your computer.
v
Date/Time:
Set date and time.
v
Password:
Set a password.
v
Startup:
Set the startup device.
8
ThinkPad X22 Service & Troubleshooting Guide


