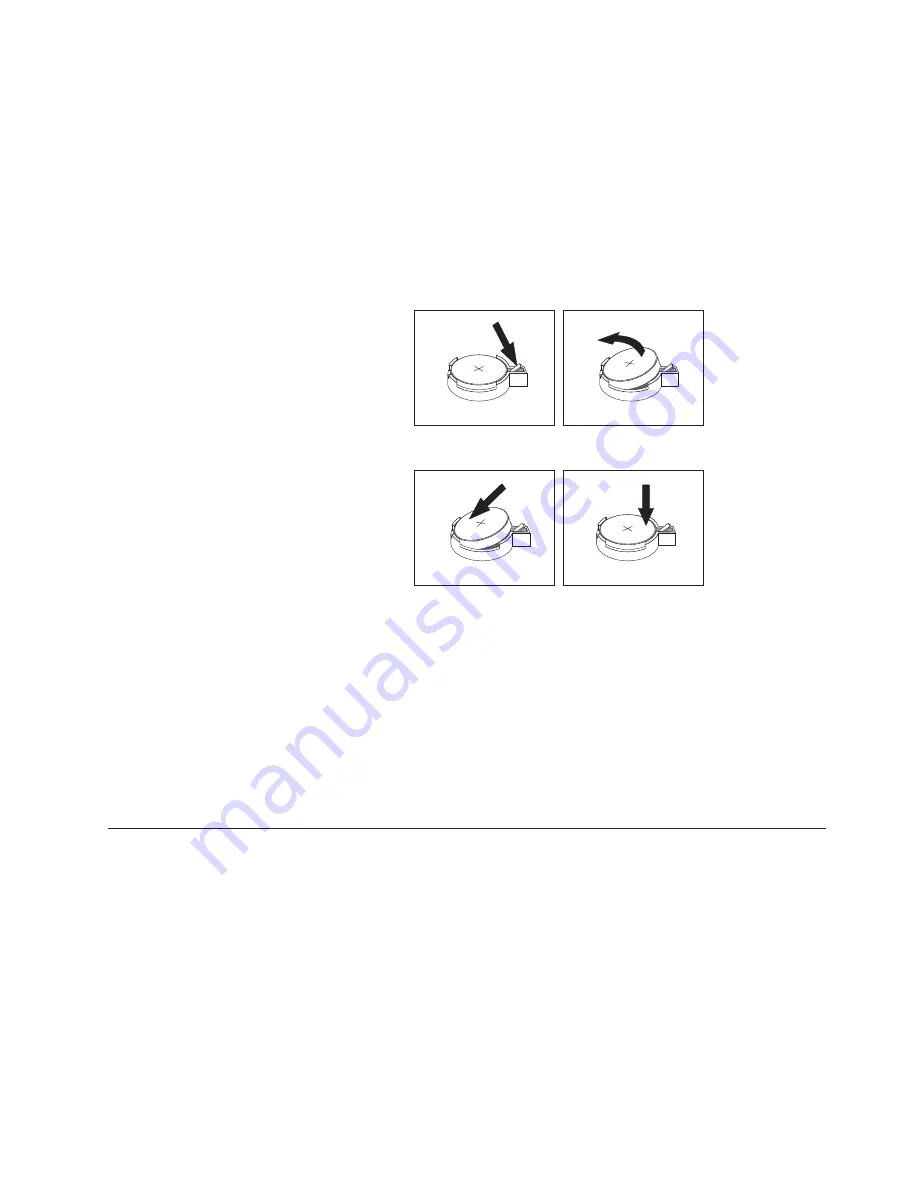
Refer to “Lithium battery notice” on page vi for information about replacing and
disposing of the battery.
To change the battery:
1.
Turn off the computer and all attached devices.
2.
Remove the cover. See “Removing the cover” on page 31.
3.
Locate the battery. See “Identifying parts on the system board” on page 32.
4.
If necessary, remove any adapters that impede access to the battery. See
“Installing adapters” on page 34 for more information.
5.
Remove the old battery.
6.
Install the new battery.
7.
Replace any adapters that were removed to gain access to the battery. See
“Installing adapters” on page 34 for instructions for replacing adapters.
8.
Replace the cover, and plug in the power cord. See “Replacing the cover and
connecting the cables” on page 44.
Note:
When the computer is turned on for the first time after battery
replacement, an error message might be displayed. This is normal after
replacing the battery.
9.
Turn on the computer and all attached devices.
10.
Use the IBM Setup Utility program to set the date and time and any
passwords. See Chapter 5, “Using the IBM Setup Utility program”, on page 93.
Erasing a lost or forgotten password (clearing CMOS)
This section applies to lost or forgotten passwords. For more information about
lost or forgotten passwords, see Access IBM on your desktop.
Note:
Some models have a POV daughter card installed on the system board. In
these models, the password is stored in the EEPROM on the POV card and
cannot be erased. See “Identifying parts on the system board” on page 32 for
the location of the POV card.
To erase a forgotten password:
1.
Turn off the computer and all attached devices.
2.
Remove the cover. See “Removing the cover” on page 31.
Chapter 2. Type 8191
43
Summary of Contents for ThinkCentre A30 8198
Page 1: ...ThinkCentre User Guide Types 2296 8191 8198 8199 8316 8434...
Page 2: ......
Page 3: ...ThinkCentre User Guide Types 2296 8191 8198 8199 8316 8434...
Page 34: ...22 User Guide...
Page 108: ...96 User Guide...
Page 120: ...108 User Guide...
Page 122: ...110 User Guide...
Page 127: ......
Page 128: ...Part Number 74P2399 Printed in U S A 1P P N 74P2399...


