Starting the BIOS Setup Utility program
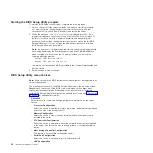
To start the BIOS Setup Utility program, complete the following steps:
1. Turn on the server. If the server is already on when you start this procedure,
you must shut down the operating system, turn off the server, wait a few
seconds until all in-use LEDs are turned off, and restart the server.
2. When the message
Press F2 to enter Setup
is displayed, press F2. (This
prompt is displayed on the screen for only a few seconds. You must press F2
quickly.) If you have set both a power-on password and an administrator
password, you must type the administrator password to access the full BIOS
Setup Utility menu. If you do not type the administrator password, a limited
BIOS Setup Utility menu is available.
Note:
If a serious error is detected during start up, the server will automatically
enter setup and display the Error Manager screen. If the CMOS/NVRAM has
been corrupted, you will not see the F2 prompt, instead, you will see the
following message prompts:
Warning: CMOS checksum invalid
Warning: CMOS time and date not set
Information on clearing the CMOS is provided in the
Problem Determination and
Service Guide
.
3. Select settings to view or change.
BIOS Setup Utility menu choices
Note:
Some options in the BIOS configuration menus might not be supported in all
server configurations.
The following choices are on the BIOS Setup Utility menu at the top of the screen.
Depending on the version of the BIOS code, some menu choices might differ
slightly from these descriptions. Depending on how passwords are configured,
certain BIOS Setup Utility fields might not be editable by all users. See “Passwords”
on page 37 for additional information.
v
Advanced
Select this choice to view and change configuration information for the server
options.
–
Processor Configuration
Select this choice to view the processor information, including the type, speed,
and cache size of the microprocessor.
–
Memory Configuration
Select this choice to view or change information about the memory that is
installed in the server.
–
ATA Controller Configuration
Select this choice to view details about the hard disk drives that are installed
in the server. Use this option also to enable, disable, or configure hard disk
drives.
–
Mass Storage Controller Configuration
This feature is not available on the dx360 server.
–
Serial Port Configuration
Select this choice to set up serial port A and serial port B.
–
USB Configuration
36
IBM iDataPlex dx360 User's Guide
Summary of Contents for System x iDataPlex dx360
Page 1: ...System x iDataPlex dx360 Types 6313 6316 6385 6390 7831 and 7833 User s Guide...
Page 2: ......
Page 3: ...System x iDataPlex dx360 Types 6313 6316 6385 6390 7831 and 7833 User s Guide...
Page 11: ...Statement 10 CAUTION Do not place any object on top of rack mounted devices Safety ix...
Page 12: ...x IBM iDataPlex dx360 User s Guide...
Page 46: ...34 IBM iDataPlex dx360 User s Guide...
Page 54: ...42 IBM iDataPlex dx360 User s Guide...
Page 67: ......
Page 68: ...Part Number 90Y5678 Printed in USA 1P P N 90Y5678...


