


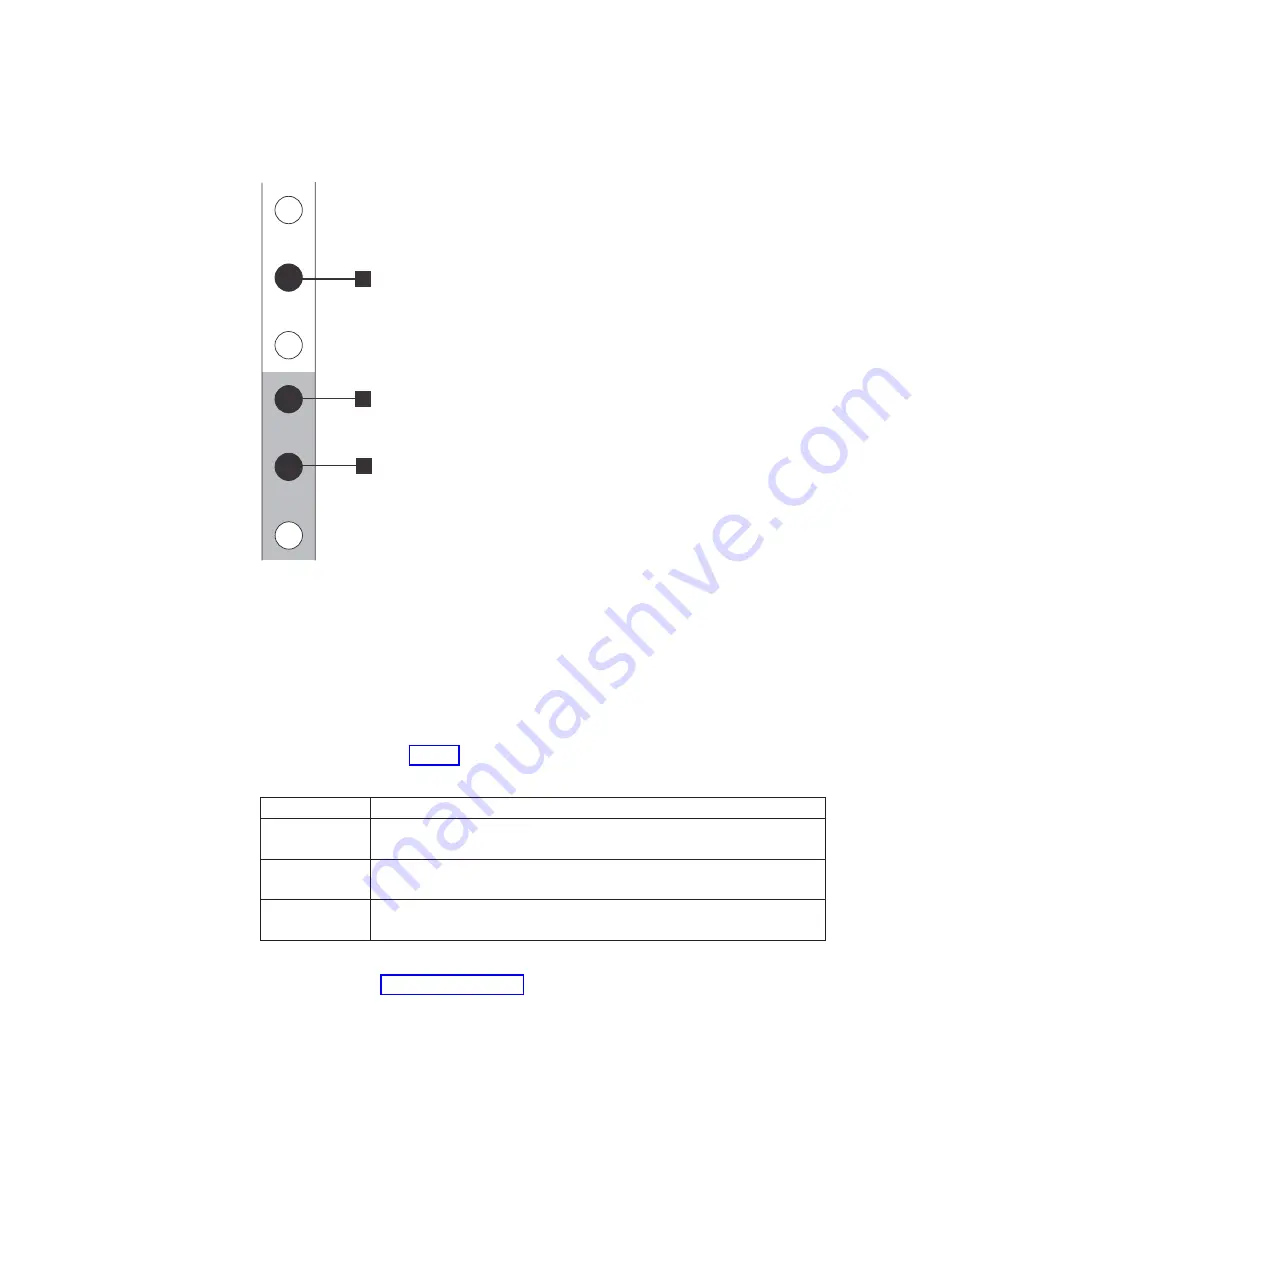
v
1
Upper rail-mounting bracket pin
v
2
Lower rail-mounting bracket pin
v
3
Rack mounting screw hole
4.
Ensure that the appropriate bracket pins are installed in the front and rear
bracket of each rail. Each rail comes with four medium pins preinstalled (two
in the front bracket and two in the rear bracket). Large and small pins are
provided separately. Use the pins that are appropriate for the mounting holes
in your rack (see Table 7).
Table 7. Selecting bracket pins for your rack
Mounting holes Bracket pins
Round,
unthreaded
Use the preinstalled medium pins.
Round, threaded Unscrew the medium pins and replace with the smaller pins supplied
with the rails.
Square
Unscrew the medium pins and replace with the large pins supplied with
the rails.
5.
At each end of the rail, grasp the tab
1
and pull
firmly
to open the hinge
bracket. (See Figure 10 on page 14.)
1
2
3
v3500162
Figure 9. Hole locations in the front of the rack
Chapter 2. Installing the hardware
13
Summary of Contents for Storwize V7000 Gen2
Page 1: ...IBM Storwize V7000 Gen2 Quick Installation Guide GC27 6500 02...
Page 4: ...iv Storwize V7000 Gen2 Quick Installation Guide...
Page 6: ...vi Storwize V7000 Gen2 Quick Installation Guide...
Page 8: ...viii Storwize V7000 Gen2 Quick Installation Guide...
Page 26: ...xxvi Storwize V7000 Gen2 Quick Installation Guide...
Page 62: ...36 Storwize V7000 Gen2 Quick Installation Guide...
Page 64: ...38 Storwize V7000 Gen2 Quick Installation Guide...
Page 72: ...46 Storwize V7000 Gen2 Quick Installation Guide...
Page 75: ......
Page 76: ...Part Number 00RY225 Printed in USA GC27 6500 02 1P P N 00RY225...