Note: Your order information is included with your product. You can also obtain the order
information from your marketing representative or the IBM Business Partner.
If you have incorrect, missing, or damaged parts, consult any of the following resources:
• Your IBM reseller.
• IBM Rochester manufacturing automated information line at 1-800-300-8751 (United States
only).
• The Directory of worldwide contacts website http://www.ibm.com/planetwide. Select your
location to view the service and support contact information.
Determining the location and attaching the mounting hardware to the rack
You might need to determine where to install the system in the rack, and install the mounting hardware.
Use this procedure to complete this task.
About this task
Note: The system requires 4 EIA rack units (4U) of space.
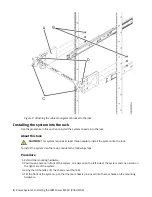
To install the rails into the rack, complete the following steps:
Procedure
1. Locate the left slide rail. The left mounting slide is stamped with an L identifier on the inside front
location.
2. At the front of the rack, position the left slide rail between the left-side front and rear rack flanges.
3. Insert the front slide flange locator studs into the front EIA mounting holes.
4. Insert the rear slide flange locator studs on the slide rail into the rear EIA mounting holes.
5. Position the slam-latch bracket to cover the front EIA space of the slide rail.
Note: Each side of the slam-latch bracket is marked with an L and an R. Ensure that you position the
R side with the right side and the L side with the left side of the rack.
6. Attach the slam-latch bracket to the front rail flange with one M5 X 16 mm screw. Place the screw in
the upper hole of the EIA rack unit.
7. Repeat these steps for the right slide rail.
8. Move to the rear of the rack.
9. Working from the rear of the rack, verify that the locator studs have been installed in the correct holes
of the flanges. Cose the mechanism to hold it into place.
10. Attach the left slide rail and right slide rail with a M5x16mm screw. Insert and tighten each screw into
the threaded slide flange hole, located in the middle hole of the lowest EIA rack unit.
11. If you are installing the system in a non-IBM rack with square holes, install the rail locator studs. To
install the rail locator studs, complete the following steps:
a. Install four longer-length locator studs on the front end of each of the rails.
b. Install four standard-length locator studs on the rear end of each of the rails.
What to do next
Note: When you have finished using the installation tools, store them for future use.
2 Power Systems: Installing the IBM Power E1050 (9043-MRX)
Summary of Contents for Power E1050
Page 1: ...Power Systems Installing the IBM Power E1050 9043 MRX IBM GI11 0003 00...
Page 4: ...iv...
Page 14: ...xiv Power Systems Installing the IBM Power E1050 9043 MRX...
Page 36: ...22 Power Systems Installing the IBM Power E1050 9043 MRX...
Page 47: ......
Page 48: ...IBM Part Number 03KG355 GI11 0003 00 1P P N 03KG355...

