Guidelines for using the drive
To avoid causing data errors or interrupting the formatting or writing process,
observe the following guidelines while the drive is writing to a disc:
v
Do not move the server.
v
Turn off any screen saver on the server.
v
Do not allow the server to go into standby or other power-saving mode.
Attention:
To avoid damaging the drive, observe the following precautions:
v
Operate the drive only on a level surface.
v
Do not insert foreign objects into the drive.
v
Do not remove the drive cover or attempt to service the drive.
v
Do not operate the drive under conditions of high temperature, high humidity,
direct sunlight, excessive dust, excessive vibration, or sudden shock.
Handling discs
To prolong the life of a disc and protect the data that is on it, observe the following
precautions:
v
Store the disc in its original packaging, away from direct sunlight and heat
sources.
v
Handle the disc by its edges or by the center hole.
v
If you must write on a disc, use a soft felt-tip marker, and do not write on the
data surface of the disc.
v
Do not bend the disc.
v
Do not use a cracked disc. Check the disc for cracks before you use it.
v
Remove the disk from the drive when you are not using it.
v
If you must clean the data surface of the disc, use only a soft, lint free cloth and
wipe from the center to the edge. Do not use any cleaning solvents.
Attention:
Wiping a disc in a circular motion might cause data loss.
Using double-sided media
To access both sides of double-sided media, you must remove the disc from the
drive, turn it over, and reinsert it.
Inserting or removing a disc
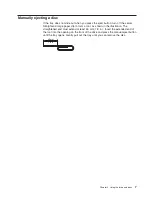
To open the drive tray, make sure that the server is turned on, and press the eject
button.
Attention:
Do not use force or insert foreign objects to open the loading tray.
When you place a disc in the tray, make sure that the label side of the disc is facing
up. Align the center of the disc with the drive spindle; then, gently press down on
the disc until it locks in place. To close the tray, press the eject button or gently
push in on the tray.
6
HH SATA Multi-Burner Optical Disk Drive: User’s Guide
Summary of Contents for HH SATA Multi-Burner
Page 1: ...HH SATA Multi Burner Optical Disk Drive User s Guide...
Page 2: ......
Page 3: ...HH SATA Multi Burner Optical Disk Drive User s Guide...
Page 10: ...Index 23 viii HH SATA Multi Burner Optical Disk Drive User s Guide...
Page 18: ...8 HH SATA Multi Burner Optical Disk Drive User s Guide...
Page 22: ...12 HH SATA Multi Burner Optical Disk Drive User s Guide...
Page 32: ...22 HH SATA Multi Burner Optical Disk Drive User s Guide...
Page 35: ......
Page 36: ...Part Number 60Y1435 Printed in USA 1P P N 60Y1435...


