background image

US-3

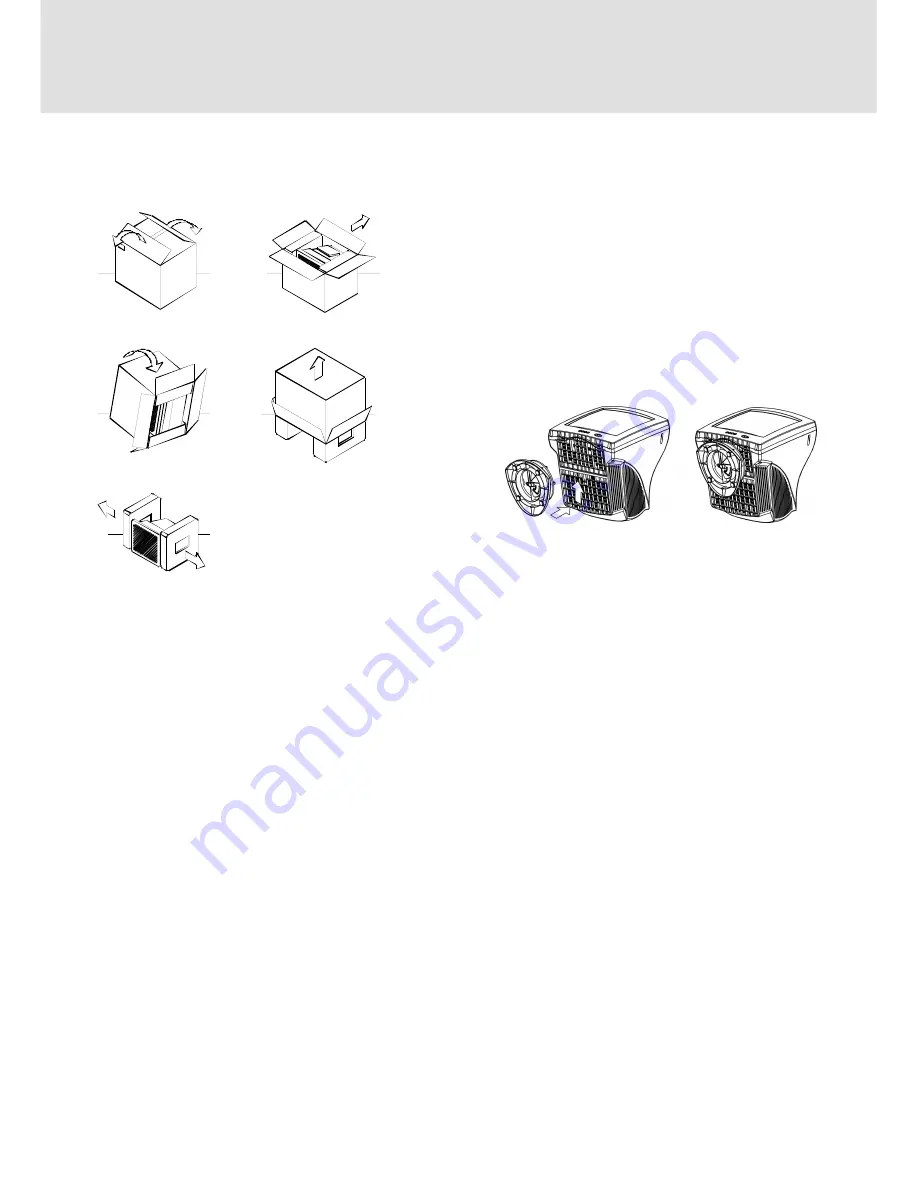
UNPACKING PROCEDURE

REPACKING

Save the original box and all packing material for
future shipping needs.

SETUP

This monitor works with platforms running at
horizontal frequencies between 30 and 69 kHz.

Step 1: Install the monitor

To connect the tilt/swivel base to the monitor, align
hooks with the sockets on bottom side of the
monitor, and gently push the base towards the front
of the monitor.

Put monitor on a flat and stable working bench.

Step 2: Connect your monitor to your

computer

Turn off the monitor and computer before
connecting. Connect the video signal cable to the
video output of your computer

The 15-pin D-shell signal connector on the signal
cable will connect easily to the video adapter
output on your personal computer. Tighten both
screws on the connector to ensure a firm
connection.

Note

Do not touch the pins of the video signal cable
connector as this might bend the pins.

When connecting the video signal cable, check the
alignment of the video input connector. Do not
force the video input connector in the wrong way
or the pins might bend.

À

Á

Â

Ã

Ä

Summary of Contents for E54

Page 1: ...Color Monitor E54 Operating Instructions English ...

Page 2: ...IBM E54 Color Monitor Users Guide 6331 07N 6331 97N 6331 47N 6331 67N ...

Page 3: ... does not infringe any of IBM s intellectual property rights or other legally protectable rights may be used instead of the IBM product program or service Evaluation and verifi cation of operation in conjunction with other products programs or services except those expressly desig nated by IBM are the user s responsibility IBM may have patents or pending patent applications covering subject matter...

Page 4: ...he monitor US 3 Step 2 Connect your monitor to your computer US 3 Step 3 Connect the power cord US 4 Step 4 Turn on the monitor and computer US 4 Workplace Preparation US 4 Using the On Screen Menu US 5 Individal Adjustment US 6 Technical Features US 8 Preset modes US 8 Note for Windows users US 8 Power saving function US 8 Troubleshooting US 8 Self Diagnosis Function US 9 Specifications US 9 Serv...

Page 5: ...a soft cloth If you use a glass cleaning liquid do not use any type of cleaner containing an anti static solution or similar additive as this may scratch the screen s coating Transportation When you transport this monitor for repair or shipment use the original carton and packing materials Use of the Tilt Swivel This monitor can be adjusted within the angles shown below Hold the monitor at the bot...

Page 6: ... AC power to the monitor g Video input cable Inputs RGB video signals 0 700 Vp p positive and sync signals 1 5 15 NOTE This pin is used for self test detection at MONITOR side this pin has to be connected to ground b c e d a Rear f g Pin Function Pin Function 1 Red signal 9 5V from computer 2 Green signal 10 Digital ground 3 Blue signal 11 Ground 4 Ground 12 SDA DDC1 DDC2B 5 NC NOTE 13 Horizontal ...

Page 7: ...g bench Step 2 Connect your monitor to your computer Turn off the monitor and computer before connecting Connect the video signal cable to the video output of your computer The 15 pin D shell signal connector on the signal cable will connect easily to the video adapter output on your personal computer Tighten both screws on the connector to ensure a firm connection Note Do not touch the pins of th...

Page 8: ...ngle to any windows The monitor should be positioned directly in front of you so that you do not have to twist your body Tilt the monitor to a comfortable viewing angle Working Practices Rest Take regular breaks Vary your posture and stand up and stretch occasionally as prolonged use of computer workstations can be tiring Back You should sit back in the chair and use the backrest Hands Use a light...

Page 9: ... The item presently being adjusted is shown 2 CONTRAST BRIGHTNESS H SIZE H POSITION V SIZE V POSITION PINCUSHION TRAPEZOID ROTATION COLOR LANGUAGE DISP FREQ DEGAUSS RECALL H MOIRE V MOIRE 1 Name of adjustment screen The adjustment level is shown by both a number and a bar It can be varied with the front buttons When the button is pressed the horizontal size adjustment screen appears Adjustment ico...

Page 10: ...to move it to the right Press the key toggles between HORIZONTAL SIZE and HORIZONTAL POSITION 2 2 2 VERTICAL SIZE adjustment Fills the viewable area vertically Press the button to make the image smaller or press the button to make it larger Press the key toggles between VERTICAL SIZE and VERTICAL POSITION VERTICAL POSITION adjustment Shifts the image on the screen vertically Press the button to mo...

Page 11: ... the button to select 1 9300O K 2 6500O K or 3 User color 2 If the 3 the user s color is selected 2 appears in the lower right of the On Screen Menu Press the button to display the USER COLOR adjustment screen USER COLOR The white of the video image can be adjusted to the user s preferred color 1 Use the button to select R red G green or B blue 2 Use the button to adjust the color as desired IMPOR...

Page 12: ...by the control signal from the display controller as indicated by the amber color power LED The power saving states will be kept until a control signal has been detected or the keyboard or mouse is activated The recovery time from Active OFF state back to ON state is around 10 seconds State Power Consumption LED Light ON Normal Green Active OFF 5 W Amber Problem Check Adjust Blank screen Monitor p...

Page 13: ...le Scre e n Size 15 in visual diagonal Viewa ble screen size 13 7 5 in Anti Glare Anti Reflective Coating Dot Pitch 0 28 mm d iagona l 0 24 mm horizo ntal Display Are a De fault Full Scan H x W 262 x 1 96 mm 10 31 x 7 7 2 in typ ical 282 x 2 11 mm 11 1 x 8 3 1 in depends on signal timing Display Colors Infinite M ax Re solution 1280 Dots x 1024 Lines Compatibility Graphic modes with horizontal fre...

Page 14: ...4V AC 50 60 Hz Curre nt Rating 1 5 A Power Consumption 75 W MAX Dimens ion W x H x D 370 x 387 x 390 mm 14 6 x 15 2 x 15 4 in Weight 12 kg Operating Te mperature 5 C to 40 C 41 F to 104 F Storage Te mperature 40 C to 65 C 40 F to 149 F Humidity 20 to 80 non condensing Altitude Up to 10000ft ...

Page 15: ... only Monitor Information PART NUMBER DESCRIPTION M T MODEL COLOR 22P7922 E54 Monitor MPR II NH 6331 07N Pearl White 22P7923 E54 Monitor TCO 99 NH 6331 97N Pearl White 22P7924 E54 Monitor MPR II NH 6331 47N Stealth Black 22P7925 E54 Monitor TCO 95 NH 6331 67N Stealth Black 22P7926 E54 FRU Tilt Swivel Pearl White 22P7927 E54 FRU Tilt Swivel Stealth Black ...

Reviews: