Attention:
v
To ensure proper cooling and airflow, install a ServeRAID adapter that has a
battery attached in slot 2 on the riser-card assembly.
v
When you install an adapter, make sure that the adapter is correctly seated
in the riser-card assembly and that the riser-card assembly is securely
seated in the riser-card connector on the system board before you turn on
the server. An incorrectly seated adapter might cause damage to the system
board, the riser-card assembly, or the adapter.
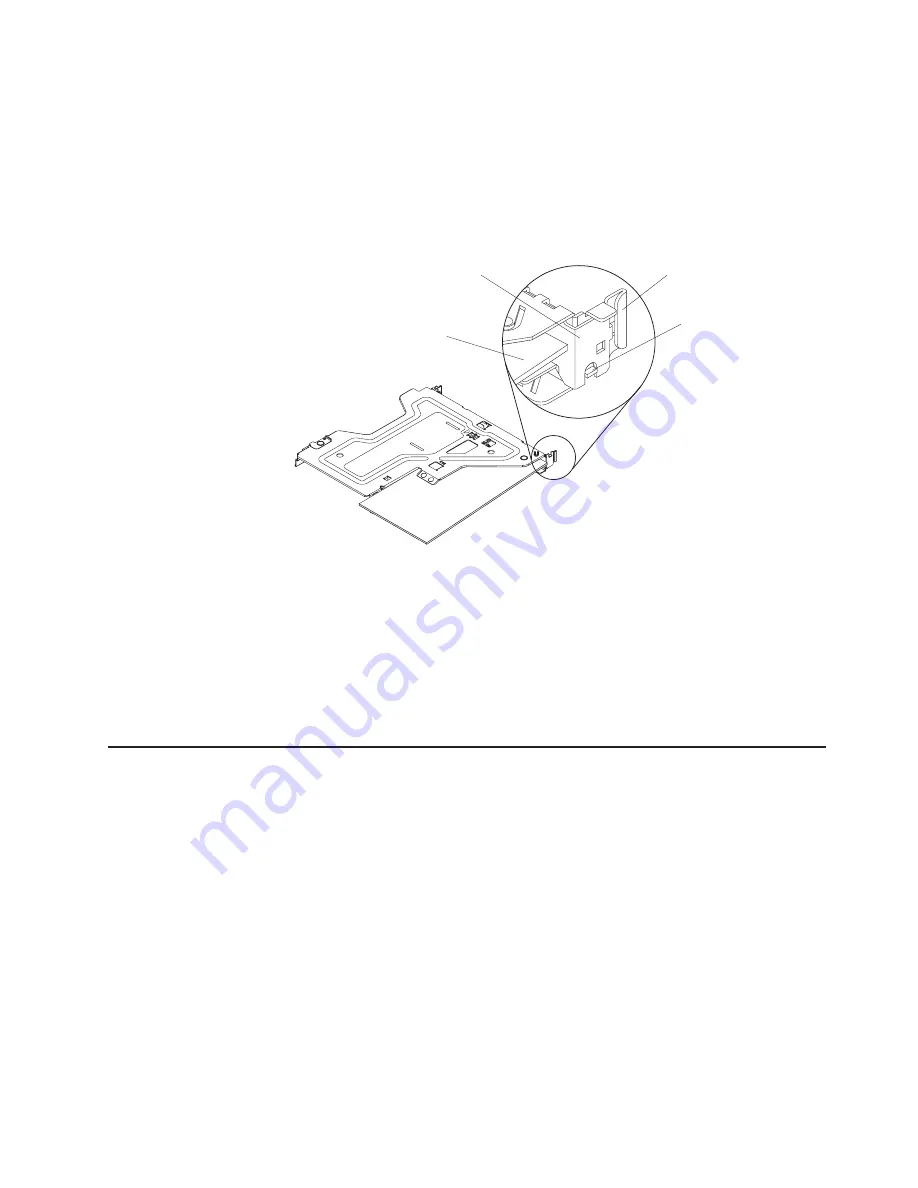
Adapter
Adapter
bracket
Expansion-slot
bracket
Tab
Important:
Make sure that the U-shaped opening in the metal adapter bracket
engages the tab on the expansion-slot bracket.
9. Reinstall the riser-card assembly in the server (see “Replacing a PCI riser-card
assembly” on page 41).
10. If you have installed an optional PCI-X riser-card assembly in the server,
reconnect the riser-card power cable to the riser-card assembly.
If you have other devices to install or remove, do so now. Otherwise, go to
“Completing the installation” on page 54.
Replacing an IBM ServeRAID-BR10il SAS/SATA Controller v2
Some server models come with an IBM ServeRAID-BR10il SAS/SATA Controller v2
installed. The adapter can be installed only in the dedicated slot on the system
board (see “System-board optional-device connectors” on page 26 for the location
of the connector). The IBM ServeRAID-BR10il v2 SAS/SATA adapter enables
integrated RAID levels 0, 1, and 1E capability on hard disk drives. For configuration
information, see the ServeRAID documentation at http://www.ibm.com/systems/
support/. To install the adapter if your server model did not come with this adapter,
complete the following steps to install an IBM ServeRAID-BR10il v2 SAS/SATA
adapter.
Important:
To ensure that any of your ServeRAID adapters function properly on
UEFI-based servers, make sure that the adapter firmware level and supporting
device drivers are updated to at least 11.x.x-XXX.
Attention:
Some cluster solutions require specific code levels or coordinated code
updates. If the device is part of a cluster solution, verify that the latest level of code
is supported for the cluster solution before you update the code.
Chapter 2. Installing optional devices
45
Summary of Contents for 425162U
Page 1: ...IBM System x3250 M3 Types 4251 4252 and 4261 Installation and User s Guide...
Page 2: ......
Page 3: ...IBM System x3250 M3 Types 4251 4252 and 4261 Installation and User s Guide...
Page 7: ...Index 85 Contents v...
Page 8: ...vi IBM System x3250 M3 Types 4251 4252 and 4261 Installation and User s Guide...
Page 34: ...18 IBM System x3250 M3 Types 4251 4252 and 4261 Installation and User s Guide...
Page 100: ...84 IBM System x3250 M3 Types 4251 4252 and 4261 Installation and User s Guide...
Page 105: ......
Page 106: ...Part Number 81Y6118 Printed in USA 1P P N 81Y6118...


