


23
Install memory, firmware, or option cards
Installing a hard disk
Follow the instructions in this section to install an optional hard disk. You need a small
Phillips screwdriver to attach the hard disk to the mounting plate.
Warning:
Hard disks are easily
damaged by static electricity. Touch
something metal on the printer before
you touch a disk.
If an option card has been installed, you may need to remove it before installing the hard
disk.
1
Remove the system board access cover (see page 20).
2
Remove the mounting plate, hard disk, ribbon cable, and attachment screws
from the package.
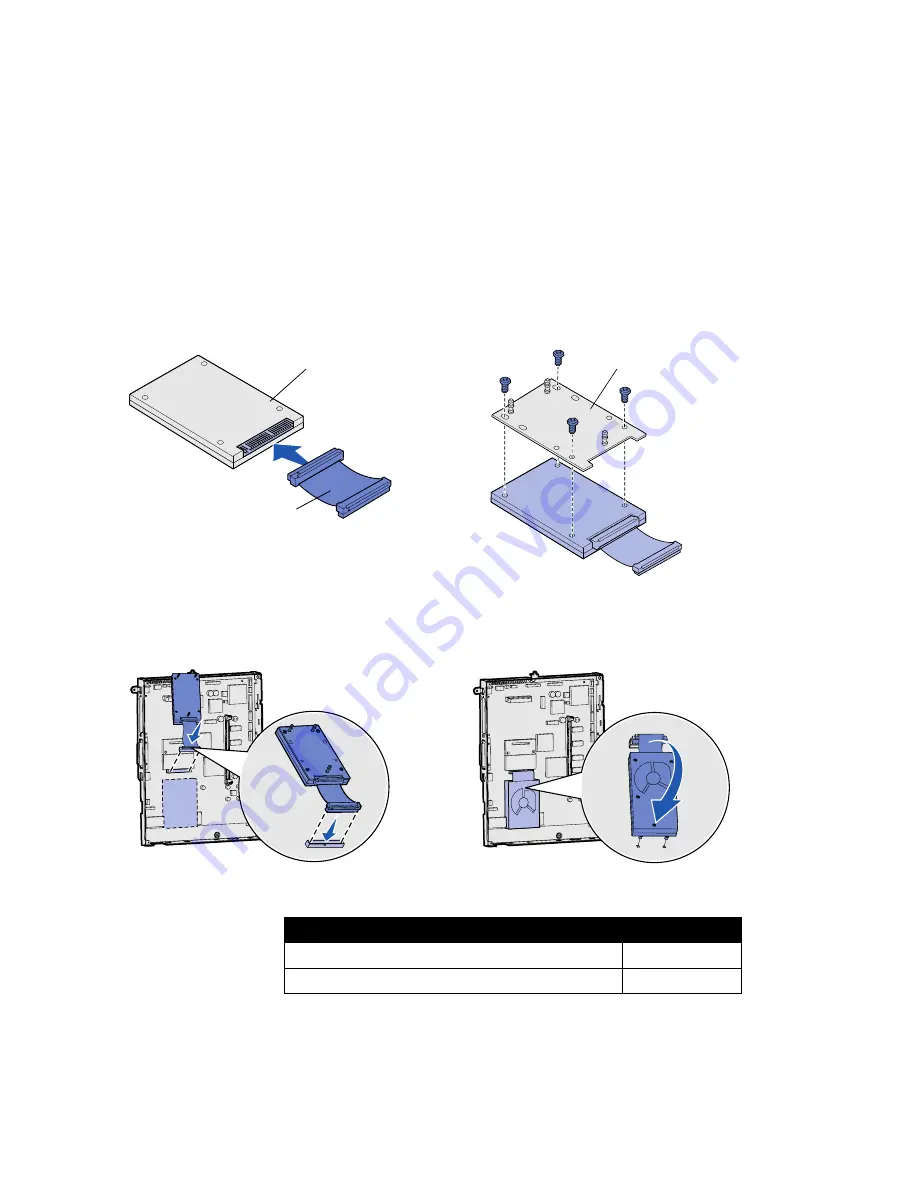
3
Align the ribbon cable connector with the connector pins on the hard disk.
4
Attach the ribbon cable to the hard disk.
5
Align the screw holes on the mounting plate with the holes in the hard disk.
6
Secure the mounting plate to the hard disk with the screws.
7
Press the ribbon cable connector into the connector on the system board.
8
Flip the hard disk over, and then press the three posts on the mounting plate into
the holes on the system board. The hard disk snaps into place.
Hard disk
Ribbon cable
Mounting plate
What do I do now?
Task
Go to page…
Installing an option card
24
Replacing the system board access cover
25
Summary of Contents for 1454
Page 1: ...Infoprint Color 1454 1464 Setup Guide S510 4059 00 ...
Page 2: ......
Page 3: ...Infoprint Color 1454 1464 Setup Guide S510 4059 00 ...
Page 6: ...6 Contents Step 12 Other sources of information 38 Viewing and using the publications CD 38 ...
Page 40: ......
Page 43: ......
Page 44: ... Part Number 75P6542 Printed in USA S510 4059 00 1P P N 75P6542 ...


