background image

©Copyright Lotronic 2009 

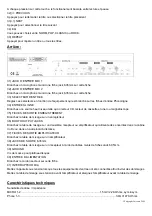
Rear Panel


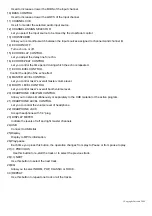
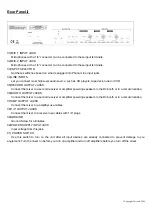
31)MIC 1 INPUT JACK 

      Microphones with a 1/4” connector can be connected to these input terminals.


32)MIC 2 INPUT JACK 

      Microphones with a 1/4” connector can be connected to these input terminals.


33)

INPUT SELECTOR 

      Set these swithches based on what is plugged into Phono/ Line input jacks.


34)

LINE INPUTS 

      Let you connect most high-level audio source, such as CD players, tape deck, tuner or VCR.


35)

RECORD OUTPUT JACKS 

      Connect the mixer to a second receiver or amplifier powering speakers in the DJ booth or in a remote location. 

36)

BOOTH OUTPUT JACKS 

      Connect the mixer to a second receiver or amplifier powering speakers in the DJ booth or in a remote location.


37)

AMP OUTPUT JACKS   

      Connect the mixer to a amplifier use cables.


38)

1/4” OUTPUT JACKS   

      Connect the mixer to a receiver use cables with 1/4” plugs.


39)

GROUND 

      Ground Screw for turntables.


40)

POWER SUPPLY INPUT JACK 

      Input voltage from this jack.


41)

 POWER SWITCH 

   Use this switch to turn on the unit after all input devices are already connected to prevent damage to you 

equipment. Turn the mixer on before you turn on amplifier and turn off amplifiers before you turn off the mixer.


Summary of Contents for DJM103USB

Page 1: ...Copyright Lotronic 2009 USER GUIDE DJM103USB INSTRUCTIONS...

Page 2: ...Copyright Lotronic 2009 GB...

Page 3: ...C plug sheet and all of exposed metal parts with ohmmeter before using and resistance ought to be more than 100K ohm 14 Stop period Unplug the power cord if the unit is not used for a long time 15 Pre...

Page 4: ...1 MIC TREBLE This knob adjusts the high tone of the microphone 2 MIC BASS This knob adjusts the bass tone of the microphone 3 MIC 1 LEVEL CONTROL Let you control the MIC 1 level as they enter the mix...

Page 5: ...VEL CONTROL Let you control mixer s overall master volume level 19 BOOTH LEVEL CONTROL Let you control mixer s overall booth volume level 20 HEADPHONE CUE PGM CONTROL Allow you to listen simultaneousl...

Page 6: ...ver or amplifier powering speakers in the DJ booth or in a remote location 36 BOOTH OUTPUT JACKS Connect the mixer to a second receiver or amplifier powering speakers in the DJ booth or in a remote lo...

Page 7: ...esponse 20Hz 20kHz 1 dB S N Ratio at 1 kHz MIC 65 dB 1 5mV input Phono 60 dB 3 0mV input Line 70 dB 150mV input Distortion MIC 0 3 Phono 0 5 Line 0 1 MIC Tone Control Treble 10kHz 12 12dB MID 1kHz 12...

Page 8: ...objet rempli de liquide sur l appareil Brancher l appareil sur une prise secteur mise la terre Avertissements Toute utilisation manipulation ou modification autre que celles sp cifi es dans ce manuel...

Page 9: ...peut pas tre pinc ou cras notamment proximit de la sortie du cordon de l appareil ou pr s de la prise secteur 13 D branchez l appareil du secteur avant de le nettoyer 14 Utilisez uniquement un chiffo...

Page 10: ...2 COMMUTATEUR D AFFECTATION DU CANAL S lectionnez la source d entr e qui sera mix e par le crossfader 13 CROSSFADER Vous permet de basculer entre les sources d entr e assign es au canal A et B 14 ECHO...

Page 11: ...ttes tuner ou magn toscope 35 FICHES DE SORTIE ENREGISTREMENT Branchez la table de mixage sur un enregistreur 36 BOOTH OUTPUT JACKS Branchez la table de mixage sur un deuxi me r cepteur ou amplificate...

Page 12: ...C230V 50Hz Puissance consomm e 20W Sicherheitshinweise Bitte lesen Sie diese Anleitung sorgf ltig vor der Inbetriebnahme durch Anleitung f r sp tere Bezugnahme aufbewahren Alle Warnhinweise auf dem Ge...

Page 13: ...rgf ltig vor der Inbetriebnahme durch Anleitung f r sp tere Bezugnahme aufbewahren 2 Alle Warnhinweise auf dem Ger t und in der Anleitung genau befolgen 3 Behandeln Sie die Netzschnur mit Sorgfalt und...

Page 14: ...IZIERTEM FACHPERSONAL AUSGEF HRT WERDEN Nach Abschluss der Wartungs und Reparaturarbeiten lassen Sie alle Routine berpr fungen durchf hren um die Sicherheit des Ger ts zu gew hrleisten DRAUFSICHT 1 MI...

Page 15: ...ngs 19 BOOTH PEGELREGLER Regelt die Lautst rke des BOOTH Ausgangs 20 CUE PGM REGLER DES KOPFH RERS Sie k nnen gleichzeitig oder getrennt das CUE Material oder das aktive Programm h ren 21 KOPFH RER PE...

Page 16: ...ERST RKER Zum Anschuss des Mischpults an einen Verst rker 38 6 35mm AUSGANGSKLINKENBUCHSE Das Mischpult ber ein 6 35mm Klinkenkabel an einen Empf nger anschlie en 39 GROUND Masseschraube f r Plattensp...

Page 17: ...N ALLE REPARATIES MOETEN DOOR EEN GEKWALIFICEERDE TECHNIEKER UITGEVOERD WORDEN De bliksem in de driehoek richt de gebruiksaandacht op de aanwezigheid van gevaarlijke spanningen die niet binnenin het p...

Page 18: ...fel aanbevolen door de verkoper van dit apparaat 8 Indien het apparaat op een steun ge nstalleerd wordt verplaats hem voorzichtig Plotse stoppingen overdreven kracht en onregelmatige oppervlakten kunn...

Page 19: ...NIVEAU Controleert het volumeniveau van het kanaal 8 CONTROLE VAN DE SCHERPE TONEN Verhoogt of verlaagt het niveau van de scherpe tonen van het ingangskanaal 9 CONTROLE VAN DE MEDIAS Verhoogt of verla...

Page 20: ...lt het volume van de koptelefoon 22 KOPTELEFOON FICHE Aanvaardt een koptelefoon voorzien van een 6 35mm Jack 23 VUMETER Geeft het niveau van de linker en rechter MASTER kanalen weer 24 USB Sluit een U...

Page 21: ...avoeding voor platendraaiers 40 INGANGSVOEDING Sluit de stekker aan op deze fiche 41 A U SCHAKELAAR Plaats het toestel onder spanning wanneer alle ingangsuitrustingen aangesloten werden teneinde schad...

Page 22: ...rebut avec les ordures m nag res Veuillez les faire recycler l o il existe des centres pour cela Consultez les autorit s locales ou votre revendeur sur la fa on de les recycler WICHTIGER HINWEIS Elek...

Reviews: