


24
25
Main Functions:
● 9.7” HD TFT touch screen, 1024 x 768 pixel resolution
● Camera: front: 2 mega pixel, back: 2 mega pixel
● Supporting HDMI, 2160P, 3D video (full-digital HD multimedia interface) output, make the HD TV
show a theater effect.
● Supports OTG function and USB stick, portable OTG hard disc to transfer data. (Whilst connecting
to the portable hard disc, DC power must be connected to the product‘s power supply, otherwise
the tablet PC will crash due to insufficient power supply)
● Multiple network access to the Internet. As WI-FI is supported, you can enjoy the Internet any-
where, at anytime.
● With the Gravity sensor (G-sensor), in addition to being able to switch the screen horizontally and
vertically, you can also install various software to improve this function, such as flicking through
text, changing songs, fun games, etc
● With the Google Android intelligent operating system, you can create your own personalized space
with APKs
● Supporting APK installation and application, existing software can be downloaded and installed from
the Play Store or Internet to your MID or PC
● With this product, you can easily conduct business and also be entertained through existing
applications, such as E-Mail, Word, website browsing, the news, instant messaging, financial activity,
blogs, online games, online videos, the stock market, weather reports, mobile TV, maps, general
“fun” software, etc
● Supports MP3, M4A, WMA, APE, FLAC, AAC, MID, WAV, AMR, OGG, etc
● Supports full HD video decoding (2160P, 1080P, 720P, 480P); video formats: MKV, AVI, RM/RMVB,
WMV, 3GP, MOV, MP4, ASF, MPG, DAT, VOB, FLV, etc
● Supports JPG, JPEG, BMP, PNG, etc, and formats image browsing.
● Supports Micro SD/SDHC (TF) Card, with a capacity of up to 32 GB.
● Personalized settings ‒ freely adjustable brightness, key tone on or off, changing wallpaper and so on
● Multilingual
● More functions could be added by updating Firmware
Appearance and Buttons
Front:
Definition:
1. M: Press Menu button to open the current screen menu. The Function is the same as other screen
functions
.
2. V+: Volume up
3. V-: Volume down
4.
: Power Button, hold down this button to turn the device on or off, or simply press this button to
lock screen in order to avoid any errors.
5. Earphone jack
6. “Home”: Home key, hold down this button shortly to return to the previous step or user screen;
press this button to return to the main menu from any screen.
7. Micro Sd/SDHC (TF) card slot
8. MIC jack
9. HDMI jack
10. OTG jack
11. USB jack
12. DC charge jack
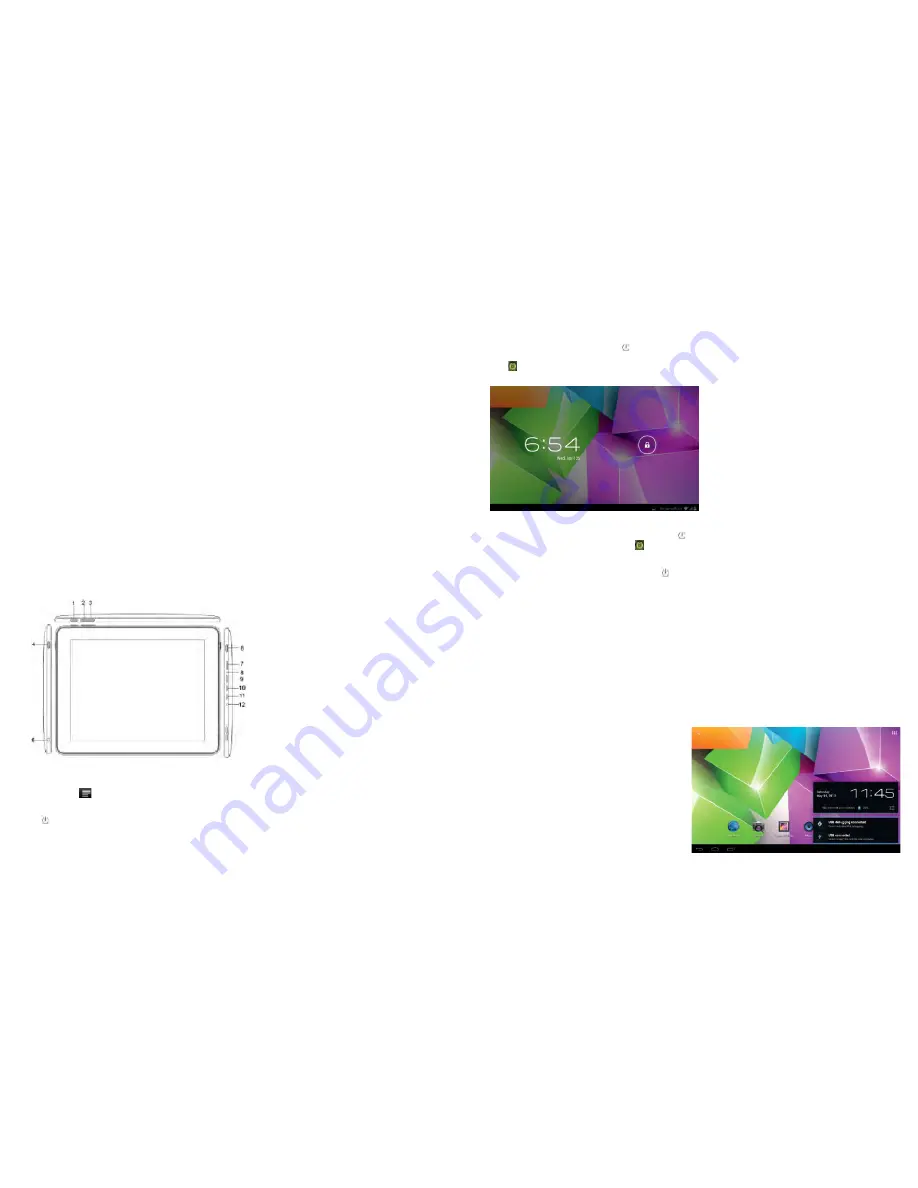
1. Quick Start
1-1 Power On/Off and unlock
When the power is off, hold down for three seconds to turn the power on. It will take a little time
to turn on, please be patient. It will take about 100 seconds to enter the system, drag the unlock
icon to the camera icon on the left to take a photo, and to the unlocking icon on the right to un-
lock, see below:
Energy-saving and locking mode:
When the machine is not being used, the system will automa-
tically enter into the energy-saving mode. Press to awaken the screen, the system will then be
ready to unlock in one second, touch to unlock.
Notes:
In energy saving mode, the system will still be turned on, only the LCD screen will be off,
showing a black screen. Music or video will continue to play.
Power Off:
Whilst using the product, press for 5 seconds, the screen will give a “power off”
option. Select this “Power off” option, confirm your choice and the system will then automatically
turn off. Select “Cancel” to cancel the machine powering off.
Notes:
When at low power, a warning will be given; at this point, connect the DC adapter and begin
to charge, it will then automatically turn off. If the product cannot boot, please check the battery.
1-2 Battery and Charge
The battery should be charged for 8 to 12 hours for the first time, in order to make sure the battery
has enough power.
Please use the provided charger. Now that the device is being charged, the battery icon will show
that the device is charging. Please do not disconnect the charger until the device is fully charged. The
battery icon will show when it is fully charged.
Please note the following precautions for protecting the lithium battery:
a. Don’t charge in or under a high temperature (for example, under direct sunlight).
b. The lithium battery does not need to be completely empty before the user can charge it.
c. While charging, it is normal that both the charger and the device will heat up.
1-3 Computer Connection & File Transfer
Upon connection of the product to the computer
with a USB cable, the status bar will show that
the USB has connected. The product’s default is
set for a USB connection. If you are connecting
an external mobile hard disc, “USB connected”
needs to be showing on the status bar. Click the
option to enable the USB status to be altered,
with reference to the icon on the bottom right,
“Open USB storage equipment”, switch this into
the USB storage status. Now, the user can access
the external hard disc. On USB storage, click
the icon again to disconnect USB and recover to
charge mode. The USB storage mode system will
limit the user‘s access to the local disc applica-
tion. By disconnecting USB storage mode, the
system will go back to the normal status, as seen
in the following image:


