


Hardware User’s Guide
Installation
11
Step Five: Secure the unit to the desk or table
1. The following items are required to secure the client to the desk.
•
Equipment to drill holes (
of 8mm. diameter
) through your desktop or tabletop.
•
Two pan-head, metric-thread screws (
diameter=6 mm., length=T+14 mm., where T is the
thickness of the surface of your desktop or table. E.g. if your desktop is 20mm thick, the screws
should be 20+14=34mm. long
).
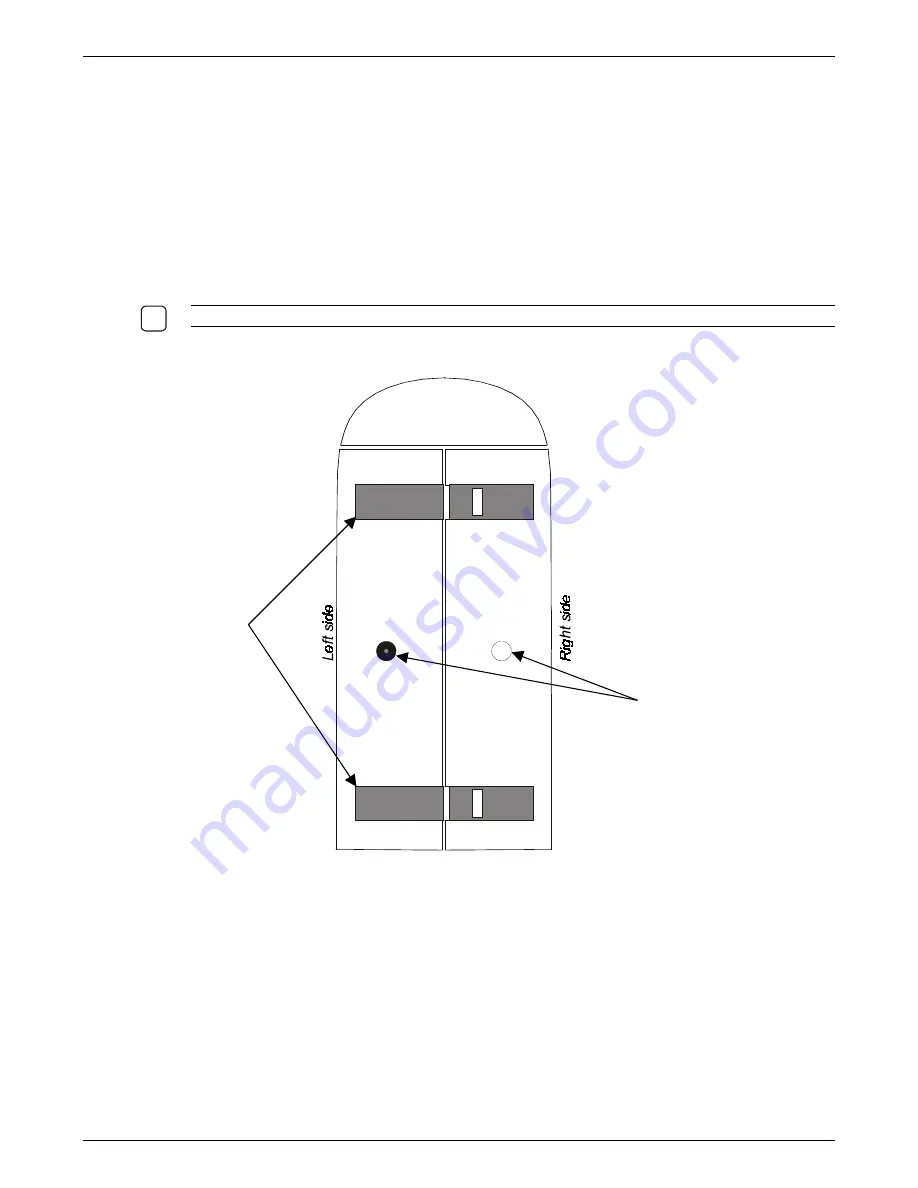
2. The base (
see Figure 7
) of the product has two tapped-holes for securing the unit. One of the holes
has a Nylon plug to lock the metal plate inside the unit. Lift the unit, hold it upright, pull out the Nylon
plug using a flat-head screwdriver and place the unit upright on a flat surface.
N
OTE
: P
LEASE RETAIN THE
N
YLON PLUG
;
IT WOULD BE REQUIRED IF YOU WANT TO MOVE THE UNIT
.
Figure 7: View of the base of Winlinx / Netica
3. Select the area on your table where you want to place the client.
4. Mark two points 44 mm. apart on the table, such that a line joining the two points would be
perpendicular to the sides of the product when it is placed on the table.
5. At each of the two marked points, drill a hole of 8mm. diameter through the surface of your table.
6. Place the product such that the holes on the base of the client are aligned with the holes on the
table. Insert the two M6 screws through the aligned holes from beneath the desktop and fasten them
until the unit is secure.
Front
Rubber pads
Holes for securing the
Thin Client to the desk
(
the hole on the left side
has the nylon plug
)
Rear
9
Summary of Contents for I-O TC4000 Series
Page 1: ...1 Hardware User s Guide...


