Summary of Contents for HYTR60Li
Page 1: ...60V BATTERY POWERED GRASS TRIMMER HYTR60Li User Manual...
Page 34: ...34...
Page 35: ...35...
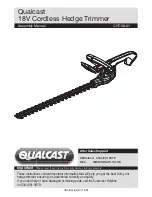
The Hyundai HYTR60Li is a powerful and efficient cordless hedge trimmer perfect for keeping your garden in top shape. Ensure you get the most out of your device by downloading the user manual for free from manualshive.com. Get all the information you need to maintain and operate your trimmer effortlessly.
Page 1: ...60V BATTERY POWERED GRASS TRIMMER HYTR60Li User Manual...
Page 34: ...34...
Page 35: ...35...