14
Operation
System Setup
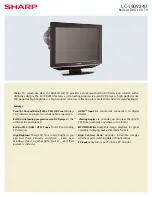
SYSTEM SETUP
TV SYSTEM
SOURCE
TV TYPE
PASSWORD
RATING
DEFAULT
EXIT SETUP
• SOURCE
In this menu you can select storage for
playback Disc/USB/Card/Auto.
• TV SYSTEM
This menu enables you to set the picture
format for your TV/DVD between NTSC/PAL/
AUTO according to your request and local TV
system.
• TV TYPE
This menu enables you to select one of the
three aspect ratios: 4:3 PS/4:3LB/16:9.
4:3PS (Normal): Normal Pan and Scan is
used for most normal television broadcasts and
it is the default setting. It has an aspect ratio
of 4:3. If you select this setting when viewing a
DVD, the picture will fill the screen but you will
not see the left and right edges of the picture.
4:3LB (Normal): Normal Letter Box will
show the DVD in its original aspect ratio .So
depending on size of your television screen,
you could see black boards above and below
the picture.
16:9 (Wide): Choose this setting if you have
a widescreen television.
Playback screen size may vary
according to disc contents. For discs with 4:3
contents, using any mode would only display
4:3 screen. Screen ratio selection should be
according to the connected TV or display
aspect ratio.
• PASSWORD
The default setting is locked. No rating
selection or change password could be done.
To edit the Rating setting please enter default
password “0000” by number buttons, then
press OK button to confirm.
To change password you could input any 4
digit number when the lock is unlocked. Once
the 4 digit number is entered, that will be new
password.
• RATING
Playback for some discs with rating. You
could select the rating setting according to your
preference. Rating restriction divided in eight
different category from KID SAFE to ADULT.
• DEFAULT SETTING
Press OK button to restore factory default.
Language Setup
LANGUAGE SETUP
OSD LANGUAGE
AUDIO LANG
SUBTITLE LANG
MENU LANG
EXIT SETUP
You can choose the suitable language as
displayed menu on the screen.
Audio Setup
AUDIO SETUP
AUDIO OUT
TONE
EXIT SETUP
AUDIO OUTPUT
Summary of Contents for H-LEDVD22V2
Page 1: ...DVD LED TV WITH BUILT IN DVD PLAYER Instruction manual H LEDVD24V2...
Page 20: ...20 KPA 060F...
Page 21: ...21 20 50 10 4 4 100...
Page 22: ...22 75 300 75 DVD VDCR CAMCORDER PC L R RCA SCART SCART VGA Y Pb Pr HDMI HDMI 75...
Page 26: ...26 VGA OSD MENU OK OSD MENU EXIT NTSC 16 9 4 3 PC...
Page 27: ...27 1 1 MENU 1 2 TV VGA DVD DVD DVD...
Page 28: ...28 DVD EJECT 1 MENU DVD 2 OK 3 EJECT DVD DVD TITLE AVI AVI 2 16 PROGRAM OK PROGRAM OK...
Page 32: ...32 8 OK SPDIF SPDIF RAW SPDIF PCM...
Page 33: ...33 VGA...