5
Сonnection/Installation
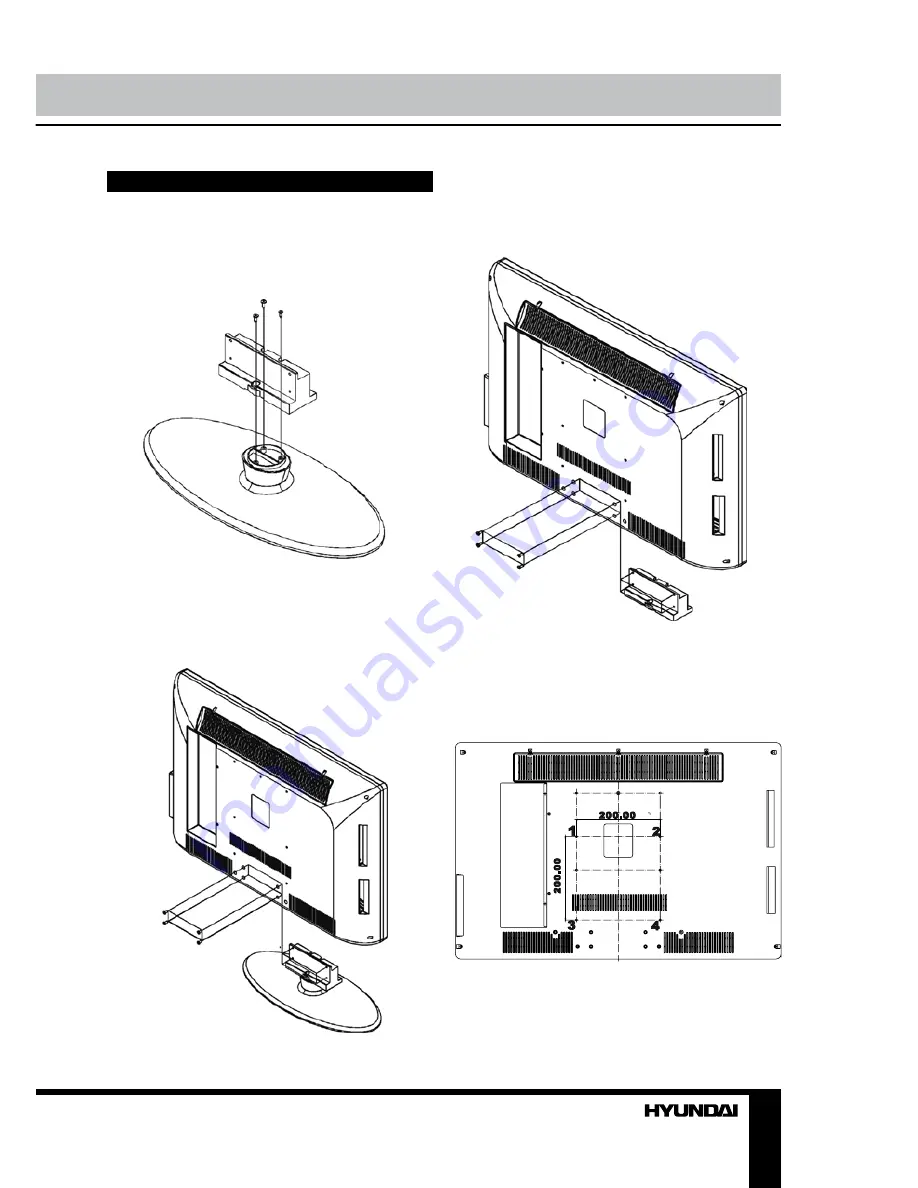
Stand installation
Fix the support to the stand by screws (3
pieces A-type screws) as shown in the picture:
Fix the finished stand assy to the unit by
screws (4 pieces B-type screws) as shown in
the picture:
Installation
Wall mounting
Fix the support to the unit by screws (4
pieces B-type screws) as shown in the picture:
Use 4 screws to fix the unit on the wall
mount bracket. Please find there are 4 VESA
holes on the back of the unit:
Summary of Contents for H-LCDVD3200
Page 1: ...DVD LCD TV WITH BUILT IN DVD PLAYER Instruction manual H LCDVD3200...
Page 23: ...23...
Page 24: ...24 20 50 LCD 10 18 2...
Page 25: ...25 3 4 4 4 4...
Page 26: ...26 75 300 75 75 DVD VDCR CAMCORDER PC L R RCA SCART SCART VGA HDMI HDMI 75...
Page 30: ...30 0001 INPUT VGA VGA LCD MENU ENTER LCD MENU VGA PC NTSC VGA PC...
Page 31: ...31 ENTER X...
Page 32: ...32 1 2 OSD Enter OSD PIN PIN 4711 ENTER PIN PIN PIN OK...
Page 38: ...38 ENTER DVD SETUP NTSC PAL 4 3 PS 4 3LB 16 9 4 3PS 4 3LB DVD 16 9 0000 ENTER 8 ENTER...
Page 39: ...39 SPDIF OFF SPDIF RAW SPDIF PCM...
Page 40: ...40 VGA CH CH...
Page 41: ...41 1 1 2 1 3 RCA 1 4 1 5 1 6 1 7 A 4X14 3 8 B 4X16 4 9 1 10 1 11 1...
Page 43: ......


