background image


[Use the following line drawing: 


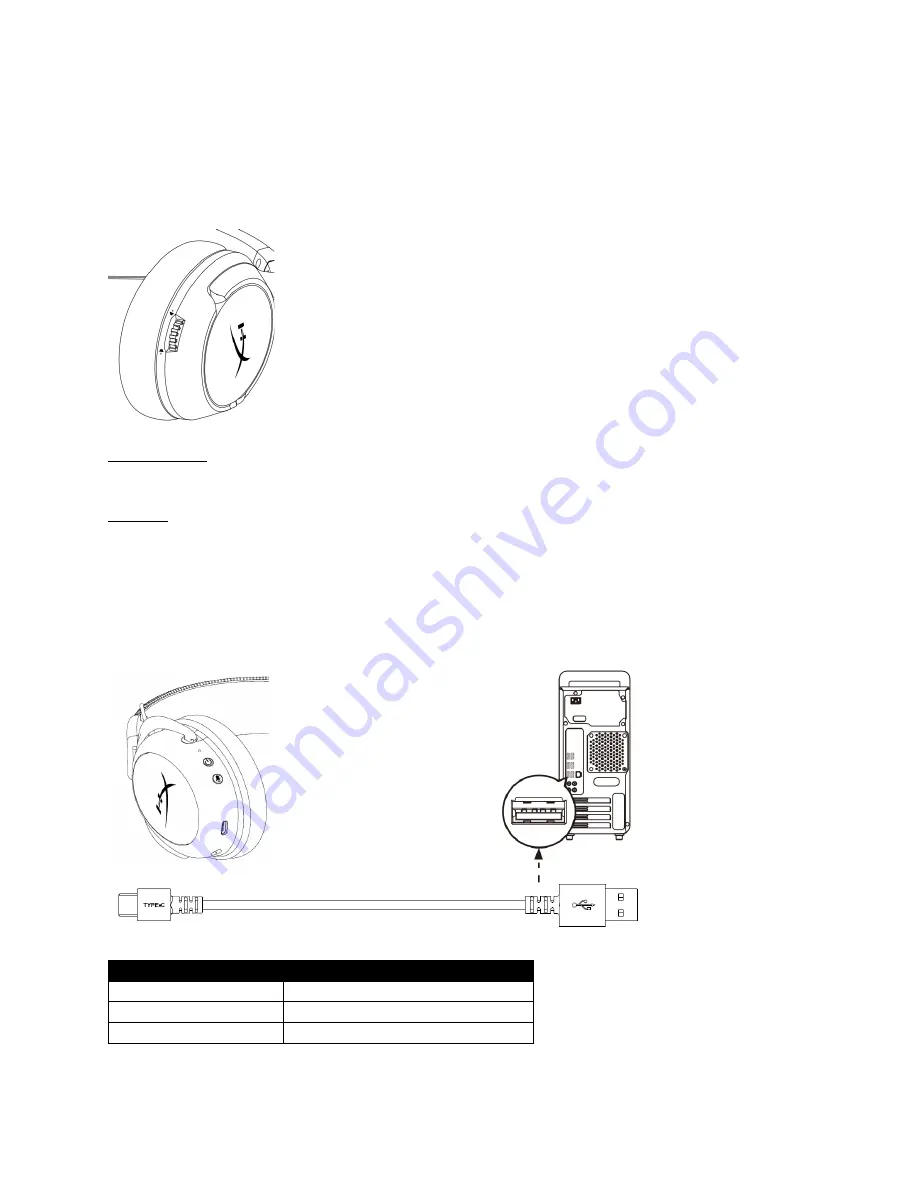
Zoomed-in crop of the right earcup with focus on volume wheel 

o


Small label “Volume wheel” with an arrow pointing to the volume wheel on the right 
earcup 


[Reference image: 


Volume wheel 
Scroll up and down to adjust volume level. 
 
Charging 
It is recommended to fully charge your headset before first use. 
 

[Use the following line drawing: 


Connect the USB-C charge cable USB-A end to PC and USB-C end to headset USB charge port 


[Reference images: 


Status [LED] 

Charge Status 

Fully Charged 

Solid green 

15% — 99% 

Breathing green 

< 15% 

Breathing red 


Summary of Contents for CL002

Page 1: ...ottom view of headset labels A F 3 Detachable boom microphone with mic foam label G H 4 Top down view of USB wireless adapter labels I K 5 USB charge cable label L Reference images A Status LED B Power 7 1 mode button C Mic mute mic monitoring button D USB C charge port E Microphone port F Volume wheel G Detachable microphone H Microphone mute LED I USB adapter J Wireless pairing pin hole K Wirele...

Page 2: ...B adapter to PC USB port and PS4 USB port Reference images 1 Connect the wireless adapter to your device 2 Power on the headset Setting up with PC Right click speaker icon Select Open Sound settings Select Sound control panel Use Windows 10 1903 Setup speaker icon menu graphic and sound settings menu graphic Reference images ...

Page 3: ...enu graphic for selecting HyperX Cloud II Wireless as Default Device Reference image 2 Right click on HyperX Cloud II Wireless and click on Configure 3 Select 7 1 Surround to configure your setup and click next Use Windows OS playback sound control panel menu graphic for selecting speaker setup Reference image ...

Page 4: ...d control panel menu graphic for selecting HyperX Cloud II Wireless as Default Device Reference image Setting up with PlayStation 4 Settings Devices Audio Devices Input Device USB Headset HyperX Cloud II Wireless Output Device USB Headset HyperX Cloud II Wireless Output to headphones All Audio ...

Page 5: ...eference image Status LED Status LED Pairing Flash green and red every 0 2s Searching Slow breathing green Connected 90 100 Solid green 15 90 Blinking green 15 Blinking red Battery level indication Power 7 1 mode button Power on off Hold button for 3 seconds to power headset on off 7 1 mode toggle Press button to toggle 7 1 on off Mic mute mic monitoring button Mic mute toggle Press button to turn...

Page 6: ... earcup Reference image Volume wheel Scroll up and down to adjust volume level Charging It is recommended to fully charge your headset before first use Use the following line drawing Connect the USB C charge cable USB A end to PC and USB C end to headset USB charge port Reference images Status LED Charge Status Fully Charged Solid green 15 99 Breathing green 15 Breathing red ...

Page 7: ...vice pursuant to part 15 of the FCC Rules These limits are designed to provide reasonable protection against harmful interference in a residential installation This equipment generates uses and can radiate radio frequency energy and if not installed and used in accordance with the instructions may cause harmful interference to radio communications However there is no guarantee that interference wi...

Page 8: ...le présent appareil est conforme aux CNR d Innovation Sciences et Développement économique Canada applicables aux appareils radio exempts de licence L exploitation est autorisée aux deux conditions suivantes 1 L appareil ne doit pas produire de brouillage 2 L appareil doit accepter tout brouillage radioélectrique subi même si le brouillage est susceptible d en compromettre le fonctionnement NCC St...

Reviews: