


6
EDGE Pro CNC
Field Service Bulletin 808110 Revision 1
Wireless networking for EDGE Pro CNCs
2. Remove the lock washer and nut from the bulkhead-mount of each cable end.
3. Thread each bulkhead-mount cable end through a hole and secure it with the lock washer and nut tightened to
10 inch-pounds.
Use an 8 mm (5/16 inch) wrench to tighten the nut to the enclosure.
Verify that the antenna base makes contact with unpainted metal on the enclosure to verify proper grounding.
4. Connect the antennas to the cable bases on the outside of the enclosure and orient them vertically.
5. Connect the other end of the cables to the coaxial connectors on the wireless network board.
Finger-tip tighten the nut on each cable to the coaxial connector.
Avoid twisting or kinking the cables.
The entire extension cable should be within the CNC enclosure. Only the antennas are mounted on the outside
of the enclosure.
6. Replace the side panel and re-fasten the screws.
7. Close the front door and re-fasten the screws.
Installing the driver
Load the driver from the USB flash drive if prompted.
1. Plug in the USB memory stick from the kit.
2. Plug in a USB keyboard.
3. Restore AC power to the CNC.
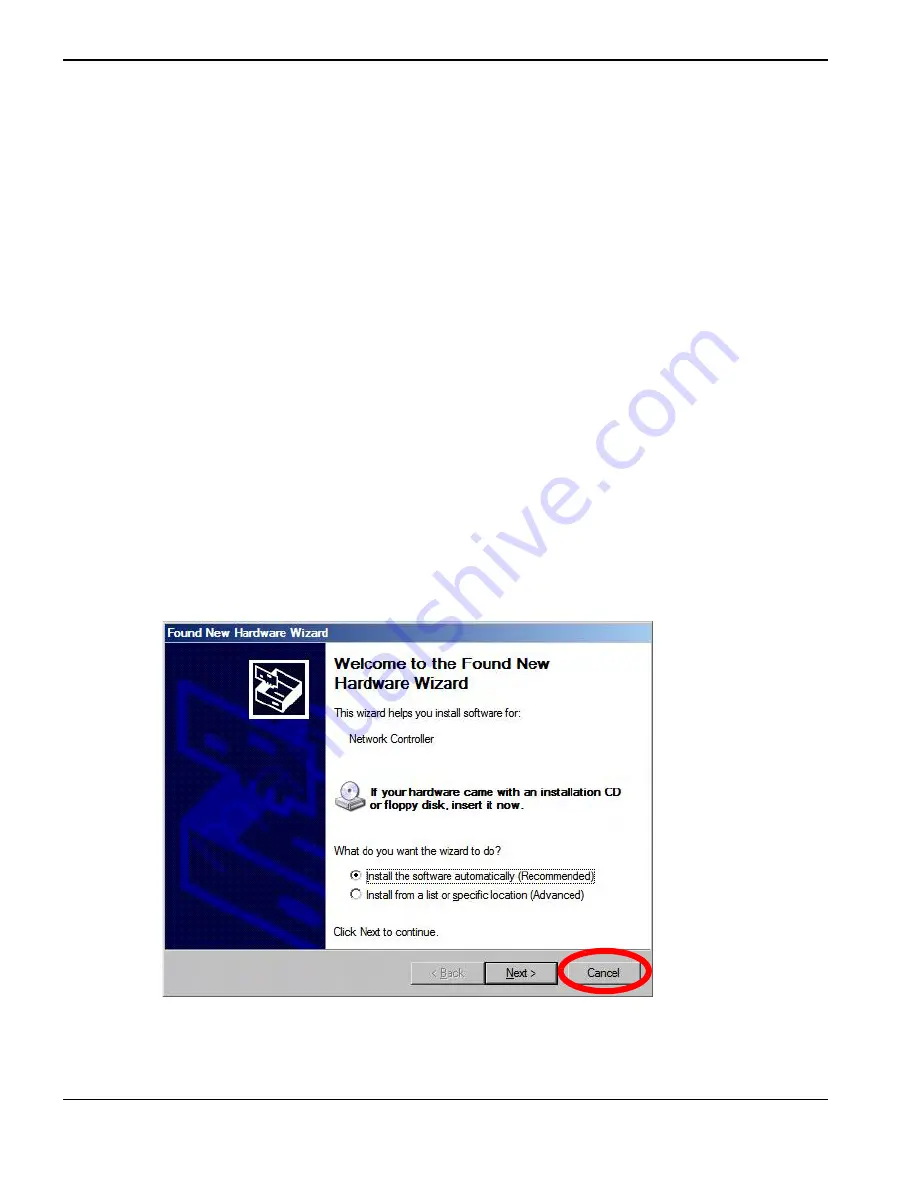
4. If the “Found New Hardware Wizard” pops up, click Cancel. Do NOT interact with the pop-up.


