background image

4.34

4.35

V18 APC 480/575 VOLT ELECTRICAL WIRING DIAGRAM, NO OPTIONS

Summary of Contents for V-18 APC

Page 1: ...izing the power and versatility of your new HYD MECH band saw please take the time to familiarize yourself and your employees with the correct operation and maintenance procedures as outlined in this manual We sincerely appreciate the confidence you have demonstrated in purchasing our product and look forward to building a long and mutually beneficial relationship Thank you HYD MECH GROUP LIMITED ...

Page 2: ......

Page 3: ...ATION 2 7 PROCEDURE FOR EDITING OR STARTING A NEW JOB IN AUTO MODE 2 7 WORKING WITH A QUEUE 2 9 BLADE BASICS 2 9 VARIABLE SPEED CONTROL 2 10 HYDRAULIC FEED CONTROL 2 10 CUTTING PARAMETERS CHART 2 10 CUTTING SOLIDS 2 11 CUTTING STRUCTURALS 2 11 ADDITIONAL CUTTING SETUP EXAMPLES 2 13 COOLANT FLOW 2 14 HEAD BACK LIMIT ADJUSTMENT 2 14 CHIP CONVEYOR 2 15 HYDRAULIC CHIP CONVEYOR 2 15 SECTION 3 MAINTENAN...

Page 4: ...2 V18 APC 480 575 VOLT ELECTRICAL WIRING DIAGRAM 4 46 V18 APC 480 575 VOLT INPUT AND OUTPUT DEVICES 4 50 SECTION 5 HYDRAULIC HYDRAULIC MANIFOLD ASSEMBLY PARTS LIST 5 1 V18 APC HYDRAULIC SCHEMATIC 5 3 V18 APC PLUMBING DIAGRAM 5 4 SECTION 6 MECHANICAL BLADE BRUSH ASSEMBLY 6 1 GUIDE ARM ASSEMBLY 6 2 IDLER WHEEL ASSEMBLY 6 4 ANGLE SCALE ASSEMBLY 6 5 90º STOP ASSEMBLY 6 6 DIGITAL ANGLE ENCODER ASSEMBLY...

Page 5: ...TOC 3 HEAD BACK ADJUSTMENT ASSEMBLY 7 6 BUNDLING ASSEMBLY 7 7 SECTION 8 SPECIFICATIONS SPECIFICATIONS 8 1 SECTION 9 WARRANTY WARRANTY 9 1 ...

Page 6: ......

Page 7: ...son Stock must not be loaded while the blade is running and the V 18APC II should not be operated unless all guards covers and doors are in place and closed Long and heavy stock should be supported where it extends off the saw table Operator should keep a safe distance from all moving parts especially the blade and operating vises Long hair loose clothing or gloves should not be worn while operati...

Page 8: ...here is a restraint bolted to the hydraulic cabinet to keep the door in place during shipping which must be removed while the machine is raised off the floor The two bolt heads can be reached from underneath the cabinet When the hydraulic door is open check for hydraulic leaks that may have developed during shipping INSTALLATION OF THE CONTROL PANEL The V18APC II comes equipped an articulating con...

Page 9: ...nist s level level the saw from side to side and from front to back HYDRAULIC OIL The V 18APC II bandsaw is supplied with Texaco Rando HD46 oil If it is necessary to change the oil to a dif ferent brand it is good practice to empty the hydraulic tank using a pump Fill the hydraulic tank approximately 1 3 full with the new brand of oil and operate the saw through several cycles with maximum cylinde...

Page 10: ...rds can dam age the hydraulic pump Power connection to the machine is made to the L1 L2 L3 and ground terminals located inside the control panel and next to the fuse holders as shown in the photo BLADE TENSION CHECK When the machine is first started the head must be swung to the vertical position so the blade position can be checked Open the door at the top of the head and see that the blade has n...

Page 11: ...former and the lid of control enclosure Also PLC and Interface units should have their own ground conductors connected to one of the main ground terminals Properly functioning ground system will Provide safety for personnel Ensure correct operation of electrical electronic devices Prevent damage to electrical electronic apparatus Help dissipate lightning strokes Divert stray radio frequency RF ene...

Page 12: ......

Page 13: ...ress the importance of familiarizing yourself with the controls of the V 18A PC II prior to start ing the machine NOTES 1 WHEN STARTING THE MACHINE FOR THE FIRST TIME MAKE SURE THE BLADE IS MOVING IN A COUNTER CLOCKWISE DIRECTION AND THAT THE HYDRAULIC PRESSURE IS 900 PSI 6200kP IF THERE IS NO IMMEDIATE PRESSURE SHUT THE SAW DOWN AND CHANGE THE PHASE ORDER AS STATED ON Pg 1 4 2 FOR THE V 18APC ALL...

Page 14: ...ition The HYDRAULIC START button must be depressed and held in momentarily until the PLC display becomes active CYCLE START PAUSE This button starts the cutting cycles and will stay illuminated white until the cycles are completed The PLC control system will prompt you to start the blade if it is not running The machine will then begin the automatic cycle until completed when it will shut itself o...

Page 15: ...en all the way or until the switch is released With the switch in the HOLD position the vise will stay where it is and will not move freely although it will not resist a large force indefinitely without creeping In CLOSE the vise will close all the way or until it encounters enough resistance to stop it GUIDE ARM This switch controls the position of the distance between the guide arms by mov ing t...

Page 16: ...o run consecutively NOTE If an emergency situation arises during any operation use the large red mushroom emergency stop button located on the control panel to shut down the machine PLC CONTROL DESCRIPTION PLC 500 CONTROL PANEL All key functions are explained in detail the on following pages ACTIVATING THE PLC The PLC control will become active when all selector switches are in the neutral positio...

Page 17: ...ch must be in the closed position MANUAL MODE This button will advance the shuttle toward the head home position AUTO MODE Button is disabled MANUAL MODE This button will retract the shuttle away from the head AUTO MODE Button is disabled MANUAL MODE This button will swing the head toward 45O left AUTO MODE Button is disabled MANUAL MODE This button will swing the head toward 45O right AUTO MODE B...

Page 18: ...th To accomplish this follow this procedure 1 Position the head for the required angle by using the 45L or 45R function keys You can also accom plish this by moving the cursor to the Angle Go feature input desired angle press ENTER To change the L or R angle press ENTER and the L or R will switch to the other Then press F2 The screen will display TO INITIATE ANGLE MOVEMENT PRESS CYCLE START Press ...

Page 19: ...d be ready for editing or starting a new job The VISE HEAD and all MANUAL functions on the control panel are disabled At this point it is possible to edit an existing job or enter a new job PROCEDURE FOR EDITING OR STARTING A NEW JOB IN AUTO MODE Each job is defined by two angles and two lengths Angle 1 A1 is the first angle to be cut this will be the trim cut Length 1 L1 is the length of the mate...

Page 20: ...e QUEUE move the cursor to the 1st JOB and key in the desired JOB and press F1 INIT initiate CYCLE You will then be prompted to enter MATERIAL HEIGHT and press ENTER and then CYCLE START Then the blade must be started to run the JOB or QUEUE otherwise the head will not advance for the cut If you wish to clear the values of any job cursor to that job and press F4 NOTE The cursor must be in the queu...

Page 21: ...e fold higher price of high technology blades Variable pitch bi metal blades like the 4 6 or 3 4 bi metal blade supplied with the saw last much longer cut faster and more accurately than conventional carbon steel blades In order to take advantage of the superiority of bi metal blades it is critical to properly break in a new blade This is accomplished by taking two or three cuts through solid four...

Page 22: ...ning Clockwise rotation of dial on the control panel increases blade speed while counter clockwise rotation decreases blade speed HYDRAULIC FEED CONTROL The Hydraulic Feed Control is located to the top of the control panel These controls allow independent control of Feed Force and Feed Rate CUTTING PARAMETERS CHART A full size PARAMETERS CHART is mounted on the front base cover The chart contains ...

Page 23: ...T should be set with the head in the down mode according to the label CUTTING SOLIDS For cutting solids the wider the section the less FF should be set to avoid blade overloading See the graph EXAMPLE When cutting a solid which is 1 2 of machine capac ity using the graph locate 50 on the horizontal line and travel upwards to the plotted line and then travel directly across to the vertical FF Setti...

Page 24: ...0mm intersects the Medium Carbon Steel Curve From this intersection point run horizontally left to the vertical axis optimum blade speed axis and find the point marked 200 For 8 200mm diameter 1045 Carbon Steel solid bar 200 ft min 60m min is the optimum blade speed NOTE Higher than optimum blade speed will cause rapid blade dulling Lower than optimum blade speeds reduce cutting rates proportionat...

Page 25: ...ade pitch curve From this intersection point run horizontally left to the vertical FEED RATE axis to arrive at 1 8 in min 45mm min FEED RATE Thus 1 8 in min 45mm min is the FEED RATE for cutting 8 200mm diameter 1045 Carbon Steel when the optimum 2 3 pitch blade is used If the saw is fitted with a blade coarser than optimum e g 1 4 2 5 TPI we can still use the graph but we go to the 1 4 2 5 curve ...

Page 26: ...A properly adjusted flow of coolant should cover the blade which in turn will carry it into the cutting area Flow adjusting tap is shown at Console side in the photo NOTE When cutting materials that do not need coolant cast iron some coolant flow is required to provide blade lubrication in order to prevent blade scoring by the carbides HEAD BACK LIMIT ADJUSTMENT For machines with the canted head o...

Page 27: ... chip bucket is included with the chip conveyor option The crank handle and chip bucket are shown below HYDRAULIC CHIP CONVEYOR An option available with the V 18 II is the hydraulic chip conveyor drive which provides an easier means of cleaning out the chips that accumulate while cut ting A Chip Conveyor control switch for the hydrauli cally driven chip conveyor is located on the operator control ...

Page 28: ......

Page 29: ...d in compartments with locking doors The photo shows the top Idler wheel with the door open STEP THREE Open Blade Guard The V 18APC II blade is only exposed to the operator at the cutting area A hinged cover protects the operator from the blade between the Idler wheel assembly and the actual cutting area A black knob on the cover allows it to be easily pulled open STEP FOUR Release Carbides It is ...

Page 30: ...d check both wheels Repeat this process until both wheels are within specification 200 220 of tooth over hang from the front of the wheel Both the drive and idler wheels are fac tory set a certain distance from the wall behind the wheel Adjustment should not be required unless the wheel is being replaced On the drive wheel there is a large hex head bolt and four set screws in a push pull ar rangem...

Page 31: ...rew turned counter clockwise to move the brush closer to the blade until the wires on the brush touch the bottom of the blade gullets If a new brush is being installed then the adjusting screw must be turned clockwise in order to move the new brush away from the blade so that the wires are touching the bottom of the gullets If the brush gets worn to approximately 70 of its original 3 diameter it s...

Page 32: ...e on the same side of the head as the in feed conveyor LUBRICATION The V 18APC II was designed with a goal to minimize the maintenance required so as to reduce downtime Moving parts of the V 18APC II will require periodic lubrication nonetheless primarily application of a general purpose grease to the guide arms vise ways and the linear bearings The following photos show the location of grease fit...

Page 33: ...US gallons NOTE The V 18 II is shipped from the factory with Texaco Rando HD 46 oil Generally any brand of recognized min eral hydraulic oil with the same properties should be compatible with Conoco Super Hydraulic 46 oil but to avoid any risk we suggest staying with Texaco Rando HD 46 If it is desirable to change brands it is necessary to drain the tank and to fill to1 3 with the new oil Operate ...

Page 34: ...pressure 2a Stop immediately Reverse any two of three phase connections 2b If pumps runs noisily then checkthe hydraulic oil level at gauge 2b Stop immediately and add hydraulic oil until the correct level is present 2c Check the pump motor coupling for separation 2c Stop immediately and check for the adjustment required 3 Functions will not re spond to manual con trols 3a Check pilots of valves I...

Page 35: ...tension is determined by system pressure Check 6 Tooth strippage 6a Blade pitch is too fine 6a Select a blade with a coarser pitch for cutting 6b Blade brush is not cleaning 6b Replace or adjust the blade brush 6c Excessive feed rate 6c Reduce the feed rate Check calcula tions for rate 6d Excessive feed force 6d Reduce the feed force pressure maxi mum setting 7 No coolant flow 7a Coolant reservoir...

Page 36: ... the PLC Another encoder is attached to the machine frame behind the head and is driven by a cable attached to the head pivot drum This encoder provides the PLC with head swing angle information The third encoder is mounted beneath the head carriage covers on V18A or behind the head cylinder cover on M16 20A and is cable driven to provide head feed rate information to the PLC A proximity sender pr...

Page 37: ... NOTE Checks of mechanical electrical components involved in the particular counting circuit should be made be fore attempting calibrations 1 No length display with shuttle moving in manual erratic length control erratic shuttle movement Per form Length Calibration LTH CLB 2 No feed rate display display reads FR 0 0 all the time Perform Head Height Calibration HD CLB 3 No angle display improper an...

Page 38: ...e accepted by the PLC To exit the procedure after completion press the EXIT key to hold position This value is determined by measuring the full stroke movement of the head Measurement on M16 20A is from the horizontal wear plate to the tip of the blade teeth along the face of the front vise datum jaw For V18A open the shuttle vise fully then start the blade The easiest measurement is made along on...

Page 39: ...angle display is inaccurate and proper calibra tion cannot be performed Proper material not available for test cuts For angle troubleshooting details please contact Hyd Mech Group Limited PARAMETER DEFINITIONS MTL INFEED V18A ONLY MATERIAL INFEED Tells PLC which side of the machine material in feed is on ACT LTH ACTUAL LENGTH Value determined by and entered after performing the Length Calibration ...

Page 40: ...erred to as the datum line to the pivot point of the head On V18APC The distance in inches from the top of the cutting table the datum line on V18 to the pivot point of the head Along with BP RADIUS used to calculate the correct shuttle length when the head swings away from 90 ie 0 082 SPD FACTOR SPEED FACTOR Blade speed adjustment number If actual blade speed is different than displayed blade spe...

Page 41: ...ween 0 000 and 0 001 or 0 000 and 0 001 then one of the encoder channels is not be ing recorded correctly To determine the cause first check the encoder cable connections at both ends to be sure all four wires are connected properly See previous page for connection wiring information Measure the voltage At encoder connector between 0 V pin and 24 V pin This voltage should be a minimum of 22 to 26 ...

Page 42: ... relays on the PLC or the hydraulic cushion valve located at the hydraulic manifold may be faulty LINEAR INACCURACY Load machine with a piece of stock for test cutting Open parameters screen Initiate length calibration as described previously in this section and measure cut length as accurately as pos sible Re enter new ACT LTH Actual Length value Re cut test lengths and check if accuracy is satis...

Page 43: ...l result in damage to the Variable Frequency Drive V18APC PLC500 COMPONENT LIST NO OPTIONS ECN W00 0047 ITEM DESCRIPTION QTY UNIT K V18A 711A 00 Kit Base Components 1 00 EA K V18A 7111 00 Kit Base Components Generic 1 00 EA 372240 Programmable Length Controller FX2N 48 MR ES UL 1 00 EA 370735 Counter Module High Speed FX2N 1HC 1 00 EA 370001 Adapter FX2N CNV BC 1 00 EA 370089 Cable FXON 65EC 1 00 ...

Page 44: ...00 EA 372335 Rail Din 35 x 7 5 Slottted 2M 4 50 IN K V18A 7115 00 Kit Plc Terminal Control Strip Generic 1 00 EA 372710 Terminal Block 4 mm 20 10 Awg 600 Beige WK4 U 6MM 12 00 EA 371055 End Plate AP 2 5 4 BEIGE 1 00 EA 371070 End Stop 9708 S35 2 00 EA 372775 Jumper Copper VB WK 4 M 70 4 00 EA 372755 Terminal Markers Marcom 1 20 EA 372335 Rail Din 35 x 7 5 Slottted 2M 11 25 IN K V18A 7116 00 Kit Ne...

Page 45: ...al 1 2 in 3 4 in 4 00 EA K V18A 71121 00 Kit Length Encoder Conduit Assembly Generic 1 00 EA 370202 Cable Shielded 2 Pair 237 00 IN 392375 Label Laser Brady 6 00 EA 370323 Conduit Metal 3 8 in LIQCON38 176 00 IN 370473 Connector Conduit Straight 3 8 Metal Liquid Tight 4 50 EA 392372 Label Cord 1 H x 2 1 00 EA 394870 Washer Metal 1 2 in 3 4 in 4 00 EA K V18A 71122 00 Kit Cables Generic 1 00 EA 3702...

Page 46: ...t Block Body Illuminated 1 NO ZB2BW061 3 00 EA 370585 Contact Block Body 2 NO ZB2BZ103 5 00 EA 370570 Contact Block Body 1 NC ZB2BZ102 2 00 EA 370530 Contact Block 1NC ZB2BE102 4 00 EA 391860 Label Control Panel V18APC 1 00 EA 391970 Label DDF V18APC 1 00 EA 392367 Label Cord 75 H x 1 5 2 00 EA 370330 Connector Heyco 2703 2 00 EA 370410 Connector Black Ferrule 58 00 EA 372850 Terminal Ring Vnl 16 ...

Page 47: ... Potentiometer Knob 54 218 0 1 00 EA 370202 Cable Shielded 2 Pair 345 00 IN 371450 Heat Shrink Black FIT 221 3 8 200B 1 00 IN 371455 Heat Shrink Black RSTS 221 3 32 3 00 IN 392375 Label Laser Brady 5 00 EA K V18A 714 00 Kit Shipping Components Generic 1 00 EA 370045 Box Junction Coolant 1 00 EA 372555 Switch Limit With Roller 1 NO 1 NC XCKL115H7 3 00 EA K V18A 7141 00 Kit Limit Switch Xck L510 Gen...

Page 48: ...4 6 V18 APC 208 240 VOLT ELECTRICAL SCHEMATIC NO OPTIONS ...

Page 49: ...4 7 ...

Page 50: ...4 8 ...

Page 51: ...4 9 ...

Page 52: ...4 10 V18 APC 208 240 VOLT WIRING DIAGRAM NO OPTIONS ...

Page 53: ...4 11 ...

Page 54: ...4 12 ...

Page 55: ...4 13 ...

Page 56: ...4 14 V18 APC 208 240 VOLT INPUT AND OUTPUTS NO OPTIONS ...

Page 57: ...4 15 ...

Page 58: ...4 16 ...

Page 59: ...4 17 ...

Page 60: ...4 18 V18 APC 208 240 VOLT ELECTRICAL SCHEMATIC ...

Page 61: ...4 19 ...

Page 62: ...4 20 ...

Page 63: ...4 21 ...

Page 64: ...4 22 V18 APC 208 240 VOLT WIRING DIAGRAM ...

Page 65: ...4 23 ...

Page 66: ...4 24 ...

Page 67: ...4 25 ...

Page 68: ...4 26 V18 APC 208 240 VOLT INPUT AND OUTPUTS ...

Page 69: ...4 27 ...

Page 70: ...4 28 ...

Page 71: ...4 29 ...

Page 72: ...4 30 V18 APC 480 575 VOLT ELECTRICAL SCHEMATIC NO OPTIONS ...

Page 73: ...4 31 ...

Page 74: ...4 32 ...

Page 75: ...4 33 ...

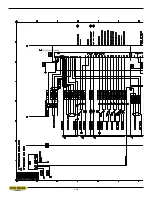
Page 76: ...4 34 V18 APC 480 575 VOLT ELECTRICAL WIRING DIAGRAM NO OPTIONS ...

Page 77: ...4 35 ...

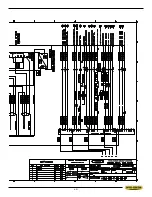
Page 78: ...4 36 ...

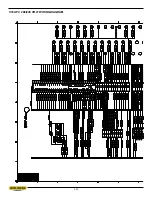
Page 79: ...4 37 ...

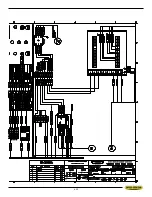
Page 80: ...4 38 V18 APC 480 575 VOLT INPUT AND OUTPUT DEVICES NO OPTIONS ...

Page 81: ...4 39 ...

Page 82: ...4 40 ...

Page 83: ...4 41 ...

Page 84: ...4 42 V18 APC 480 575 VOLT ELECTRICAL SCHEMATIC ...

Page 85: ...4 43 ...

Page 86: ...4 44 ...

Page 87: ...4 45 ...

Page 88: ...4 46 V18 APC 480 575 VOLT ELECTRICAL WIRING DIAGRAM ...

Page 89: ...4 47 ...

Page 90: ...4 48 ...

Page 91: ...4 49 ...

Page 92: ...4 50 V18 APC 480 575 VOLT INPUT AND OUTPUT DEVICES ...

Page 93: ...4 51 ...

Page 94: ...4 52 ...

Page 95: ...C4 00 HEAD CYLINDER 2 2 V18 C3 00A VISE CYLINDER 3 1 S25 C5 00 BLADE TENSION CYLINDER 4 1 V18 C6 00 GUIDE ARM CYLINDER 5 1 V18L 6 00 GUIDE ARM CYLINDER extended head 6 1 V18 C7 00 HEAD SWING CYLINDER 7 1 2 V18 531 00 BUNDLING CYLINDER option 8 1 V18A C1 00A SHUTTLE CYLINDER 9 1 V18A C22 00 DATUM CYLINDER 10 2 V18A C3 00 SHUTTLE VISE SQUARING VISE 11 1 DCV3P AB T HEAD CONTROL VALVE 12 2 DCV3P AB C ...

Page 96: ...on 26 3 5 PG 10 PRESSURE GAUGE 1000psi 27 1 HM 01 CHIP CONVEYOR MOTOR option 28 1 HYP 1 PUMP 29 1 TFS 100 0 P SUCTION STRAINER 30 1 SF 6520 RETURN FILTER 31 1 EB 03 EXTENSION BLOCK 32 2 PRV1 12 PRESSURE REDUCING VALVE VVP OPTION 33 2 PRV2 PRESSURE REDUCING VALVE SUBPLATE 34 1 PV2P A C SWING CUSHION VALVE 35 1 PV2P A C SHUTTLE CUSHION VALVE 36 1 PV2P A C HOLD VALVE BLADE TENSION ...

Page 97: ...5 3 V18 APC HYDRAULIC SCHEMATIC ...

Page 98: ...5 4 V18 APC PLUMBING DIAGRAM ...

Page 99: ...ETHANE WHEEL 4 1 S20 925 02A SHAFT EXTENSION 5 1 5043 3 BLADE BRUSH 6 2 5FLT FLAT WASHER 7 1 B1 50x1 0 HEX HEAD CAP SCREW 8 2 TC 13 COMPRESSION SPRING 9 4 375FLT FLAT WASHER 10 2 A1 375X3 5 SOCKET HEAD CAP SCREW 11 1 S1 375X2 5 SOCKET SET SCREW FLAT POINT 12 1 S1 25x 25 C SOCKET SET SCREW CUP POINT 13 1 375 16HXNUT HEX NUT 14 1 50LOC LOCK WASHER ...

Page 100: ...6 2 GUIDE ARM ASSEMBLY ...

Page 101: ...AT SOCKET HEAD CAP SCREW 16 2 S1 375x1D SOCKET SET SCREW DOG POINT 17 2 S1 19x 25C SOCKET SET SCREW CUP POINT 18 1 V18 461 00C LOWER BLADE GUIDE BLOCK 19 3 A1 375x1 5 SOCKET HEAD CAP SCREW 20 1 V18L C6 00A GUIDE ARM CYLINDER 21 1 CM 10 5 8 ROD END 22 1 5 8 18JNUT HEX JAM NUT NF 23 1 B1 625x1 625 HEX HEAD CAP SCREW 26 2 SH 0237 PA EXTERNAL RETAINING RING 2 3 8 27 3 125x1 5 ROLL PIN 28 2 125x 5 ROLL...

Page 102: ...OC LOCK WASHER 7 1 B1 625x2 25 HEX HEAD CAP SCREW 8 1 S1 375x 375C SOCKET SET SCREW CUP POINT 9 1 V18 43 03A IDLER WHEEL SHAFT 10 1 S25 C5 00 BLADE TENSION CYLINDER 11 1 5 8 18JNUT HEX JAM NUT NF 12 1 AM 10 5 8 ROD END 13 1 V18 38 01A IDLER BOX LINER 14 1 W19 45A 01 IDLER WHEEL 15 2 6309 2RS BALL BEARING 16 1 S25 3 03C IDLER WHEEL BEARING SPACER 17 1 HO 0354 PA 3 9 16 INTERNAL RETAINING RING 18 1 ...

Page 103: ...EW 3 4 375LOC LOCK WASHER 4 4 375FLT FLAT WASHER 5 1 V18 95 02 ANGLE SCALE 6 1 V18 91 05G POINTER MOUNTING BRACKET BASE 7 1 A1 312x 5 SOCKET HEAD CAP SCREW 8 1 312LOC LOCK WASHER 9 1 312FLT FLAT WASHER 10 1 V18 95 03A ANGLE VERNIER SCALE 11 1 V18 91 06 POINTER MOUNTING BRACKET 12 2 B1 25x 375 HEX HEAD CAP SCREW 13 2 25LOC LOCK WASHER ...

Page 104: ...ING 6 15 33354 DISC SPRING 7 1 A1 5x1 25S SOCKET HEAD SHOULDER SCREW 8 1 F1 19x1 5 FLAT SOCKET HEAD CAP SCREW 9 2 P1 19x1 25 PHILLIPS PAN HEAD MACHINE SCREW 10 5 19HX HEX NUT 11 2 B1 25x 5 HEX HEAD MACHINE SCREW 12 2 25LOC LOCK WASHER 13 2 25HX HEX NUT 14 1 25x 5 ROLL PIN 15 1 E0650 063 2000 EXTENSION SPRING 16 1 XCK L110 LIMIT SWITCH 17 1 HEYCO 3221 CABLE FITTING 18 2 T1 19x 5 PHILLIPS TRUSS HEAD...

Page 105: ...5 02 ENCODER DRIVE ARM 3 4 TRA 815 FLAT THRUST WASHER 4 2 NTA 815 NEEDLE THRUST BEARING 5 15 33354 SPRING WASHER 6 1 A1 375x1 25S SOCKET HEAD SHOULDER BOLT 7 2 A1 19x 625 SOCKET HEAD CAP SCREW 8 1 E0635 089 0381 EXTENSION SPRING 9 1 6 111090 04 ENCODER 10 4 A1 14x 5 SOCKET HEAD CAP SCREW 11 1 S2020 141 2 SPUR GEAR ...

Page 106: ...ER DESCRIPTION 1 1 V18 75 06B DIGITAL ANGLE BACK PLATE COVER 2 1 V18 751 00A REAR LUG 3 2 S1 625x1 SOCKET SET SCREW 4 1 V18 75 11 DIGITAL ANGLE DRIVE GEAR 5 2 A1 375x 75 SOCKET HEAD CAP SCREW 6 2 25x 5 ROLL PIN 7 1 V18 75 07A DIGITAL ANGLE COVER ...

Page 107: ...ER 8 2 S25A 24 03 AUXILLARY ROLLER ROD 9 6 SC 5 8 SHAFT COLLAR 10 2 S25A 24 01 SHAFT CARRIER 11 4 S1 5x2 25C SOCKET SET SCREW CUP POINT 12 2 S1 312x 5C SOCKET SET SCREW CUP POINT 13 4 B1 5x3 25 HEX HEAD CAP SCREW 14 4 5LOC LOCK WASHER 15 2 S25A 312 02 BUSHING 16 2 6307 2RS BALL BEARING 17 1 A18 14 01 ROLLER 18 1 A18 14 02 ROLLER ROD 19 1 A18 222 00 BACK SHAFT MOUNTING WELDMENT 20 2 S1 375x 75C SOC...

Page 108: ...FT MOVABLE VISE 9 0 or 1 V18 5 06B RIGHT MOVABLE VISE 10 2 or 4 A1 5x2 SOCKET HEAD CAP SCREW 11 2 or 4 FL1 5x1 5 FLANGED HEX HEAD CAP SCREW 12 2 or 3 V18 5 01A VISE KEY 13 1 or 2 V18 5 02B VISE GIB 14 1 or 2 A2 375x1 25 SOCKET HEAD CAP SCREW 15 1 or 2 V18 C3 00A VISE CYLINDER 16 2 or 4 SH 0237 PA 2 3 8 EXTERNAL RETAINING RING 17 2 or 4 V18 5 04A HIGH VERTICAL WEAR STRIP option 18 1 V18 721 02 ROD ...

Page 109: ...REW 5 1 L 075 750 LOVE JOY COUPLING FLANGE 6 1 L 075 LOVE JOY COUPLING SLEEVE 7 1 L 075 875 LOVE JOY COUPLING FLANGE 8 1 6028 2HP BELL HOUSING 9 6 375LOC LOCK WASHER 10 6 B1 375x1 HEX HEAD CAP SCREW 11 1 PVQ 13 A2R SE 1S 10 CM7 HYDRAULIC PUMP 12 1 0502 12 12 ADAPTER 1 1 16 MNF 3 4 FNPT 13 1 MP 116E BMI ELBOW M F 14 1 102 12 12 MNPT HOSE BARB FITTING 15 1 0503 12 8 ADAPTER 1 1 16 MNF MJIC ...

Page 110: ...6 12 SQUARING VISE ASSEMBLY ...

Page 111: ...AD CAP SCREW 11 4 5LOC LOCK WASHER 12 2 S1 312x 5C SOCKET SET SCREW CUP POINT 13 4 S1 5x2 25 SOCKET SET SCREW CUP POINT 14 1 A18 14 02 ROLLER ROD 15 1 A18 512 00B MOVABLE JAW WELDMENT 16 1 A18 51 9 WEAR STRIP 17 12 F1 312x 5 FLAT SOCKET HEAD CAP SCREW 18 1 V18 5 01A VISE KEY 19 1 V18A 51 13A VISE GIB 20 1 A1 5x1 5 SOCKET HEAD CAP SCREW 21 1 V18A C3 00 VISE CYLINDER 22 2 SH 0237 PA 2 3 8 EXTERNAL R...

Page 112: ...6 14 SHUTTLE VISE ASSEMBLY ...

Page 113: ... S1 312x 5C SOCKET SET SCREW CUP POINT 17 4 S1 5x2 25C SOCKET SET SCREW CUP POINT 18 1 A18 14 02 ROLLER ROD 19 1 A18 522 00B MOVABLE JAW WELDMENT 20 1 A18 51 10 WEAR STRIP 21 12 F1 312x1 FLAT SOCKET HEAD CAP SCREW 22 2 V18 5 01A VISE KEY 23 1 A18 51 13A VISE GIB 24 1 A1 5x1 5 SOCKET HEAD CAP SCREW 25 1 V18A C3 00 VISE CYLINDER 26 2 SH 0237 PA 2 3 8 EXTERNAL RETAINING RING 27 1 A18 521 00A DATUM JA...

Page 114: ...LER CAP BREATHER 50micron 6 6 T1 19x 5 TRUSS HEAD MACHINE SCREW 7 1 SNA2B LEVEL TEMPERATURE GAUGE 8 1 TFS 100 0 P SUCTION STRAINER 9 1 MP 100E BMI 90deg ELBOW FNPT FNPT 10 1 0188 12 12 FITTING MNPT HOSE BARB 11 1 MP 116 E 90 deg ELBOW MNPT FNPT 12 1 SAF07 25 0 FILTER HEAD 13 1 SF6520 10 micron RETURN FILTER 14 1 0102 12 8 REDUCER MNPT FNPT 15 1 2103 4 4 90 deg ELBOW MNPT MJIC 16 1 2103 8 8 90 deg ...

Page 115: ...6 17 COOLANT ASSEMBLY ...

Page 116: ...01A LAMP HOUSING V18 351 00A DRIP TRAY V18 341 00 BASE FRONT COVER V18 14 00 DRIVE DOOR at bottom of head ASSY V18 32 00 DRIVE COVER on other side of head V18 30101 00B CARRIAGE COVER V18 241 00 BASE REAR COVER V18 13 00C BLADE GUARD V18 371 00 IDLER DOOR ASSEMBLY V18 33 00 ...

Page 117: ...OC LOCK WASHER 11 4 B1 5 X 1 25 HEX HEAD CAP SCREW 12 1 V18 4010 01 ACCESS HOLE COVER 13 2 A2 25 X 5 SOCKET HEAD CAP SCREW 14 1 HM5E RENOLDS GEARBOX 39 1 15 1 KEY GEARBOX INPUT KEY 16 2 KEY GEARBOX OUTPUT KEY 17 2 B3 16 X 50 METRIC HEX HEAD CAP SCREW 18 2 V18 4A 02 UPPER GB MRG BOLT 19 2 V18 4A 01A GB ADJUSTING BOLT 20 1 HSP 3B VBS BREATHER VENT 3 8 BST 21 1 V18 1G4 04 DRIVE WHEEL 22 1 H16 4 02 DR...

Page 118: ...6 20 CHIP CONVEYOR SHOWN WITH CRANK AND OPTIONAL HYDRAULIC MOTOR ...

Page 119: ...3 CRANK 13 1 CL 20 PH HANDLE 14 1 A1 375x3 5 SOCKET HEAD CAP SCREW 15 8 V18 12 07A CHAIN RETAINER 16 16 A1 25x 5 SOCKET HEAD CAP SCREW 17 1 V18 12 08 CHIP CONVEYOR PADDLE 18 2 V18 12 06 CONNECTING LINK 19 8 A1 19x 5 SOCKET HEAD CAP SCREW 20 2 B1 5x3 HEX HEAD CAP SCREW 21 2 SH 100 ST EXTERNAL SNAP RING 22 2 V18 124 00 IDLER ECCENTRIC SHAFT WELDMENT 23 2 V18 12 05 ECCENTRIC SHAFT WASHER 24 2 5FLT FL...

Page 120: ...8 531 01B 16 ROD 16 10 2 Z HMS7 260TFE WEAR RING 11 1 V18 532 01A 16 TUBE 16 12 1 V18 532 02 CAP 13 1 SC 5 8 SHAFT COLLAR c w set screw 14 1 HO 0275 PA 2 3 4 INTERNAL RETAINING RING 15 0 or 1 V18 53 05 BUNDLING CLAMP LEFT HAND 16 0 or 1 V18 53 06 BUNDLING CLAMP RIGHT HAND 17 0 or 1 V18 53 02A 16 BUNDLING GUIDE PIN LONG 16 18 0 or 1 V18 53 03A BUNDLING GUIDE PIN SHORT 19 1 V18 53 01 URETHANE STRIP ...

Page 121: ...CENTRIC SLEEVE CYLINDER SIDE 4 1 V18 922 00 ROLLER ROD WELDMENT 5 1 V18 923 00 LEVER WELDMENT 6 1 V18 921 01 ROLLER 7 2 S25A 312 02 BUSHING 8 2 6307 2RS BALL BEARING 9 1 V18 C10 00 LIFT ROLLER CYLINDER 10 1 CM 10 5 8 ROD END 11 1 5 8 18HXNUT HEX NUT NF 12 2 SH 0062 PA 5 8 EXTERNAL RETAINING RING 13 1 3 8x2 3 4 ROLL PIN 14 4 5LOC LOCK WASHER 15 4 B1 5x1 5 HEX HEAD CAP SCREW ...

Page 122: ...NSERTS ITEM QTY PART NUMBER DESCRIPTION 1 1 V18 1 13 WEAR STRIP TABLE INSERT RH 2 1 V18 1 11 TABLE INSERT RH 3 1 V18 1 14 WEAR STRIP TABLE INSERT LH 4 1 V18 1 12 TABLE INSERT LH 5 6 A1 25x 5 SOCKET HEAD CAP SCREW ...

Page 123: ...7 3 TALL VISE INSERTS ITEM QTY PART NUMBER DESCRIPTION 1 1 per vise V18 5 04A TALL VISE INSERT rotate horizontally for oposite hand 2 2 per vise FL1 1 5x1 5 FLANGED HEX HEAD CAP SCREW ...

Page 124: ...7 4 GUIDE ARM ASSEMBLY FOR EXTENDED HEAD OPTION ...

Page 125: ...AT SOCKET HEAD CAP SCREW 16 2 S1 375x1D SOCKET SET SCREW DOG POINT 17 2 S1 19x 25C SOCKET SET SCREW CUP POINT 18 1 V18 461 00C LOWER BLADE GUIDE BLOCK 19 3 A1 375x1 5 SOCKET HEAD CAP SCREW 20 1 V18L C6 00A GUIDE ARM CYLINDER 21 1 CM 10 5 8 ROD END 22 1 5 8 18JNUT HEX JAM NUT NF 23 1 B1 625x1 625 HEX HEAD CAP SCREW 26 2 SH 0237 PA EXTERNAL RETAINING RING 2 3 8 27 3 125x1 5 ROLL PIN 28 2 125x 5 ROLL...

Page 126: ...L CABLE 2 1 V18C 741 00 CABLE GUIDE 3 2 A1 375X 75 SOCKET HEAD CAP SCREW 4 2 375LOC LOCK WASHER 5 1 S1 25X 5 SET SCREW 6 1 V18C 74 03A PUSH ROD GUIDE 7 1 V18C 74 02A CABLE PUSH ROD 8 1 S1 19X 5 SET SCREW 9 1 LIMIT SWITCH with roller arm 10 1 LIQUID TIGHT FITTING 11 2 A1 19X 75 SOCKET HEAD CAP SCREW NOT SHOWN 1 V18C 74 04 THROTTLE CABLE BOX ...

Page 127: ...TUBE 9 1 V18 531 01B 16 ROD 16 10 2 Z HMS7 260TFE WEAR RING 11 1 V18 532 01A 16 TUBE 16 12 1 V18 532 02 CAP 13 1 SC 5 8 SHAFT COLLAR c w set screw 14 1 HO 0275 PA 2 3 4 INTERNAL RETAINING RING 15 0 or 1 V18 53 05 BUNDLING CLAMP LEFT HAND 16 0 or 1 V18 53 06 BUNDLING CLAMP RIGHT HAND 17 0 or 1 V18 53 02A 16 BUNDLING GUIDE PIN LONG 16 18 0 or 1 V18 53 03A BUNDLING GUIDE PIN SHORT 19 1 V18 53 01 URET...

Page 128: ......

Page 129: ... Pressure Compensated Constant Pressure Variable Flow 6 1 2 GPM Hydraulic Pump 3 1 2 GPM Hydraulic Pump 150 W Vises Hydraulic full stroke 2nd hydraulic vise optional Head Swing Hydraulically positioned and Locked Full 45 deg Left or Right Table Height 38 Feed System Independent Feed Rate and Feed Force System Pressure 900 PSI Tank Capacity Hydraulic 7US Gallons Coolant 30US Gallons Guide Arm Hydra...

Page 130: ...8 2 ...

Page 131: ...8 3 ...

Page 132: ......

Page 133: ...in the manufacture of the V18 APC but not originally manufactured by Hyd Mech are subject to the original manufacturer s warranty Hyd Mech will provide such assistance and information as is necessary and available to facilitate the user s claim to such other manufacturer Liability or obligation on the part of Hyd Mech for damages whether general special or for negligence and expressly including an...

Page 134: ... TTL MEAS ANG Act LTH ANG CLB ENTER STROKE ANG TRG WD LNG TRG WD ANG DEC ACC DIST BP RADIUS DEC DIST DP RADIUS SLW DIST SPD FACTOR FVO DIST WHEEL TRG SVO DIST ACT POSITION ON OFF CLS TIME BRKN PROX ON OFF HD CLB ENTER BLD CHAMBER ON OFF ACT HD MVT Password ANG CLB ENTER ...

Reviews: