REV C
4-2
121363
6. Start the engine. Move the steering control lever to
barely engage the brake (neutral) slot and hold it in
that position (Do not engage the steering control lever
far enough to engage the brakes in the brake slot).
7. Beginning with the right side of the mower:
• Adjust the steering control rod so that the right
side wheel starts rotating forward while holding
the steering control lever in the neutral position.
• Adjust the steering rod back the opposite direc-
tion to the point when the wheel stops rotating.
• From that point, turn the steering rod back again
½ turn. This ensures that the steering rod is
adjusted so that the transmission control arm is
centered in the neutral band of the transmission.
Figure 4-5
• Move the steering control lever forward and back-
ward making sure that the wheel rotates forward
and backward correctly.
• Return the steering control lever to neutral and
re-check to make sure the wheel has stopped in
the neutral position.
• Place the steering control lever in the park brake
position. If neutral is set properly, you should not
hear the transmission whine.
8. Repeat steps 4 through 10 for the left side.
9. Once both sides are properly adjusted, check them
together to make sure everything is working properly.
10. IMPORTANT: Unbolt the seat platform from the mower
frame.
• Disconnect the two female spade connectors
from each other (from step #3).
• Reconnect them to the seat switch. This must be
completed so that the safety circuit is function-
ing properly. Figure 4-1
• Re-attach the seat platform to the mower frame.
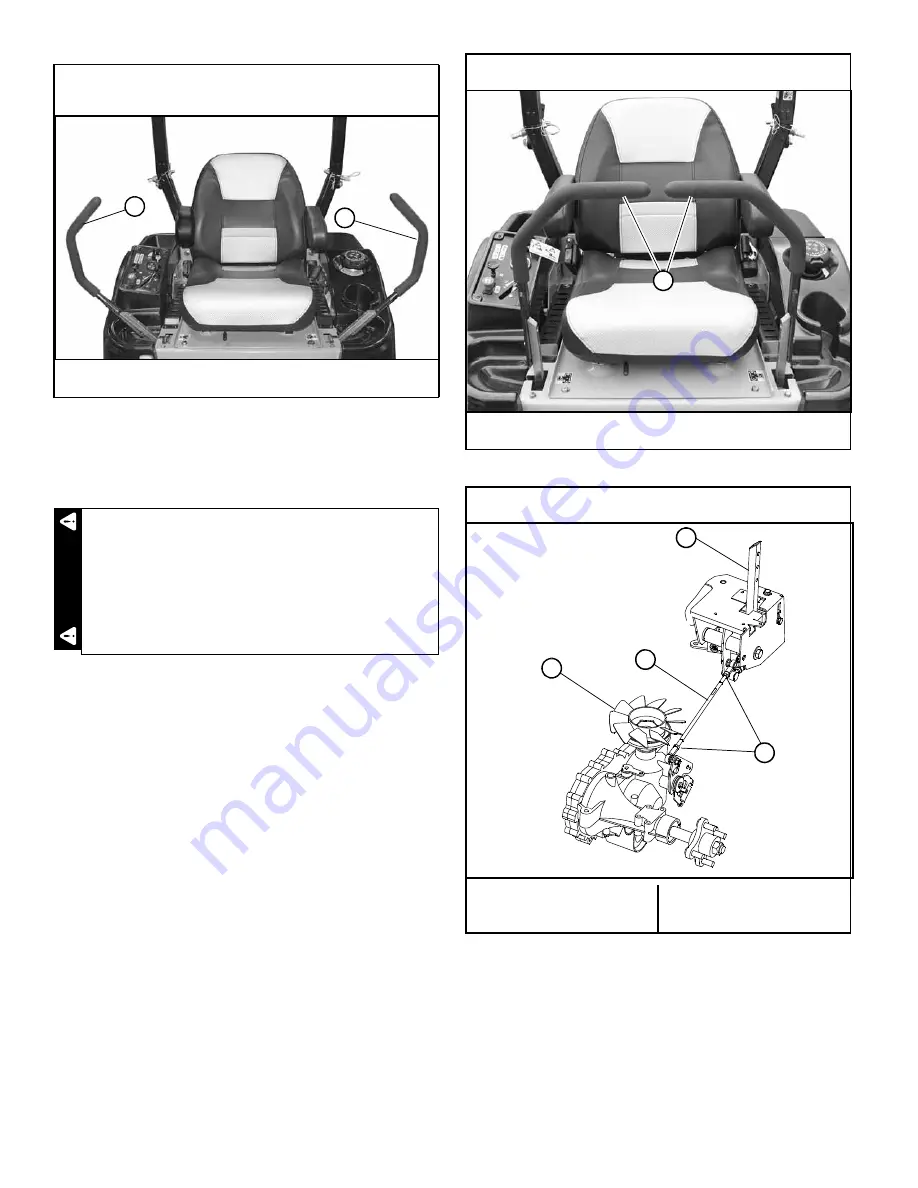
Shown with steering control levers in the park brake
position
A. Steering control lever
Figure 4-2
This operation is extremely dangerous. Pay close
attention when adjusting the steering control rod
so you do not get your fingers, tools, or anything
else close to the transaxle’s cooling fans.
A
A
WA
RNI
N
G
Shown with steering control levers in the neutral position
A. Steering control lever
Figure 4-3
Shown with steering control lever in the neutral position
A. Steering control lever
B. Jam nuts
C. Steering control rod
D. Transaxle cooling fan
Figure 4-4
A
B
C
A
D
Summary of Contents for FasTrak
Page 1: ...121363 REV C Hustler FasTrak General Service Manual 200 South Ridge Road Hesston Kansas 67062 ...
Page 6: ...REV C 1 2 121363 ...
Page 12: ...REV C 3 2 121363 ...
Page 29: ...121363 7 1 REV B ELECTRICAL Main Electrical Harness Schematic ...
Page 30: ...REV B 7 2 114241 Main Harness to Fuel Gauge Voltage Convertor Schematic ...
Page 34: ...REV C 8 4 121363 ...


