IGUP-RED-0309
4
LOCATION
The refrigerated merchandisers have been designed for
use only in air conditioned stores where temperature and
humidity are maintained at or below 75°F and 55% rela-
tive humidity. DO NOT allow air conditioning, electric fans,
ovens, open doors or windows (etc.) to create air cur-
rents around the merchandiser, as this will impair its cor-
rect operation.
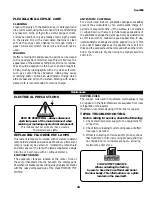
DO NOT place Self Contained versions
of this case, having the electric evapo-
rator pan, underneath or adjacent to
any flammable structure or structure
housing flammable merchandise!
UNCRATING THE STAND
Place the fixture as close to its permanent position as
possible. Remove the top of the crate. Detach the walls
from each other and remove from the skid. Unbolt the
case from the skid. The fixture can now be lifted off the
crate skid. Lift only at base of stand!
EXTERIOR LOADING
These models have not been structurally designed to sup-
port excessive external loading. Do not walk on their
tops; This could cause serious personal injury and dam-
age to the fixture.
SETTING AND JOINING
The sectional construction of these models enable them
to be joined in line to give the effect of one continuous
display. A joint trim kit is supplied with each joint.
Attention Installer!
Proper case joint sealing is extremely
important to prevent water leaks!
It is the contractor’s responsibility to install
case(s) according to local construction and
health codes.
LEVELING
IMPORTANT! It is imperative that cases be
leveled from front to back and side to side prior
to joining. A level case is necessary to insure
proper operation, water drainage, glass align-
ment, and operation of the hinges supporting
the glass. Leveling the case correctly will solve
most hinge operation problems.
NOTE: A. To avoid removing concrete flooring, begin
lineup
leveling from the highest point of the
store floor.
B. When wedges are involved in a lineup, set them
first.
All cases were leveled and joined prior to shipment to
insure the closest possible fit when cases are joined in the
field. When joining, use a carpenters level and shim legs
accordingly. Case must be raised correctly, under legs
where support is best, to prevent damage to case.
1. Check level of floor where cases are to be set.
Determine the highest point of the floor; cases will
be set off this point.
2. Set first case, and adjust legs over the highest part of
the floor so that case is level. Prevent damage – case
must be raised under leg or by use of 2x6 or 2x4 leg
brace. Remove side and back leg braces after case is
set.
3. Set second case as close as possible to the first case,
and level case to the first using the instructions in
step one.
4. Apply masking tape 1/8" in from end of case on
inside and outside rear mullion on both cases to be
joined.
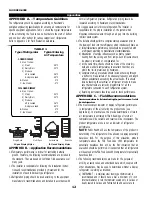
5. Apply liberal bead of case joint sealant (butyl) to
dotted area shown in (Fig.2, #1) of first case. Apply
heavy amount to cover entire shaded area.
DO NOT USE PERMAGUM!
6. Slide second case up to first case snugly. Then level
second case to the first case so the front bumper
and top fascia are even.
7. To compress silicone at joint, use two Jurgenson
wood clamps. Make sure case is level from front to
back and side to side on inside bulkheads at joint.
8. Bolt tops together behind llight, and close camlocks
usiong a 5/16" allen wrench. Camlocks are located in
the rear of the case below air discharge and be-
tween the front legs.
Do not use cam locks to pull cases together.
ENDS
Bolt the end(s) onto the case using the bolts provided in
the pre-drilled holes on the side(s) of the case.
D
O
N
OT
S
EAL
J
OINT
T
RIM
T
O
F
LOOR
!
Installation
Summary of Contents for Chino RED
Page 14: ...IGUP RED 0309 14...


