background image

English-

39

LUBRICATION

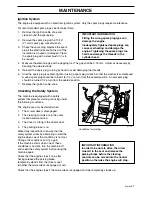
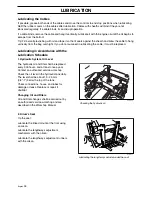
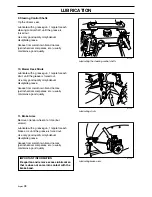
12. Belt Adjuster, Hydraulic Pumps

Lubricate using a grease gun, 1 nipple, until 
the grease squeezes out.

Use only good quality molybdenum 
disulphide grease.

Grease from well-known brand names 
(petrochemical companies, etc.) usually 
maintains a good quality.

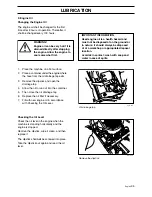
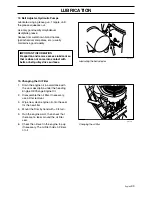
13. Changing the Oil Filter

1.

Drain the engine oil in accordance with 
the work description under the heading 
Engine Oil/Change Engine Oil. 

2.

Disassemble the oil filter. If necessary, 
use a filter remover.

3.

Wipe new, clean engine oil onto the seal 
for the new filter.

4.

Mount the filter by hand with + 3/4 turn.

5.

Run the engine warm, then check that 
there are no leaks around the oil filter 
seal.

6.

Check the oil level in the engine, top up 
if necessary. The oil filter holds 0.2 liters 
of oil.

8011-575

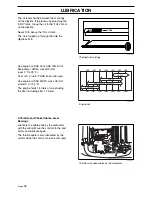
Lubricating the belt adjuster

IMPORTANT INFORMATION

Be spartan and remove excess lubricant so 
that is does not come into contact with 
belts or belt pulley drive surfaces.

8011-570

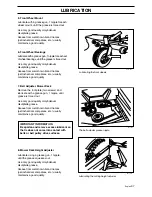
Changing the oil filter

Summary of Contents for ZTH

Page 1: ...ZTH Operator s manual Please read these instructions carefully and make sure you understand them before using the machine English ...

Page 2: ......

Page 3: ...25 Maintenance Schedule 25 Ignition System 27 Checking the Safety System 27 Checking the Engine s Cooling Air Intake 29 Checking and Adjusting the Choke Cable 29 Replacing the Air Filter 30 Replacing the Fuel Filter 31 Checking the Fuel Pump s Air Filter 31 Checking Tire Pressures 31 Checking the Parking Brake 32 Checking the Blades 32 Adjusting the Mower Deck 32 Cleaning and Washing 32 Lubricatio...

Page 4: ...English 2 ...

Page 5: ...re driving and transport on public roads If the machine is transported you shall always use approved fastening equipment and ensure that the machine is well anchored Towing When your machine is equipped with a hydrostatic transmission you should if necessary only tow the machine over short distances and at a low speed otherwise there is a risk of damaging the transmission Operating This machine is...

Page 6: ...manufacturer s type number Model The machine s serial number Serial no Please state the type designation and serial number when ordering spare parts The engine s manufacturing number is stated on a barcode decal This is placed on the left side of the crankcase in front of the start motor The plate states The engine s serial number E NO The engine s type designation Code Please state these when ord...

Page 7: ...o follow instructions given in the manual Used also when there is a potential for misuse or misassembly WARNING Xxxxxxx xxxx xxxxxxxx xxx x Xxxxx xxxxxx xx xx xxxxxxxx xxxxx xxx xx IMPORTANT INFORMATION Xxxxxxx xxxx xxxxxxxx xxx xxx xxxx xxxxxx xx Parking brake Do not stand here Battery acid is corrosive explosive and flammable CE conformity marking Warning Rotating blades keep away from the disch...

Page 8: ...ork area Clear the area of objects such as stones toys steel wire etc that may become caught in the blades and thrown out Beware of the discharge deck and do not point it at any one Do not use the machine without the discharge deck in place Stop the engine and prevent it from start ing before you clean the discharge deck Remember that the operator is responsible for dangers or accidents Never take...

Page 9: ...service it Local laws may regulate the age of the user Make sure that you have first aid equipment close at hand when using the machine Never use the machine when barefoot Always wear protective shoes or boots preferably with steel toecaps Always wear approved protective glasses or a full visor when assembling or driving Never wear loose clothing that can fasten in moving parts WARNING Engine exha...

Page 10: ...rection Avoid unnecessary turns on slopes and if it proves necessary turn slowly and gradually downward if possible Watch out for and avoid driving over furrows holes and bumps On uneven terrain the machine can tip more easily Long grass can hide obstacles Drive slowly Use small movements of the steering controls Be extra cautious with any additional equipment which can alter the machine s stabili...

Page 11: ...he machine Be particularly cautious near corners bushes trees or other objects that block your view Maintenance Stop the engine Prevent the engine from starting by removing the spark plug cables from the spark plugs or by removing the ignition key before making any adjustments or performing maintenance Never fill the fuel tank indoors Gasoline and gasoline fumes are poisonous and extremely flammab...

Page 12: ...immediately Be careful when servicing the battery Explosive gases form in the battery Never perform maintenance on the battery when smoking or near open flames or sparks The battery can explode and cause serious injury damage Ensure that nuts and bolts especially the fastening bolts for the blade attachments are properly tightened and that the equipment is in good condition Do not modify safety eq...

Page 13: ...e the risk of fire by removing grass leaves and other debris that may have fastened in the machine Allow the machine to cool before putting it in storage Transport The machine is heavy and can cause serious crushing injuries Be extra cautious when it is loaded on or unloaded from a vehicle or trailer Use an approved trailer to transport the machine Activate the parking brake turn off the fuel supp...

Page 14: ...raulic motor for each drive wheel Using the left and right steering controls the flow is regulated and thereby the direction and speed Control Locations 1 Steering control left and right 8 Fuel tank cap 2 Hour meter 9 Fuel tap 3 Parking brake 10 Seat adjustment lever 4 Control for engaging the mower deck 11 Choke control 5 Ignition lock 12 Throttle regulates the engine speed 6 Fuses 13 Cutting hei...

Page 15: ...ease or decrease the engine speed the control is moved downward or upward respectively Avoid idling the engine for longer periods as there is a risk of the spark plugs gaining a coating Use full throttle when mowing Ignition Lock The ignition key is placed on the driver s panel and is used to start the machine Hour Meter The hour meter displays the total operating time 8011 508 Choke control 8011 ...

Page 16: ...f the machine Pull the lever backward to activate the brake and forward to release it Seat Locking Device To the left behind the seat is a locking device that locks the seat into its folded position The seat has a linked fixture at the front edge and can be folded forward when the locking device is moved aside 8011 510 Engaging the mower deck 8011 511 Parking brake not activated 8011 523 The seat ...

Page 17: ...rder for example to turn right while moving forward move the right control towards the neutral position The rotation of the right wheel is reduced and the machine turns to the right Turning on the spot can be achieved by moving one control backward behind the neutral position and carefully moving the other steering control forward from its neutral position The rotation direction when turning on th...

Page 18: ...ght behind the seat The tap has three positions right tank left tank and off in the middle position Fuses The fuses are located in a holder to the left of the hydraulic tank They are flat pin fuses of the same type used in automobiles There are two fuses as well as sockets for two spare fuses Fuse ratings and functions moving from the right 20 A Primary fuse 7 5 A Mower deck coupling Socket for sp...

Page 19: ...eck is then raised 2 Depress the lock handle counter hold and move the lifting lever forward toward the peg to engage the set cutting height The deck is then lowered 3 The lifting lever can also be used to temporarily adjust the cutting height such as when passing a minor bump in the lawn Accessories For mulching there is a BioClip attachment available This is mounted underneath the mower deck and...

Page 20: ... before the engine can be started the driver must be seated on the seat the control for engaging the mower deck must be depressed the parking brake must be on both steering controls must be in the locked outer neutral position Starting the Engine 1 Sit on the seat 2 Raise the mower deck by pulling the lifting lever backward to the locked position transport position Activate the parking brake 3 Dis...

Page 21: ... outer neutral position 5 Move the throttle to the middle position 6 If the engine is cold the choke control shall be pulled out to its end position 8011 526 Steering controls in the outward locked neutral position 8011 509 Set the throttle 8011 508 Set the choke control ...

Page 22: ...n the engine starts immediately release the ignition key back to the drive position 8011 506 Open the fuel tap 8011 559 Turn to the start position 8011 560 Return to drive position IMPORTANT INFORMATION Do not run the start motor for more than 5 seconds each time If the engine does not start wait about 10 seconds before re trying ...

Page 23: ...ore loading it too heavily Use full throttle when mowing Running 1 Move the steering controls to the neutral position N 2 Release the parking brake by moving the lever forward 8011 508 Gradually press in the choke control 8011 509 Set the engine speed WARNING Never run the engine indoors in enclosed or poorly ventilated spaces Engine exhaust fumes contain poisonous carbon monoxide 8011 511 Release...

Page 24: ...an equal amount forward or backward the machine moves in a straight line forward or backward respectively In order for example to turn right while moving forward move the right control towards the neutral position The rotation of the right wheel is reduced and the machine turns to the right Turning on the spot can be achieved by moving one control backward behind the neutral position and carefully...

Page 25: ...buted over the mown area The total time taken is not increased as a higher driving speed can be used without poorer mowing results Avoid mowing wet lawns The mowing result is poorer because the wheels sink into the soft lawn clumps build and the grass clippings fasten under the cowling Hose beneath the mower deck with water after each use When cleaning the mower deck shall be raised into the trans...

Page 26: ...3 Move the throttle to the minimum position tortoise symbol Turn the ignition key to the stop position 4 When the rider is standing still activate the parking brake by pulling the lever backward 5 Move the steering controls outward Moving by Hand In order for the machine to be moved with the engine turned off the vent screws on both hydraulic pumps must be opened 1 4 1 2 turn 8011 510 Disengage th...

Page 27: ... Check the fuel pump s air filter 31 Check the safety system 27 Check clean the engine s cooling air intake 29 Check the mower deck 32 Check fastenings screws nuts etc Start the engine and blades listen for unusual sounds Clean under the mower deck 32 Check the hydraulic system s oil level 34 Check the condition of belts belt pulleys etc Check for damage Check the tire pressures 31 Thoroughly clea...

Page 28: ...wer deck s struts 38 Lubricate the mower deck s cutting height adjuster 37 Check adjust the cutting height Clean the air cleaner s pre filter Oil foam 30 Clean the air cleaner s filter cartridge 2 paper filter 30 Change the engine oil 1 35 Change the hydraulic oil every 300 hours Replace the engine oil filter every 200 hours 39 Clean replace the spark plugs 27 Replace the fuel filter 31 Clean the ...

Page 29: ...iving under the following conditions The engine can only be started when 1 The mower deck is disengaged 2 The steering controls are in the outer locked neutral position 3 The driver is sitting in the driver s seat 4 The parking brake is on Make daily inspections to ensure that the safety system works by attempting to start the engine when one of the conditions is not met Change the conditions and ...

Page 30: ...English 28 MAINTENANCE 8011 553 Safety system Start motor Works Does not work Ignition system ...

Page 31: ...able is mounted in the correct hole in the lower lever see illustration 3 Push the throttle cable s outer casing as far to the left as possible and tighten the clamping screw Checking and Adjusting the Choke Cable If the engine produces black smoke or is difficult to start this can be because the choke cable is incorrectly adjusted upper cable If doubts arise contact the service workshop If adjust...

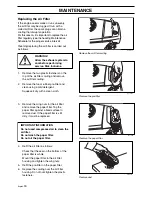
Page 32: ...emove the wing nuts for the air filter and remove the paper filter Tap the paper filter against a fixed surface to remove dust If the paper filter is still dirty it must be replaced 4 Refit the air filter as follows Check that the seal on the bottom of the paper filter is whole Mount the paper filter in the air filter housing and tighten the wing nuts 5 Refit the pre filter on the paper filter 6 R...

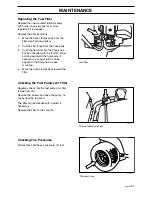
Page 33: ...W arrow pointing up toward the fuel pump If necessary a soap solution can be applied to the filter ends to ease mounting 4 Move the hose clamps back toward the filter Checking the Fuel Pump s Air Filter Regularly check that the fuel pump s air filter is free from dirt Remove the screws and open the pump no hoses need be removed The filter can be cleaned with a brush if necessary Replace the filter...

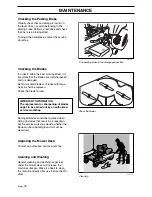
Page 34: ...he blade mounts Damaged blades should be replaced when hitting obstacles that result in a breakdown Let the service workshop decide whether the blade can be repaired ground or must be discarded Adjusting the Mower Deck Contact an authorized service workshop Cleaning and Washing Regular cleaning and washing especially under the mower deck will increase the machine s lifespan Make it a habit to clea...

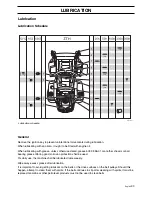
Page 35: ...ll bearing grease offering good corrosion protection shall be used For daily use the machine shall be lubricated twice weekly Wipe away excess grease after lubrication It is important to avoid getting lubricant on the belts or the drive surfaces on the belt pulleys Should this happen attempt to clean them with spirits If the belt continues to slip after cleaning with spirits it must be replaced Ga...

Page 36: ...placed Lubricating in Accordance with the Lubrication Schedule 1 Hydraulic System Oil Level The hydraulic oil and filter shall be replaced every 300 hours and at least once a year Contact an authorized service workshop Check the oil level in the hydraulic tank daily The level shall be about 19 25 mm 3 4 1 below the top of the tank Check connections hoses and tubes for damage or leaks Replace or re...

Page 37: ...ng the Oil Level Checking the Oil Level Check the oil level in the engine when the machine is standing horizontally and the engine is stopped Remove the dipstick wipe it clean and then replace it The dipstick shall not be screwed into place Take the dipstick out again and read the oil level WARNING Engine oil can be very hot if it is drained directly after stopping the engine Allow the engine to c...

Page 38: ...SAE 5W 20 class SC SH under 0 C 32 F The engine holds 1 5 liters of oil excluding the filter including filter 1 7 liters 4 Throttle and Choke Cables Lever Bearings Lubricate the cable ends by the carburetor with the oilcan Move the controls to the end points and lubricate again The throttle cable is also lubricated by the control when the control console is removed ADD FULL ADD FULL 8009 159 The d...

Page 39: ...wer Deck Remove the foot plate two screws and lubricate with a grease gun 1 nipple until grease is forced out Use only good quality molybdenum disulphide grease Grease from well known brand names petrochemical companies etc usually maintains a good quality 8 Mower Deck Height Adjuster Lubricate using a grease gun 1 nipple until the grease squeezes out Use only good quality molybdenum disulphide gr...

Page 40: ... molybdenum disulphide grease Grease from well known brand names petrochemical companies etc usually maintains a good quality 11 Brake Arms Remove one rear wheel at a time four screws Lubricate with a grease gun 1 nipple for each brake arm until the grease is forced out Use only good quality molybdenum disulphide grease Grease from well known brand names petrochemical companies etc usually maintai...

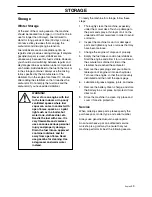
Page 41: ...gine Oil Change Engine Oil 2 Disassemble the oil filter If necessary use a filter remover 3 Wipe new clean engine oil onto the seal for the new filter 4 Mount the filter by hand with 3 4 turn 5 Run the engine warm then check that there are no leaks around the oil filter seal 6 Check the oil level in the engine top up if necessary The oil filter holds 0 2 liters of oil 8011 575 Lubricating the belt...

Page 42: ...starter motor does not turn the engine over Dead battery Poor contacts on the battery terminal cable connections Fuse blown Ignition system faulty Fault in the starter motor safety circuit See Safety system on page 28 The engine runs unevenly Faulty carburetor The choke control is pulled out with a warm engine Defective valves Defective piston cylinder piston ring or cylinder head seal The cylinde...

Page 43: ...ttery not charging Poor contact with battery terminal cable connectors The machine moves slowly unevenly Parking brake on or not at all Venting valve on pump open Drive belt for the pump slack or has come off Defective hydraulic system Air in the hydraulic system Mower deck not engaging Drive belt for the mower deck has come loose Contact for the electromagnetic coupling has loosened The control f...

Page 44: ...uneven The chain fixture has come loose The blades are blunt Driving speed too high The grass is too long Grass collected under the mower deck The machine vibrates The blades are loose The blades are incorrectly balanced The engine is loose ...

Page 45: ... nuts or screws that may have become loose 3 Change the engine oil dispose of properly 4 Empty the fuel tanks or add a fuel stabilizer Start the engine and allow it to run until even the carburetor is drained of fuel or the stabilizer has reached the carburetor 5 Remove the spark plugs and pour about a tablespoon of engine oil into each cylinder Turn over the engine so that the oil is evenly distr...

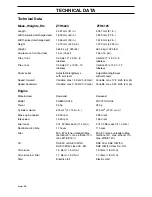
Page 46: ...ariable max 12 9 km h 8 mph Variable max 12 9 km h 8 mph Speed backward Variable max 3 23 km h 2 mph Variable max 3 23 km h 2 mph Engine Manufacturer Kawasaki Kawasaki Model FH680V AS15 FHV721V AS04 Power 23 hp 25 hp Cylinder volume 675 cm3 41 19 cu in 675 cm3 41 19 cu in Max engine speed 2 950 rpm 2 950 rpm Idle speed 1 550 rpm 1 550 rpm Fuel tanks 2 22 liters each 11 4 Gal 2 22 liters each 11 4 ...

Page 47: ...liters 2 qt 1 9 liters 2 qt Hydraulic oil type 15W 50 Synthetic 15W 50 Synthetic Mower Deck Cutting width 1 321 mm 52 in 1 549 mm 61 in Cutting height Adjustable 38 152 mm Adjustable 38 152 mm in 6 4 mm steps in 6 4 mm steps Blade length 457 2 mm 18 in 533 4 mm 21 in Anti scalp rollers Adjustable 6 Adjustable 6 Accessories BioClip attachment Foot operated mower deck ZTH5223 Tip protector When this...

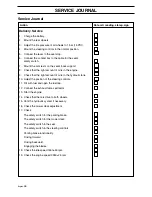
Page 48: ...ht amount of oil is in the hydraulic tank 10 Adjust the position of the steering controls 11 Fill with fuel and open the fuel tap 12 Connect the exhaust fumes extractor 13 Start the engine 14 Check that there is drive to both wheels 15 Vent the hydraulic system if necessary 16 Check the mower deck adjustment 17 Check The safety switch for the parking brake The safety switch for the mower deck The ...

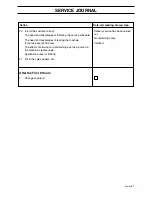
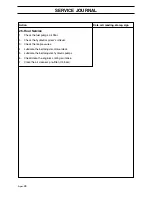
Page 49: ...ges of leaving the machine for service every 300 hours The effects of service and maintaining a service journal on the machine s resale value Application areas for BioClip 21 Fill in the sales papers etc Date mtr reading stamp sign Delivery service has been carried out No remaining notes Certified After the First 8 Hours 1 Change engine oil ...

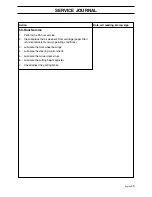
Page 50: ... Check the fuel pump s air filter 2 Check the hydraulic system s oil level 3 Check the tire pressures 4 Lubricate the belt adjuster mower deck 5 Lubricate the belt adjuster hydraulic pumps 6 Check clean the engine s cooling air intake 7 Clean the air cleaner s pre filter Oil foam ...

Page 51: ...ervice 2 Clean replace the air cleaner s filter cartridge paper filter shorter intervals for dusty operating conditions 3 Lubricate the front wheel bearings 4 Lubricate the steering control shafts 5 Lubricate the mower deck struts 6 Lubricate the cutting height adjuster 7 Check adjust the parking brake ...

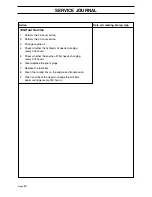
Page 52: ...ge engine oil 4 Check whether the hydraulic oil needs changing every 300 hours 5 Check whether the engine oil filter needs changing every 200 hours 6 Clean replace the spark plugs 7 Replace the fuel filter 8 Clean the cooling fins on the engine and transmission 9 Clean and check the need to change the air filter s paper cartridge every 200 hours ...

Page 53: ...r as to which additional work is to be carried out 2 Perform the 25 hour service 3 Perform the 50 hour service 4 Perform the 100 hour service 5 Change the oil and filter in the hydraulic system 6 Clean the combustion chamber and grind the valve seats 7 Check the play in the engine valves 8 Replace the air cleaner s pre filter Oil foam ...

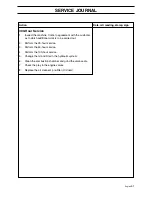
Page 54: ...rs 4 Change the engine oil 100 hours 5 Replace the engine oil filter 200 hours 6 Change the oil and filter in the hydraulic system 300 hours 7 Check adjust the cutting height 8 Check adjust the parking brake 50 hours 9 Clean Change the spark plugs 100 hours 10 Change the fuel filter 100 hours 11 Clean the cooling fins 100 hours 12 Check the play in the engine valves 300 hours 13 Perform the 300 ho...

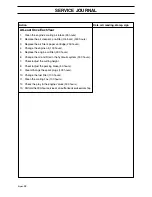
Page 55: ...English 53 SERVICE JOURNAL Action Date mtr reading stamp sign ...

Page 56: ...English 54 SERVICE JOURNAL Action Date mtr reading stamp sign ...

Page 57: ...English 55 SERVICE JOURNAL Action Date mtr reading stamp sign ...

Page 58: ... H h 6 ...

Page 59: ......

Page 60: ... H h 6 2002W14 114 00 87 26 ...

Reviews: