background image

5:4

SEWING A STITCH PROGRAM

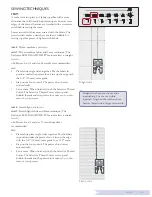
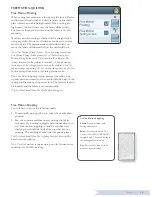
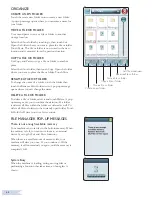
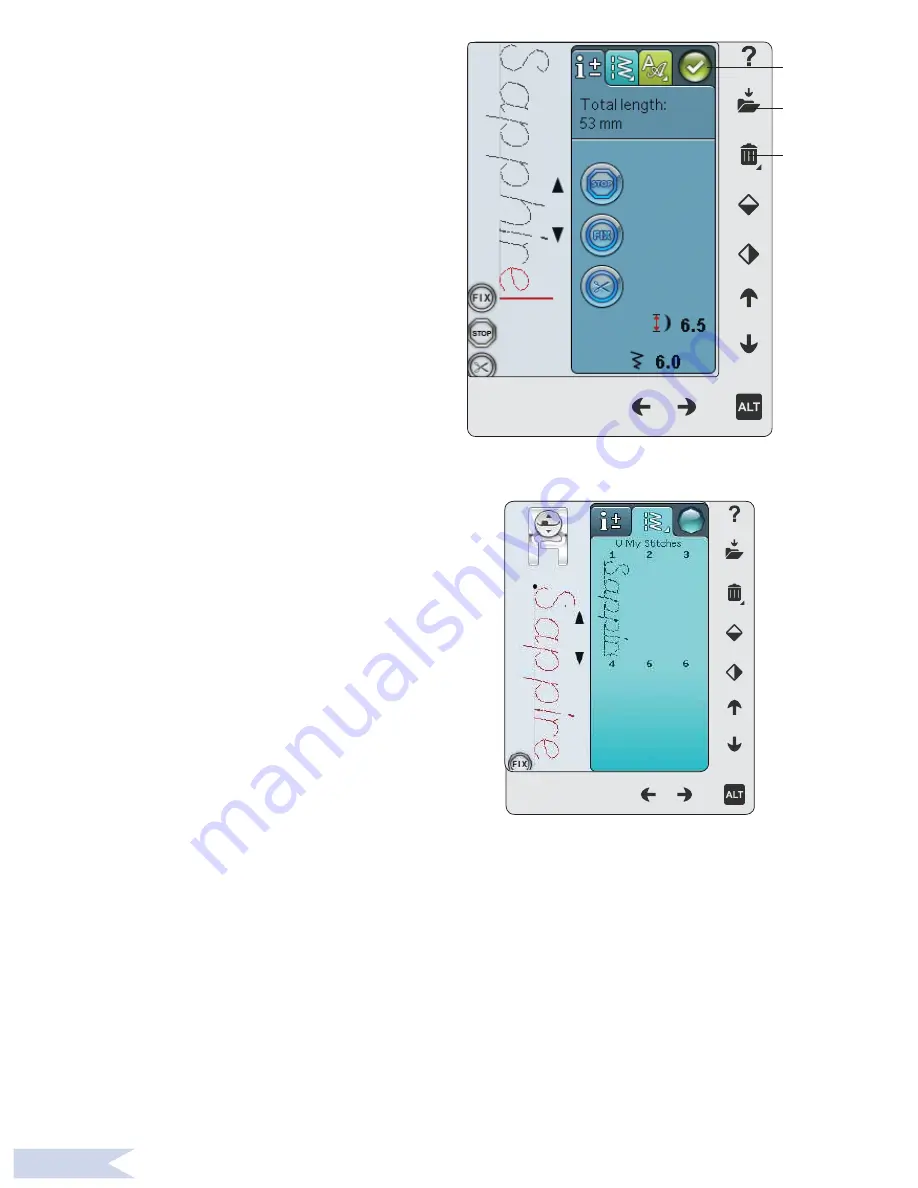
To sew the stitch program, load it by touching the OK icon 
at the top right corner in the program window. You can 
also press on the foot control and the stitch will load and 
you will start to sew.

Adjust the Entire Program

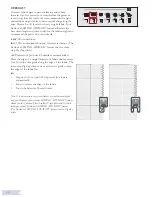
To adjust the entire program, close the program window. 
Adjustments made outside of  Program mode will affect the 
whole program.

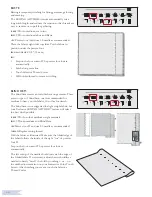
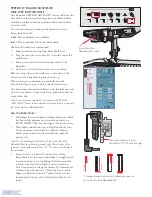
SAVE TO MY STITCHES

2QFH\RXDUHÀQLVKHGZLWK\RXUVWLWFKWRXFKWKH2.LFRQ

at the top right hand corner to load the program. Touch 

WKH6DYHWR0\6WLWFKHVLFRQDQGWKH6DYHWR0\6WLWFKHV

window will open. There are four menus, which you can 
scroll between using the arrows at the bottom of  the 
screen. 

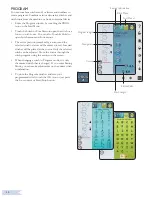
Previously saved stitches or stitch programs are shown 
in the 

0\6WLWFKHVPHQX8PHQX7KHQHZVWLWFKRU

SURJUDPFDQEHVDYHGDWDQ\IUHHSRVLWLRQ6LPSO\WRXFK

a free position, and your stitch or stitch program is stored 
there.

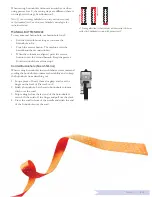
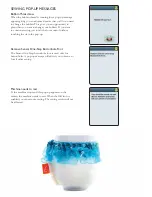
Touch an occupied position and a pop-up message will ask 

\RXWRFRQÀUPWKHRYHUZULWLQJRI WKHROGVWLWFK7RXFK2.

to replace the old stitch with the new one. Touch Cancel 
to close the pop-up message, and choose another saving 
position.

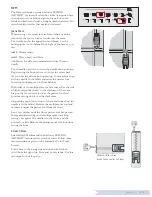
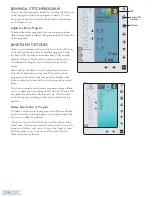
Delete Saved Stitch or Program

To delete a saved stitch or program, touch Delete  and then 
touch the stitch or stitch program. A pop-up message will 

DVN\RXWRFRQÀPWKHGHOHWLRQ

Note: If  you Touch & Hold Delete, you can delete all your stitches 
on that menu. Once you have touched the delete icon, an image will be 
shown at the bottom of  your screen. As long as that image is shown 
the Delete funtion is active, and you can delete stitches.Touch the 
Delete to deactivate the function.

OK

Save to My 

Stitches

Delete

Summary of Contents for Sapphire 960Q

Page 1: ...KEEPING THE WORLD SEWING User s Guide ...

Page 2: ...e the sewing machine with any air openings blocked Keep ventilation openings of the sewing machine and foot control free from the accumulation of lint dust and loose cloth HHS ÀQJHUV DZD IURP DOO PRYLQJ SDUWV 6SHFLDO FDUH LV UHTXLUHG DURXQG WKH VHZLQJ PDFKLQH QHHGOH Always use the proper needle plate The wrong plate can cause the needle to break Do not use bent needles R QRW SXOO RU SXVK IDEULF ZK...

Page 3: ...ision or instruction concerning use of the appliance in a safe way and understand the hazards involved Children shall not play with the appliance Cleaning and user maintenance shall not be made by children without supervision 7KH QRLVH OHYHO XQGHU QRUPDO RSHUDWLQJ FRQGLWLRQV LV OHVV WKDQ G 7KH PDFKLQH PXVW RQO EH XVHG ZLWK IRRW FRQWURO RI W SH 5 µ PDQXIDFWXUHG E 6KDQJKDL LRDR Precision Mould Co Lt...

Page 4: ......

Page 5: ... 11 Update instructions 2 11 Settings functions 3 1 FUNCTION BUTTONS 3 2 6SHHG DQG 3 2 6HOHFWLYH 7KUHDG XWWHU 3 2 1HHGOH 6WRS 8S RZQ 3 2 6723 3 2 3 3 6HQVRU RRW 8S DQG WUD LIW 3 3 6WDUW 6WRS 3 3 6HQVRU RRW RZQ DQG 3LYRW 3 3 Reverse 3 3 EXCLUSIVE SENSOR SYSTEM 3 3 OVERVIEW TOUCH AREA 3 4 Quick Help 3 4 6DYH WR 0 6WLWFKHV 0 LOHV 3 4 Delete 3 4 Mirror end to end mirror side to side 3 4 ALT and functi...

Page 6: ...POP UP MESSAGES 5 5 File Manager 6 1 FILE MANAGER 6 2 AVAILABLE MEMORY 6 2 BROWSE FILE MANAGER 6 3 List Thumbnail View 6 3 MY FILES 6 3 86 6 3 2SHQ D ROGHU 6 3 0RYH 8S 2QH ROGHU HYHO 6 3 ORGANIZE 6 4 UHDWH D 1HZ ROGHU 6 4 0RYH D LOH RU ROGHU 6 4 RS D LOH RU ROGHU 6 4 5HQDPH D LOH RU ROGHU 6 4 HOHWH D LOH RU ROGHU 6 4 FILE MANAGER POP UP MESSAGES 6 4 Maintenance 7 1 CLEANING THE MACHINE 7 2 TROUBLE...

Page 7: ...1GETTING TO KNOWYOUR MACHINE This section of the User s Guide will give you an overview of your machine its accessories and stitches ...

Page 8: ...13 XQFWLRQ EXWWRQ SDQHO 14 Main spool pin 15 Bobbin winding thread guide 16 Auxiliary spool pin 17 Bobbin stop 18 Thread cutter for bobbin winding 19 Bobbin winder spindle 20 Handwheel 21 QWHUDFWLYH RORU 7RXFK 6FUHHQ 22 Built In 86 SRUW 23 6W OXV KROGHU 24 21 2 VZLWFK connectors for power cord and foot control REAR SIDE 25 Handle 26 UHH DUP NEEDLE AREA 27 6HQVRU 2QH 6WHS XWWRQKROH RRW socket 28 Bu...

Page 9: ...bobbin tray ACCESSORIES INCLUDED ACCESSORIES 36 6W OXV 37 7KUHDG QHW 38 HOW SDG 39 6FUHZGULYHU 40 6HDP ULSSHU 41 Brush 42 Edge Quilting guide 43 2 spool caps large DWWDFKHG RQ WKH PDFKLQH DW GHOLYHU 6SRRO FDS PHGLXP DWWDFKHG RQ WKH PDFKLQH DW GHOLYHU 6SRRO FDS VPDOO 46 Multipurpose tool Button reed 47 6 REELQV LQ PDFKLQH DW GHOLYHU 48 PICTOGRAM Pen 49 6WUDLJKW VWLWFK SODWH ACCESSORIES INCLUDED Not...

Page 10: ... 7KH ÀQJHU RQ WKH EDFN RI WKH IRRW KROGV cording for corded buttonholes Blindhem Foot D This foot is used for blindhem stitches The inner edge of this foot guides the fabric The right toe of the foot is designed to ride along the hem edge 7 Zipper Foot E This foot can be snapped on either to the right or to the left of the needle This makes it easy to sew both sides of the zipper Move needle posit...

Page 11: ...th open front gives greater visibility for accuracy Embroidery Darning Foot R This foot is used for IUHH PRWLRQ HPEURLGHU TXLOWLQJ VWLWFKLQJ DQG KRRS HPEURLGHU 7 Side Motion Foot S This foot is used for side motion Omnimotion stitches 7 Sensor One Step Buttonhole Foot 3OXJ LQWR WKH PDFKLQH WKHQ HQWHU WKH GHVLUHG EXWWRQKROH OHQJWK WR VHZ 6HQVRU 2QH 6WHS Buttonholes The middle mark measures a 5 8 PP...

Page 12: ...QJ RQ EDQGV HWF 6WLWFK ZLGWK LQFUHDVHV HTXDOO WR WKH OHIW DQG right 8 7KUHH 6WHS LJ DJ B J RU PHQGLQJ VHZLQJ RQ SDWFKHV DQG HODVWLFV 6XLWDEOH IRU OLJKW DQG PHGLXP ZHLJKW IDEULF RU RYHUFDVWLQJ VHOHFW RYHUFDVW IURP WKH FOXVLYH 6 1 9 625 9 7ZR 6WHS LJ DJ A B RU MRLQLQJ WZR SLHFHV RI IDEULF ZLWK ÀQLVKHG HGJHV DQG IRU HODVWLF VKLUULQJ OVR VXLWDEOH IRU VHZLQJ on lace 10 2YHUFDVW 6WLWFK J 6HDP DQG RYHUFD...

Page 13: ...hole 6HQVRU 2QH 6WHS XWWRQK RRW 6WDQGDUG EXWWRQKROH IRU PRVW IDEULF ZHLJKWV 28 Round End Buttonhole 6HQVRU 2QH 6WHS XWWRQK RRW RU EORXVHV DQG FKLOGUHQ V JDUPHQWV 29 Medium Reinforced Buttonhole C RU PHGLXP DQG KHDY IDEULFV 30 Heirloom Buttonhole 6HQVRU 2QH 6WHS Buttonhole RRW RU KDQG ORRNµ RQ ÀQH DQG GHOLFDWH IDEULFV 7LS RU MHDQV EXWWRQKROHV LQFUHDVH OHQJWK DQG ZLGWK RI WKH EXWWRQKROH 8VH WKLFNHU ...

Page 14: ...1 12 B Satin Stitches RU GHFRUDWLYH VHZLQJ DQG DSSOLTXp A Utility 6WLWFKHV IRU JDUPHQW VHZLQJ DQG PHQGLQJ ...

Page 15: ...NOW YOUR MACHINE 1 13 C Heirloom Stitches RU KHPVWLWFKLQJ VPRFNLQJ DQG VHZLQJ RQ ODFH WULPV DQG PXFK PRUH 6RPH VWLWFKHV FDQ EH XVHG ZLWK D ZLQJ QHHGOH D Quilt Stitches 6WLWFKHV IRU DOO W SHV RI TXLOWLQJ WHFKQLTXHV ...

Page 16: ...1 14 E Vintage Stitches VHOHFWLRQ RI TXLOW VWLWFKHV IRU FUD SDWFK TXLOWLQJ and decorative stitching F Decorative Stitches RU GHFRUDWLYH VHZLQJ ...

Page 17: ... 1 15 H Specialty stitches 6HZ VSHFLDO WHFKQLTXHV LQFOXGLQJ FDQGOHZLFNLQJ DQG edging Extra accessories may be needed Use Quick Help for detailed information G Omnimotion stitches 6HZ GHFRUDWLYH VLGHPRWLRQ VWLWFKHV ZLWK WKH 6 IRRW ...

Page 18: ...Brush Line Block Script Cyrillic and Hiragana 5XVVLDQ DQG DSDQHVH DOSKDEHWV 6HH WKH IRQWV RQ WKH RORU 7RXFK 6FUHHQ RI RXU VHZLQJ PDFKLQH ALPHABETS J Tapering stitches These stitches can be used for tapering ...

Page 19: ...2This section of the User s Guide will help you get started with your machine Learn how to thread your machine wind the bobbin change needle and presser foot SET UP ...

Page 20: ...ct the cord to the socket inside the space of the foot control 3XVK ÀUPO WR PDNH VXUH LW LV SURSHUO FRQQHFWHG 3 Lay the cord in the slot on the underside of the foot control CONNECT THE POWER CORD AND FOOT CONTROL 2Q WKH XQGHUVLGH RI WKH PDFKLQH RX ZLOO ÀQG LQIRUPDWLRQ DERXW WKH SRZHU VXSSO YROWDJH 9 DQG WKH IUHTXHQF Note Before plugging in the foot control check to ensure that it is of type FR5 s...

Page 21: ... remove it and use the free arm Use the free arm to facilitate sewing trouser legs and sleeve hems To replace the accessory box slide it onto the machine until LW ÀWV LQ SODFH USB PORT 2Q WKH ULJKW VLGH RI RXU PDFKLQH RX ZLOO ÀQG D 86 SRUW WR FRQQHFW RXU 86 VWLFN Note Make sure that the USB stick you use has the format FAT32 CONNECT TO AND REMOVE FROM USB PORT Insert the 86 VWLFN LQ WKH 86 SRUW RQ...

Page 22: ...read turn it in the opposite way or use the vertical position VERTICAL POSITION Lift the spool pin up and all the way to the right Lock the spool pin in the vertical position by slightly pressing it GRZQ 6OLGH RQ WKH ODUJH VSRRO FDS RU VSRROV VPDOOHU WKDQ the medium size spool cap or when using specialty threads place a felt pad under the thread spool to prevent the WKUHDG IURP UHHOLQJ RII WRR IDV...

Page 23: ...ADER The needle threader allows you to thread the needle automatically The needle must be in the up position to use the Built In needle threader We also recommend lowering the presser foot 1 Use the handle to pull the needle threader all the way down The WKUHDGHU KRRN VZLYHOV WKURXJK WKH needle eye 3ODFH WKH WKUHDG IURP WKH EDFN RYHU WKH KRRN DQG XQGHU WKH WKUHDG KRRN 3 Let the needle threader gen...

Page 24: ...ut this thread should lie between the right thread tension discs DQG RXWVLGH WKH QHHGOH WKUHDG JXLGH 7KUHDG the right needle manually Note Activate and choose the correct needle width in Sewing Settings in SET Menu to prevent damage to the needle or the presser foot Note The weight and irregular surface of specialty threads such as metallic increases the amount of friction on the thread By reducin...

Page 25: ...ol or touch the start stop button to stop the bobbin winder motor from running Move the bobbin winder spindle to the left and the pop up will close Remove the bobbin and cut the thread using the bobbin thread cutter Note It is important that you cut the thread end close to the bobbin Note Moving the bobbin spindle to the left will engage the sewing mechanism Always stop winding by pushing the Star...

Page 26: ...V LQ RQH ZD ZLWK WKH ORJR IDFLQJ XS 7KH WKUHDG unreels from the left of the bobbin The bobbin will then rotate counter clockwise when you pull the thread 3ODFH RXU ÀQJHU RQ WKH EREELQ WR NHHS LW IURP WXUQLQJ DV RX SXOO WKH WKUHDG ÀUPO WR WKH ULJKW DQG then to the left into the WHQVLRQ VSULQJ XQWLO LW FOLFNVµ LQWR SODFH RQWLQXH WKUHDGLQJ DURXQG DQG WR WKH ULJKW RI WKH WKUHDG FXWWHU 6OLGH RQ WKH ERE...

Page 27: ...VWLWFKHV ZKHQ WKHUH LV D ÁH LQ WKH IDEULF RU NQLWV VZLPZHDU ÁHHFH V QWKHWLF VXHGHV DQG OHDWKHUV Embroidery Needle C Embroidery needles have a special scarf a slightly rounded point and a slightly larger eye to avoid damage to thread and materials Use with metallic and other specailty threads for embroidery and decorative sewing Denim Needle D Denim needles have a sharp point to penetrate tightly Z...

Page 28: ... after stitching Iron on Tear Away Iron on tear away is a totally stable stabilizer that has a slick side that will iron on to fabric It is recommended for knits DQG DOO XQVWDEOH IDEULFV XVH LW WR WKH ZURQJ VLGH RI WKH fabric before decorative stitching or hooping Tear away excess stabilizer after stitching Cut Away Stabilizer Cut away stabilizer does not tear so the excess has to be cut away It i...

Page 29: ... RXU 86 VWLFN following the instructions on the web site 3 Make sure that your machine is turned off Connect the 86 VWLFN ORDGHG ZLWK WKH QHZ VRIWZDUH YHUVLRQ WR WKH 86 SRUW RQ RXU PDFKLQH 4 While pressing and holding the reverse button turn your machine on 5 The update starts automatically and you can release the reverse button when the process bar appears Note It might take up to one minute befo...

Page 30: ...2 12 ...

Page 31: ...User s Guide will guide you through the basic settings and function buttons of your machine Learn how to navigate the functions and settings on the Interactive Color Touch Screen and how to use the function buttons on the sewing machine head ...

Page 32: ...tch program is completed the machine will make a DQG WKHQ FXW WKH XSSHU WKUHDG DQG EREELQ WKUHDG 7KH 6HOHFWLYH 7KUHDG XWWHU IXQFWLRQ FDQ EH SURJUDPPHG VHH page 5 3 Note Your machine cuts the threads automatically after certain stitches such as completing a Sensor One Step Buttonhole Automatic Selective Thread Cutter Auto can be cancelled in the SET Menu see page 3 8 NEEDLE STOP UP DOWN 7RXFK WKH 1...

Page 33: ... the thickness of fabric when stitching and sews over it smoothly and evenly with perfect fabric feeding Go to the 6 7 0HQX WR VHH WKH DFWXDO VHWWLQJ RI WKH 6HQVRU SUHVVHU IRRW SUHVVXUH IRU WKH VHOHFWHG IDEULF DQG adjust the presser foot pressure FIX LV XVHG WR WLH RII D VWLWFK LV DXWRPDWLFDOO DFWLYDWHG ZKHQ RX VHOHFW D VWLWFK XVH WKH 6HOHFWLYH 7KUHDG XWWHU VHOHFW 6WLWFK 5H 6WDUW RU XVH 6723 ZKLOH...

Page 34: ...ULEH WKH DUHD RXWVLGH WKH RORU 7RXFK 6FUHHQ 7KLV SDUW will not change its appearance Quick Help ALT Function arrows Mirror Side to Side Mirror End to End Delete Save to My Stitches My Files Exclusive SEWING ADVISOR Function arrows MIRROR END TO END MIRROR SIDE TO SIDE To mirror stitches or stitch programs sidewise touch Mirror 6LGH WR 6LGH IXQFWLRQ RU PLUURULQJ WKH VWLWFK RU VWLWFK programs length...

Page 35: ...DLQ VWLWFK PHQX VHH FKDSHU Stitch Font Menu 7RXFK WKH 6WLWFK RQW 0HQX DQG D SRS XS ZLOO DSSHDU ZLWK WKH DYDLODEOH VWLWFK IRQWV 6HOHFW D IRQW E WRXFKLQJ LW KHQ a font is selected you will automatically enter the Program mode Program Touch the Program icon to go to Program window You can combine stitches and or letters and numbers to create stitch programs Combine various decorative stitches and sti...

Page 36: ...FW RXU GHVLUHG language by touching it Audio Repeat When active the signal for some warning alerts or attention pop up messages is repeated in intervals until it is cancelled Lock Screen If there is the possibility of bumping into the screen and changing the stitch or settings while sewing it is easy to lock the screen When activated the screen is automatically locked everytime it is inactive for ...

Page 37: ...J D VWLWFK RQ D SLHFH RI VFUDS IDEULF ZLWK VWDELOL HU XQGHUQHDWK Q WKH 6 7 0HQX VHOHFW 6WLWFK 6HWWLQJV I RXU VWLWFK ORRNV OLNH WRXFK LI RXU VHZQ VDPSOH ORRNV OLNH LOOXVWUDWLRQ WRXFK LV WKH SHUIHFWO balanced stitch in this example Width balance adjustment 6WDUW E VHZLQJ D VWLWFK RQ D SLHFH RI VFUDS IDEULF ZLWK VWDELOL HU XQGHUQHDWK Q WKH 6 7 0HQX VHOHFW 6WLWFK 6HWWLQJV I RXU VWLWFK ORRNV OLNH WRXFK...

Page 38: ... WKH 6HOHFWLYH 7KUHDG XWWHU DXWR IRU VHZLQJ LQ WKH 6HZLQJ 6HWWLQJV 7KH WKUHDGV DUH FXW DXWRPDWLFDOO DQG the presser foot raises when you have completed a buttonhole when VHZLQJ RQ D EXWWRQ HWF KHQ GHVHOHFWHG QR 6HOHFWLYH 7KUHDG XWWHU auto for sewing will be performed Sensor Presser Foot Lift KHQ VHOHFWHG WKH 6HQVRU 3UHVVHU RRW LIW LV DFWLYDWHG 7KH SUHVVHU foot will raise to pivot height when you s...

Page 39: ...SEWING Q WKLV FKDSWHU RX ZLOO ÀQG LQIRUPDWLRQ DERXW KRZ WR VHOHFW VWLWFKHV DGMXVW program and sew them 4 ...

Page 40: ...WLWFK 0HQX WDE KDV D WULDQJOH LQ WKH FRUQHU ZKLFK means that you can Touch Hold on the tab Touch ROG WR VKRZ WKH PHQX IROGRXW ZLQGRZ 7RXFK WKH 6WLWFK Menu of your choice and that stitch menu will open The 6WLWFK 0HQX LFRQ KDV GRWV WR LQGLFDWH WKH QXPEHU RI SDJHV ZLWKLQ WKDW PHQX 7RXFK WKH 6WLWFK 0HQX LFRQ DJDLQ WR JR WR WKH QH W SDJH LQ WKH PHQX 7KH 6WLWFK 0HQX IROGRXW ZLOO stay open until you sel...

Page 41: ...h Your changed settings will be reset to default when selecting another stitch The changed settings are not automatically saved when turning your machine off You can save the adjusted stitch in 0 6WLWFKHV VHH SDJH Thread Tension Your machine automatically sets the best thread tension for the selected stitch The thread tension can be adjusted for VSHFLDOW WKUHDG WHFKQLTXHV RU IDEULF 7RXFK WR LQFUHD...

Page 42: ...reful not to reduce the presser foot height too much The fabric must still move freely under the presser foot Note If Free Motion Floating is activated do not use any Spring action foot as this might damage the presser foot Activate Stitch Width Safety if the presser foot requires that Free Motion Spring Action 6HOHFW UHH 0RWLRQ 6SULQJ FWLRQ WR DFWLYDWH WKH UHH motion spring action mode The feed t...

Page 43: ...ngthening a satin stitch where the density can be adjusted the entire stitch will be longer but the density will remain the same Note When trying to exceed minimum or maximum settings for width and length a warning sound will be heard The default setting is shown in black Changed settings are shown in red Stitch Positioning Use the arrows below to move the stitch to the right or to the left when u...

Page 44: ...d set the button size on screen Note There is a guide in front of your machine where you can measure the size of the button Button Sew On When sewing a button you can set the number of stitch repeats Touch arrows to increase or decrease the number RI VWLWFK UHSHDWV 5HDG PRUH DERXW XWWRQ 6HZ 2Q RQ SDJH 4 15 Button Sew On Buttonhole size ...

Page 45: ...f two thread systems warp lengthwise and weft crosswise that intersect at right angles A knit fabric is made of one thread system with interlaced stitches A knit fabric usually has stretch As a general rule enter Woven for stable fabrics that have QR VWUHWFK DQG 6WUHWFK IRU IDEULFV WKDW KDYH VWUHWFK Suggested Fabrics A WOVEN LIGHT chiffon organza batiste silk wool challis etc B WOVEN MEDIUM FDOLFR...

Page 46: ... Is not recommended for light weight fabric or for leather vinyl Your machine selects the best stitch possible for the fabric you select 6 HEM selects the best visible or top stitch hem for your fabric type and weight 7 BUTTONHOLE WKH FOXVLYH 6 1 9 625 feature selects the best buttonhole possible for your fabric Note If an unsuitable combination is selected for example woven light blind hem your m...

Page 47: ...U IRRW ORZHUV automatically 6HZ D VHDP KHQ ÀQLVKHG WRXFK WKH 6HOHFWLYH 7KUHDG XWWHU 7KH 6HOHFWLYH 7KUHDG XWWHU FXWV WRS DQG bobbin threads and the presser foot raises so you can remove your project FABRIC 6WUHWFK OLJKW FXW LQ WZR SELECT 6WUHWFK OLJKW IDEULF DQG 6HDP WHFKQLTXH 7KH FOXVLYH 6 1 9 625 feature selects a stretch VWLWFK USE Presser foot A and size 75 stretch needle as recommended SEW Pla...

Page 48: ... selects a three VWHS LJ DJ VWLWFK USE Presser foot J and size 80 needle as recommended Place the edge of a single thickness of fabric under presser foot J with the wire guide along the edge of the fabric The three step Zig Zag stitch sews over the wire guide to keep WKH HGJH RI WKH IDEULF ÁDW SEW 6WHS RQ WKH IRRW FRQWURO 7KH SUHVVHU IRRW ORZHUV automatically 6HZ WR RYHUFDVW WKH HGJH RI WKH IDEULF...

Page 49: ...KLQH RXU FOXVLYH 6 1 9 625 feature will select the best one for your fabric and make all adjustments automatically FABRIC 6WUHWFK OLJKW FXW LQ WZR SELECT 6WUHWFK OLJKW DQG 6HDP 2YHUFDVW RQ WKH FOXVLYH 6 1 9 625 feature USE Presser foot J and size 75 stretch needle as recommended SEW Place fabric pieces right sides together Put the fabric in position under the presser foot with the wire guide on th...

Page 50: ...le should just catch the edge of the folded fabric If neccessary adjust the stitch width as QHHGHG WR EDUHO FDWFKµ WKH IROG E WRXFKLQJ RU î RQ the width adjustment icon on your Interactive Color Touch 6FUHHQ IWHU ÀQLVKLQJ RXU VHDP WRXFK WKH 6HOHFWLYH Thread Cutter BASTE DVWLQJ LV WHPSRUDU VWLWFKLQJ IRU ÀWWLQJ JDUPHQWV JDWKHULQJ and marking 7KH 6 1 9 625 feature automatically sets a long stitch len...

Page 51: ...ine stops with the needle in the fabric and raises the presser foot Insert the multipurpose tool from behind Both sides of the multipurpose tool are raised Use the side which corresponds closest to the thickness of the seam 6WHS RQ WKH IRRW FRQWURO WR ORZHU WKH SUHVVHU IRRW DQG continue sewing slowly over the thick seam 6WRS VHZLQJ DJDLQ MXVW LQ IURQW RI WKH VHDP QRWLFH KRZ WKH QHHGOH LV LQ WKH ID...

Page 52: ... selects buttonholes that should not be sewn with the Sensor One Step Buttonhole Foot Sew the Buttonhole ROG IDEULF LQ WZR DQG SODFH VWDELOL HU LQEHWZHHQ 0DUN the buttonhole placement on your fabric with your PICTOGRAM 3HQ 6HW WKH OHQJWK RI WKH EXWWRQ VL H 3ODFH IDEULF XQGHU 6HQVRU 2QH 6WHS XWWRQKROH RRW The measurement wheel can be raised by lifting it which makes it easier to place the fabric un...

Page 53: ... Touch the reverse button The machine sews the bartack and the second column When the columns are aligned press the reverse button to sew the second bartack Keep the presser foot down until the machine stops Corded Buttonhole Stretch fabrics When sewing buttonholes in stretch fabrics we recommend cording the buttonhole to increase the stability and to keep the buttonhole from stretching out 1 Loop...

Page 54: ...ies This is indicated by the optional presser foot icon 1RWH 8VH WKH 4XLFN HOS WR ÀQG GHWDLOHG LQIRUPDWLRQ IRU HDFK VWLWFK DECORATIVE TAPERING STITCHES Menu J includes decorative stitches that can be tapered Touch the Tapering icon to open a pop up where you can select the tapering angle of your stitch Touch the tab on the left to set what angle the beginning of your stitch should have and touch t...

Page 55: ...n off the Free Motion Spring Action mode in the Sewing Information tab 7KH UHH 0RWLRQ 6SULQJ FWLRQ SUHVVHU IRRW IROORZV WKH up and down movement of the needle with the help of the spring and the arm on the presser foot The feed teeth must be lowered and the fabric is moved manually Tip Use the optional Open Toe Free Motion Spring foot Free Motion Stippling You will have to move the fabric manually...

Page 56: ...you want to continue sewing just touch the foot control without touching the ok in the pop up Remove Sensor One Step Buttonhole Foot 7KH 6HQVRU 2QH 6WHS EXWWRQKROH IRRW LV XVHG RQO IRU buttonholes A pop up message will advise you to remove it for all other sewing Machine needs to rest If the machine stops and this pop up appears on the screen the machine needs to rest When the OK icon is enabled y...

Page 57: ...5PROGRAM This section of the Users Guide will help you make beautiful combinations of stitches and letters to decorate your fabric ...

Page 58: ...ursor and the selected stitch or letter will be marked in red Inserted stitches will be placed at the cursor Only the selected stitch can be adjusted Move the cursor through the stitch program using the arrows on the screen When changing a stitch in Program mode it is only WKH PDUNHG VWLWFK WKDW LV FKDQJHG I RX HQWHU 6HZLQJ Mode you can make adjustments on the entires stitch combination To close t...

Page 59: ...the same way as when sewing Only the selected stitch will be adjusted Delete a Stitch or Letter If you want to delete a stitch move the cursor to the stitch RX ZDQW WR GHOHWH WKH VHOHFWHG VWLWFK ZLOO EH UHG DQG WRXFK Delete Touch Hold Delete to delete the entire program Note A straight line at the point of the Scroll Up or Down icon indicates scroll to beginning or end STITCH PROGRAM COMMANDS You ...

Page 60: ...s are shown in the 0 6WLWFKHV PHQX 8 PHQX 7KH QHZ VWLWFK RU SURJUDP FDQ EH VDYHG DW DQ IUHH SRVLWLRQ 6LPSO WRXFK a free position and your stitch or stitch program is stored there Touch an occupied position and a pop up message will ask RX WR FRQÀUP WKH RYHUZULWLQJ RI WKH ROG VWLWFK 7RXFK 2 to replace the old stitch with the new one Touch Cancel to close the pop up message and choose another saving...

Page 61: ...hanges to the programmed stitch in Program mode Note If the machine is turned off the program disappears from the Program Mode Remember to save your program before turning the machine off PROGRAM POP UP MESSAGES Not a Programmable Stitch 6RPH VWLWFKHV DUH QRW SRVVLEOH WR LQVHUW LQ D VWLWFK SURJUDP for example buttonholes Stitch Program Out of Range The stitch you are trying to add will make the st...

Page 62: ...5 6 ...

Page 63: ...6 Q WKLV VHFWLRQ ZH ZLOO WDNH D FORVHU ORRN DW KRZ WR RUJDQL H RXU ÀOHV LQ RXU sewing machine FILE MANAGER ...

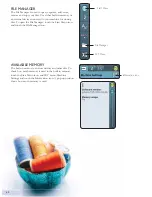
Page 64: ...R RSHQ WKH LOH 0DQDJHU WRXFK WKH 6WDUW 0HQX LFRQ DQG WRXFK WKH LOH 0DQDJHU LFRQ AVAILABLE MEMORY 7KH EXLOW LQ PHPRU FDQ VWRUH VWLWFKHV DQG RWKHU ÀOHV 7R check how much memory is used in the built in memory WRXFK WKH 6WDUW 0HQX LFRQ DQG 6 7 PHQX 0DFKLQH 6HWWLQJV DQG WRXFK WKH QIRUPDWLRQ LFRQ SRS XS ZLQGRZ shows how much memory is used File Manager Start Menu SET Menu Information icon ...

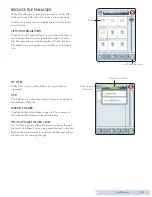
Page 65: ...icon again to switch back to Thumbnail view MY FILES Q 0 LOHV RX FDQ FUHDWH IROGHUV WR NHHS RXU ÀOHV organized USB 7KH 86 LFRQ LV RQO DFWLYH ZKHQ D GHYLFH LV FRQQHFWHG WR WKH PDFKLQH 86 SRUW OPEN A FOLDER Touch Hold on the folder to open it The contents of the folder will be shown in the selection area MOVE UP ONE FOLDER LEVEL Use the Move up one folder level icon to step up through WKH OHYHOV RI ...

Page 66: ...VWH RENAME A FILE OR FOLDER To change the name of a folder touch the folder then WRXFK WKH 5HQDPH ÀOH RU IROGHU LFRQ SRS XS PHVVDJH opens where you can change the name DELETE A FILE OR FOLDER 7R GHOHWH D ÀOH RU IROGHU VHOHFW LW DQG WRXFK HOHWH SRS XS PHVVDJH DVNV RX WR FRQÀUP WKH GHOHWLRQ I D IROGHU LV GHOHWHG DOO ÀOHV ZLWKLQ WKH IROGHU DUH GHOHWHG DV ZHOO 7R GHOHWH DOO ÀOHV RU IROGHUV LQ WKH FXUU...

Page 67: ...7MAINTENANCE Q WKLV VHFWLRQ RX ZLOO ÀQG LQIRUPDWLRQ DERXW KRZ WR WDNH FDUH RI RXU machine and also a troobleshooting guide ...

Page 68: ...d with the accessories Cleaning under the Bobbin Area Clean the area under the bobbin case after sewing several projects or any time you notice an accumulation of lint in the bobbin case area Remove the EREELQ FDVH KROGHU FRYHULQJ WKH IURQW SDUW of the bobbin case by lifting it up Remove the bobbin case E OLIWLQJ LW XS OHDQ ZLWK WKH EUXVK Note Use caution when cleaning around the Selective Thread ...

Page 69: ...nsert a new needle Is the needle too small for the thread Change the needle to the proper size for the thread Is the needle plate hole damaged Change the stitch plate Did you thread the machine properly Check how the machine is threaded Rethread the machine see page 2 5 Are you using poor thread with slubs or thread which has become dry KDQJH WR D QHZ KLJK TXDOLW WKUHDG SXUFKDVHG IURP DQ DXWKRUL H...

Page 70: ...ad tension and the threading Are you using too thick or slubbed thread Change the thread Is the bobbin thread evenly wound KHFN EREELQ ZLQGLQJ VHH SDJH Is a correct needle used Insert a proper needle correctly as described in chapter 2 The Machine does not Feed or Feeds Irregularly Did you thread the machine properly KHFN KRZ WKH PDFKLQH LV WKUHDGHG DQG UHWKUHDG WKH PDFKLQH VHH SDJH Has sewing lin...

Page 71: ...se 1 7 Changing the Needle 2 9 Changing the needle plate 2 8 KDQJLQJ WKH 3UHVVHU RRW 2 8 Check Needle Thread 4 18 Cleaning the Bobbin Area 7 2 Cleaning the machine 7 2 Cleaning under the Bobbin Area 7 2 OHDU 2SHQ 7RH RRW 1 9 RORU 7RXFK 6FUHHQ 3 5 Connecting the foot control cord 2 2 Connector for foot control 1 6 Connector for power cord 1 6 Connect to the power supply 2 2 RQQHFW WR 86 SRUW 2 3 Co...

Page 72: ... rest 4 18 Machine overview 1 6 0DFKLQH 6HWWLQJV 3 6 Magnifying glass 2 8 Main spool pin 1 6 2 4 2 7 Manual Buttonhole 4 15 0LFURÀEHU FORWK 1 7 Mirror End to End 5 3 Mirror end to end mirror side to side 3 4 0LUURU 6LGH WR 6LGH 5 3 0RYH D LOH RU ROGHU 6 4 0RYH ÀOH 6 2 0RYH 8S 2QH ROGHU HYHO 6 3 Multipurpose tool 1 7 2 9 4 13 0 LOHV 6 3 0 6WLWFKHV 4 3 0 6WLWFKHV PHQX 5 4 N Needle bar 1 6 Needle cla...

Page 73: ... NQLIH 7 2 6HOI GKHVLYH OLGH 3ODWHV 1 9 6HQVRU RRW RZQ DQG 3LYRW 3 3 6HQVRU RRW 3UHVVXUH 3 7 6HQVRU RRW 8S DQG WUD LIW 3 3 6HQVRU 2QH 6WHS XWWRQKROH RRW 1 6 1 9 2 5 4 6 4 14 6HQVRU 2QH 6WHS XWWRQKROH RRW VRFNHW 1 6 6HQVRU 3UHVVHU RRW LIW 3 8 6HQVRU 4 IRRW 4 4 6 7 0HQX 3 2 3 3 3 6 7 3 6 1 9 625 4 7 6HZLQJ D VWLWFK SURJUDP 5 4 6HZLQJ QIRUPDWLRQ 4 2 6HZLQJ QIRUPDWLRQ 7DE 4 3 5 3 6HZLQJ SRS XS PHVVDJH...

Page 74: ...Universal Needle 2 9 Unpacking 2 2 Update your machine 2 11 86 6 3 86 SRUW 2 3 86 VWLFN 2 3 Utility 1 12 8WLOLW RRW 1 8 8WLOLW 6WLWFKHV 1 10 V Vertical spool pin 2 4 2 5 2 6 9LQWDJH 6WLWFKHV 1 14 Vinyl 1 8 W Warranty card 1 7 DWHU 6ROXEOH 6WDELOL HU 2 10 Width balance adjustment 3 7 Winding Bobbin 2 7 LQGLQJ 6SHFLDOW 7KUHDGV 2 7 Wing Needles 2 5 2 9 Woven 4 7 Woven heavy 4 7 Woven light 4 7 Woven ...

Page 75: ... this product must be safely recycled in accordance with relevant National legislation relating to electrical electronic products Do not dispose of electrical appliances as unsorted muncipal waste use separate collection facilities Contact your local government for information regarding the collection systems available When replacing old appliances with new ones the retailer may be legally obligat...

Page 76: ...www husqvarnaviking com www husqvarnaviking com 413 35 70 26C English InHouse 2014 KSIN Luxembourg II S ar l All rights reserved Printed in Germany on environmentally friendly paper ...

Reviews: