7
ASSEMBLY
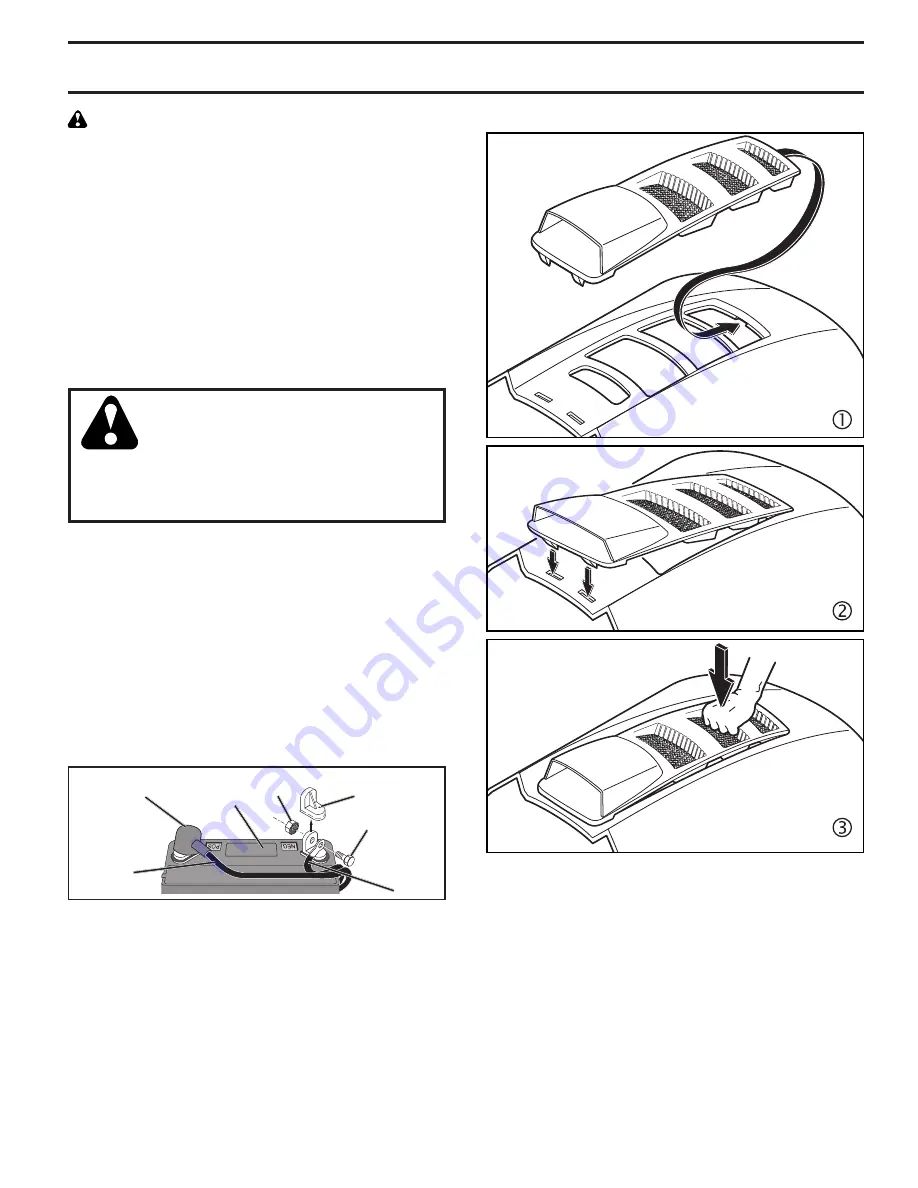
TO INSTALL HOOD SCOOP (See Fig. 6)
Fig. 6
CONNECT BATTERY (See Fig. 5)
WARNING: Do not short battery ter mi nals
by allowing a wrench or any other object
to contact both terminals at the same
time. Before connecting battery, remove
metal bracelets, wristwatch bands, rings,
etc. Positive terminal must be connected
first to prevent sparking from ac ci den tal
grounding.
NOTE:
If this battery is put into service after month and
year indicated on label (label is located between terminals)
charge battery for minimum of one hour at 6-10 amps. (See
“BATTERY” in the Maintenance section of this manual for
charging instructions.)
• Determine battery location. Battery location will be
under the seat or the hood.
• Lift seat pan or hood to raised position.
• Remove two terminal caps and discard.
•
First connect RED battery cable to positive (+) terminal
with bolt and nut as shown. Tighten securely. Slide
terminal cover over terminal.
• Connect BLACK grounding cable to negative (-)
ter mi nal with remaining bolt and nut. Tighten se cure ly.
Fig. 5
02605
NUT
POSITIVE
(RED)
CABLE
NEGATIVE
(BLACK)
CABLE
BOLT
TERMINAL
COVER
LABEL
TERMINAL
CAP
WARNING:
Ensure the seat assembly is securely
fastened to the seat pan before occupying or operating
tractor.
• Lower seat into operating position and sit on seat.
Press clutch/brake pedal all the way down. If operating
position is not comfortable, adjust seat.
TO ADJUST SEAT (See Fig. 4)
• Grasp adjustment handle and pull up. Slide seat to
desired position and release adjustment handle.
IMPORTANT:
Before operating tractor, ensure
operator presence switch is functioning properly
(see “CHECK OPERATOR PRESENCE SYSTEM”
in the MAINTENANCE section of this manual).
Summary of Contents for LTH17538
Page 58: ...58 SERVICE NOTES ...
Page 59: ...59 AVISO ...
Page 60: ...09 06 18 JSE Printed in U S A ...


