background image

3

SAFE OPERATION PRACTICES FOR PE DES TRI AN-CONTROLLED ROTARY 
LAWNMOWERS

IMPORTANT:  This cutting machine is capable of amputating hands and feet and throwing objects.  Failure to observe the following safety 

•           Stop the blade if the lawnmower has to be tilted for trans por ta tion 

when crossing surfaces other than grass, and when transport-
ing the lawnmower to and from the area to be mowed.

•           Never operate the lawnmower with defective guards, or without 

safety devices, for example defl ectors and/or grass catchers, 
in place.

•      Do not change the engine governor settings or overspeed 

the engine.  Operating the engine at excessive speed may 
increase the hazard of personal injury.

•      Disengage all blade and drive clutches before starting the 

engine.

•       Start the engine or switch on the motor carefully according to 

instructions and with feet well away from the blade.

•       Do not tilt the lawnmower when starting the engine or switch-

 ing on the motor, except if the lawnmower has to be tilted for 
starting.  In this case, do not tilt more than absolutely nec es sary 
and lift only the part which is away from the operator.

•           Do not start the engine when standing in front of the discharge 

chute.

•      Do not put hands or feet near or under rotating parts.  Keep 

clear of the discharge opening at all times.

•           Never pick up or carry lawnmower while the engine is running.

•      Stop the engine and disconnect the spark plug wire:

-    before cleaning blockages or unclogging chute;

-    before checking, cleaning or working on the lawnmower;

-    after striking a foreign object.  Inspect the lawnmower for 

damage and make repairs before re start ing and op er at ing 
the lawnmower;

-    if the lawnmower starts to vibrate abnormally (check im-

 me di ate ly).

•      Stop the engine:

-    whenever you leave the lawnmower;

-    before refuelling.

•      Reduce the throttle setting during engine shut down and, if 

the engine is provided with a shut-off valve, turn the fuel off 
at the conclusion of mowing.

•      Go slow when using a trailing seat.

IV. Maintenance and Storage

•       Keep all nuts, bolts and screws tight to be sure the equip ment 

is in safe working condition.

•      Never store the equipment with petrol in the tank inside a 

building where fumes may reach an open fl ame or spark.

•      Allow the engine to cool before storing in any enclosure.

•      To reduce the fi re hazard, keep the engine, silencer, battery 

compartment and petrol storage area free of grass, leaves, 
or excessive grease.

•      Check the grass catcher frequently for wear or de te ri o ra tion.

•      Replace worn or damaged parts for safety.

•           If the fuel tank has to be drained, this should be done outdoors.

instructions could result in serious injury or death.

I.    Training

•      Read the instructions carefully.  Be familiar with the con trols 

and the proper use of the equipment.

•       Never allow children or people unfamiliar with the ins truc tions 

to use the lawnmower.  Local regulations may restrict the age 
of the operator.

•      Never mow while people, especially children, or pets are 

nearby.

•       Keep in mind that the operator or user is responsible for acci-

dents or hazards occurring to other people or their prop er ty.

II.   Preparation

•      While mowing, always wear substantial footwear and long 

trousers.  Do not operate the equipment when barefoot or 
wearing open sandals.

•      Thoroughly inspect the area where the equipment is to be 

used and remove all objects which may be thrown by the 
machine.

•      WARNING - Petrol is highly fl ammable.

-    Store fuel in containers specifi cally de signed for this pur-

 pose.

-    Refuel outdoors only and do not smoke while re fu el ing.

-    Add fuel before starting the engine.  Never remove the cap 

of the fuel tank or add petrol while the engine is running or 
when the en gine is hot.

-    If petrol is spilled, do not attempt to start the engine but 

move the machine away from the area of spillage and avoid 
cre at ing any source of ig ni tion until petrol va pors have dis-
 si pat ed.

-    Replace all fuel tanks and container caps se cure ly.

•      Replace faulty silencers.

•      Before using, always visually inspect to see that the blades, 

blade bolts and cutter assembly are not worn or damaged.  
Replace worn or damaged blades and bolts in sets to pre serve 
balance.

•      On multi-bladed machines, take care as rotating one blade 

can cause other blades to rotate.

III.  Operation

•           Do not operate the engine in a confi ned space where dan ger ous 

carbon monoxide fumes can collect.

•      Mow only in daylight or in good artifi cial light.

•      Avoid operating the equipment in wet grass, where feasible.

•      Always be sure of your footing on slopes.

•      Walk, never run.

•       For wheeled rotary machines, mow across the face of slopes, 

never up and down.

•      Exercise extreme caution when changing direction on 

slopes.

•      Do not mow excessively steep slopes.

•           Use extreme caution when reversing or pulling the lawnmower 

towards you.

Summary of Contents for J50R

Page 1: ...en Manuel d instructions Lisez très attentivement et soyez certain de comprende ces instructions avant d utiliser cette machine Manual de las instrucciones Por favor lea cuidadosamente y com prenda estas intrucciones antes de usar esta maquina Instructieboekje Lees deze instructies aandachtig en zorg dat u ze begrijpt voordat u deze machine gebruikt Manuale di istruzioni Prima di utilizzare la mac...

Page 2: ...ONTAGGIO 11 20 REGOLAZIONE 21 AVVIAMENTO ED ARRESTO 22 23 USO DELLA FALCIATRICE 24 MANUTENZIONE 25 27 INFORMAZIONE GENERICHE 27 CONTENTS PAGE SAFETY RULES 3 8 TECHNICAL DATA 9 OVERVIEW 10 ASSEMBLY 11 20 ADJUSTMENTS 21 START AND STOP 22 23 USE 24 MAINTENANCE 25 27 GENERAL INFORMATION 27 INHALTSVERZEICHNIS SEITE SICHERHEITSREGELN 3 8 TECHNISCHE DATEN 9 ÜBERSICHT 10 MONTIEREN 11 20 EINSTELLUNG 21 STA...

Page 3: ...duce the fire hazard keep the engine silencer battery compartment and petrol storage area free of grass leaves or excessive grease Check the grass catcher frequently for wear or deterioration Replace worn or damaged parts for safety If the fuel tank has to be drained this should be done outdoors instructions could result in serious injury or death I Training Read the instructions carefully Be fami...

Page 4: ...r häufig auf Abnutzung oder Verschleiß prüfen Abgenutzte oder beschädigte Teile zur Sicherheit immer sofort ersetzen Falls der Kraftstofftank entleert werden muß sollte dies im Freien getan werden I Schulung Die Anleitungen sorgfältig durchlesen Mit den Bedienungsele menten und der vorschriftsmäßigen Bedienung der Maschine vertraut machen Auf keinen Fall Kindern oder Erwachsenen die mit der Bedien...

Page 5: ...e haut en bas Soyez très prudents lorsque vous changez de direction sur les pentes Ne tondez pas excessivement les pentes escarpées Soyez extrêmement prudents lorsque vous faites marche arrière ou tirez la tondeuse à gazon vers vous Utilisez une butée d arrêt afin de maintenir la lame immobile si la tondeuse à gazon doit être inclinée pour le transport lorsqu elletraversedessurfacesautresquelegazo...

Page 6: ...rde el motor el silen ciador el comportamiento de la batería limpios de césped hojas y de demasiado grasa Verifique frecuentemente el recogedor del césped para ver si hay uso o deterioración Para la seguridad reemplace las partes que estén usadas o dañadas Si el tanque del combustible debe ser vaciado hágalo afuera I Instrucción Lea todas las instrucciones cuidadosamente Familiarícese completament...

Page 7: ...imte vrij van gras bladeren of een overmaat aan smeervet Controleer de opvangzak vaak op slijtage of verwering Vervangversletenofbeschadigdeonderdelenomveiligheidsre denen Als de brandstoftank afgetapt moet worden moet dit buiten worden gedaan I Training Lees de instructies aandachtig Zorg dat u vertrouwd bent met de bedieningselementen en het juiste gebruik van de machine Laatkinderenofmensendien...

Page 8: ...iberi da erba foglie o quantità eccessive di grasso Controllare spesso il raccoglitore dell erba tagliata per individuare eventuali segni di usura o di danneggiamento Per maggiore sicurezza sostituire le parti usurate o danneggiate Ilserbatoiodelcarburantevavuotatoall aperto qualoranecessario I Addestramento All uso Studiare attentamente le istruzioni Acquisire dimesti chezza con i comandi e conos...

Page 9: ... trouver sur votre machine ou dans les publications fournies avec le produit Apprenez à comprendre la signification de ces symboles Estos símbolos pueden aparecer sobre su unidad o en la literatura proporcionada con el producto Aprenda y comprenda sus significados Simboli utilizzati sull apparato di taglio o nella documentazione fornita unitamente al prodotto E importante conoscerne bene il signif...

Page 10: ...10 2 3 1 6 4 8 7 5 ...

Page 11: ...ter le guidon inférieur sur les écrous de fixation en appuyant les deux extrémités du guidon l une contre l autre de facon à coïncider avec les écrous Poser les deux goupilles fendues sur les écrous de fixation Monter le guidon supérieur sur le guidon inférieur avec le trou de montage du guide cordon sur le côté droit Assembler les guidons supérieur et inférieur avec les deux vis et bloquer avec l...

Page 12: ...ESTA ESAGONALE 3 1 5 2 4 6 7 MONTAGE Hendel Hetstuurkanindepositie HOOG of LAAG wordengemonteerd afhankelijk vanhetfeithoehetonderstegedeeltevanhetstuuropdebevestingsbouten is gemonteerd Monteer het onderste gedeelte van het stuur op de bevistingingsbouten door de beide uiteinden van het stuur naar elkaar toe te duwen tot ze op de bevestigingsbouten passen Monteer de twee haarspeldpennen op de bev...

Page 13: ...rdo del manillar superior Fijar con un tornillo embridado de cabeza hexagonal Montar uno de los extremos del mando en el orificio que hay encima del tope y el extremo plano con orificios en el orificio que hay en el lado derecho del mango Presionar el extremo derecho del mando hacia adentro para que pueda introducirse en el orificio del manillar Bedieningshendel Monteer de aanslagnok voor de bedie...

Page 14: ... brazo de freno del motor Presionar la fijación de plástico cónica de la funda exterior del cable contra el orificio de la fijación hasta que encajen las piezas entre sí Guiar el cable por debajo de la barra transversal del manillar inferior Fijar el extremo del cable al orificio del lado derecho del mando Kable voor de bedeningshendel Haak de kabel vast in de remarm van de motor Druk de kegelvorm...

Page 15: ...de velocidad en el motor Instalar sueltamente el sujetador vaciado en molde metálico Empujar el cable hacia adelante hasta que la palanca de velocidad toque el tope y apretar el tornillo sujetador Adjuntar el cable en el lado del motor con el sujetador de acero estampado y el tornillo Gastoevoer De gashendel op MAX zetten Steek Z bocht van kabel in binnenste gat van snelheidshendel op mo tor Monte...

Page 16: ...omme illustrées Cables al manillar superior Ponerloscablessegúnsemuestrayasegurarlosconuntornillodemáguina y una contratuerca Adjuntar las grampas para cables según se muestra Kabels naar bovenste gedeelte van stuur Monteer de kabels zoals afgebeeld en zet ze met kolomschroef en borg moer vast Bevestig de kabelklemmetjes zoals afgebeeld Cavi del manubrio superiore Posizionare i cavi nel modo illus...

Page 17: ...ca 1 4 20 Sujetar la horquilla del freno abajo al manillar superior y lentamente tire hacia afuera el cordón de arranque hasta que se deslice en el circulo del cáncamo de guía Stuuroogbout voor startsnoer Monteer de stuuroogbout in de zijkant van het bovenste gedeelte van het stuur en bevestig met een 1 4 20 borgmoer Houd de bedieningshendel op het bovenste gedeelte van het stuur neer en trek het ...

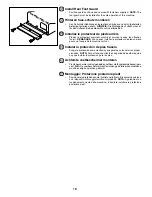
Page 18: ... pieds arrière pour que l usage de la machine soit sûr Instalar la protección de pies trasera Ponga la protección como mostrado y asegúrela con las amarras propor cionadas NOTA Para el funcionamiento en seguridad de esta máquina hay que instalar la protección para los pies Achterste voetbeschermer monteren Plaatsbeschermerzoalsafgebeeldenzethemmetbijgeleverdebevestigers vast N B De voetbeschermer ...

Page 19: ...o por la presión de la tapa sobre el marco del colector Assembleren en monteren van de grasvergaarbak Zet het frame in de grasvergaarbak met het harde gedeelte van de gras vergaarbak naar onderen Trek de plastic haken over het frame Open de achterklep van de grasmaaier en bevestig het frame op de haken op het scharnierbevestiging van het luik De grasvergaarbak wordt op zijn plaats gehouden door de...

Page 20: ...r inutilement le tissu du sac collecteur Vaciado del colector de hierba Levantar la tapa posterior y quitar el colector utilizando el mango No dejar caer el colector al suelo al vaciarlo pues podría desgastarse la tela de la bolsa No permita que el recogedor sea arrastrado cuando lo vacié puede oca sionarse daños Legen van de grasvergaarbak Schakel de motor uit door de bedieningshendel los te late...

Page 21: ...idhöhe mit dem Hebel am jeweiligen Rad einstellen Hebel gegen das Rad drückenundSchneidhöheregeln AlleRädermüssenaufgleicherHöhemontiert sein andernfalls ergibt sich eine ungleichmäßige Schnitthöhe Reglage La tondeuse peut être réglée pour des hauteurs de coupe différentes Choisis sez la hauteur de coupe désirée au moyen du levier de chaque roue Appuyez le levier contre la roue et réglez la hauteu...

Page 22: ...ondern sich langsam wieder aufrollen lassen Der Motor wird durch Loslassen des Bedienungshebels abgestellt HINWEIS Beikaltem Wetter müssen die Bedienungsschritte für die Vorpumpe mögliicherweise wiederholt werden Bei warmem Wetter kann durch zu starke Betätigung der Vorpumpe der Motor Uuberflutet werden so daß der Motor infolgedessen nicht anspringt Solte der Motor überflutet sein einige Minuten w...

Page 23: ...gshendel tegen het stuur en trek kort en krachtig aan de starthendel Laat het startsnoer langzaam vieren Schakel de motor uit door de bedieningshendel los te laten N B Bij koeler weer kan het nodig zijn om de voorinspuitstappen te herhalen Bij warmer weer kan te veel voorinspuiten ertoe leiden dat de motor verzuipt en niet start Als u de motor verzuipt moet u enkele minuten wachten alvorens hem te...

Page 24: ... it is very long Mähen Sie das Gras bei starkem Wachstum zweimal wöchentlich Mähen Sie niemals mehr als 1 3 der Graslänge Dies gilt besonders für trockene Peri oden Mähen Sie danach das Resultat und stellen Sie dann die erwuunschte Schnitthöhe ein lst das Gras besonders hoch fahren Sie langsam mit dem Rasenmäher Mähen Sie gegebenenfalls zweimal Au cours de la période de croissance intensive coupez...

Page 25: ...pulizie o lavori di menutenzione Dopo 5 ore di funzionamento stringere viti e dadi Controllare l olio Piegando la falciatrice sul fiancolare attenzione che la candela sia il punto più alto Regularly Stop the engine and unscrew the dipstick The level should be between FULL and ADD NOTE the dipstick must be screwed all the way down in order to indicate correct oil level Avoid filling with too much o...

Page 26: ... Grinding and balancing the cutter blade Remove the spark plug lead Fit ting and removing the blade require the use of protective gloves Unscrew the cutter blade and deliver it to a service workshop for grinding and balancing Tighten the screw properly when reassembling Jährlich nach Beendigung der Saison Schleifen und Auswuchten des Messers Achtung Vor Demontage des Messers Zündkabel von der Zünd...

Page 27: ...FILTER 3 GEHÄUSE 1 VIS 2 FILTRE 3 CORPS 1 TORNILLO 2 FILTRO 3 CUERPO 1 SCHROEF 2 FILTER 3 HUISSTE AFBEELDING 1 VITE 2 FILTRO 3 SEDE Cleaning of air filter Slacken the screw remove the lid and remove the filter cartridge Cleanse the filter in kerosene Add 2 3 spoonfuls of oil and spread it evenly throughout the filter ReinigungdesLuftfilters Schraubenlösen DeckelabnehmenundFiltereinsatz herausnehme...

Page 28: ...532 19 40 53 Rev 2 08 01 05 BY Printed in U S A ...

Reviews: