HuntersZone Wolf 30MP 4K 4G LTE Cloud Manual Download Page 6


Fig 4 Inloggning via Linckeazi APP 

3.2 

Add camera


Please note: Your camera must be added to your account in the cloud service before use! 

Name your camera; type in the SN and IMEI number from your camera.  Add location description if 
necessary.  You can find SN and IMEI on a sticker inside your camera. 


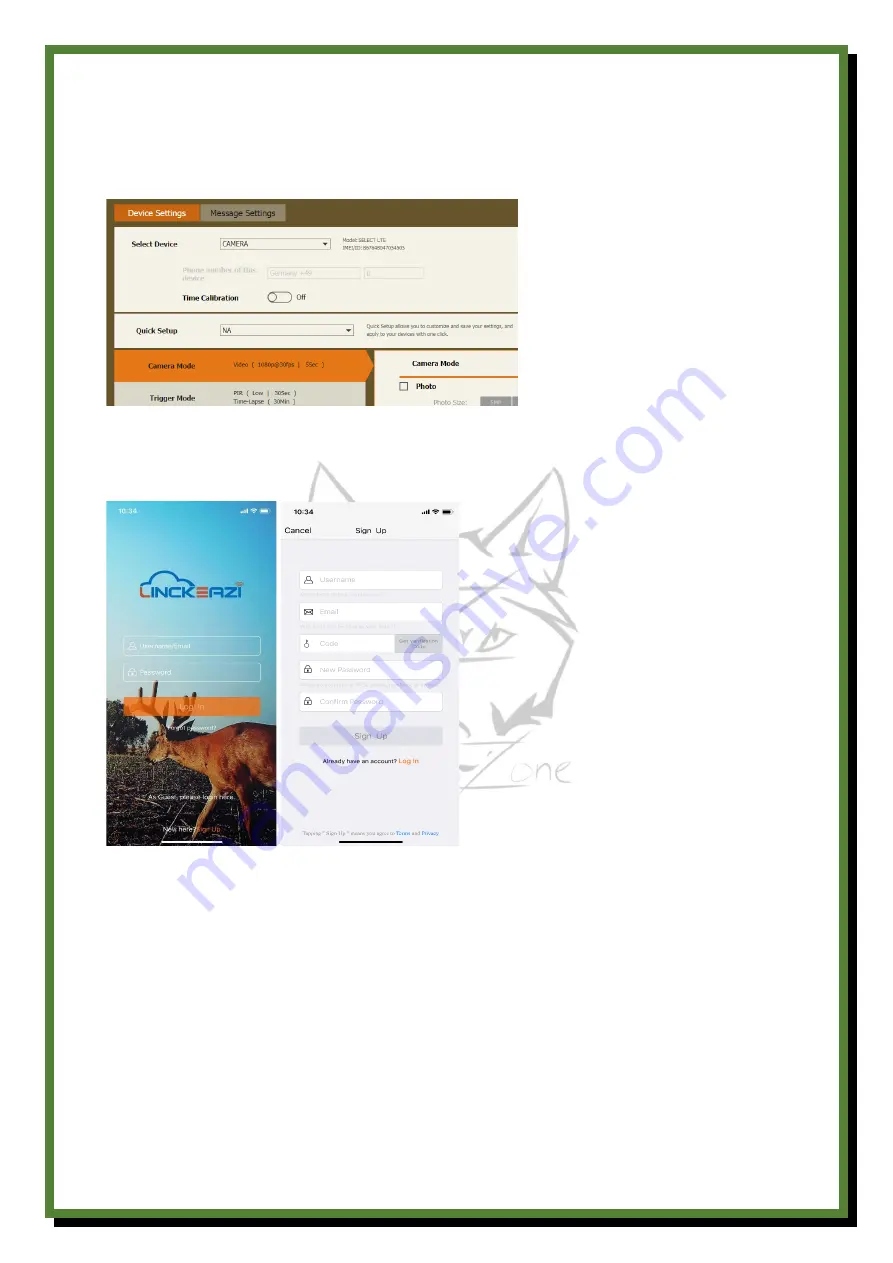
4.4 Change camera setting with web portal or APP  

The CAM is easy to set through Web Portal or APP.  


 Fig 8 Device Settings via web portal 

Summary of Contents for Wolf 30MP 4K 4G LTE Cloud

Page 1: ...WOLF 30MP 4G LTE Cloud...

Page 2: ...ow the camera works The HuntersZone Wolf 30MP 4G LTE S cloud camera makes use of high speed 4G LTE connectivity via LinckEazi s cloud platform It shoots in a maximum of 30MP resolution and in a maximu...

Page 3: ...1 Camera overview 1 1 Camera 1 Black Vision 940nm IR flash 2 Lens 3 Light Sensor 4 Start button 5 PIR sensor 6 Keyboard 7 HD TFT Screen 8 LTE Antenna...

Page 4: ...aration 2 1 Installation of the batteries This camera can be powered by 12AA batteries or 6V 12V external power Pay attention to the or molded into each sleeve to determine whether you insert the posi...

Page 5: ...https www linckeazi com You can also scan the QR code and install the APK file on your smartphone Android APP IOS APP 3 Add the camera to the Linckeazi account 3 1 Login To send images to your cloud a...

Page 6: ...d service before use Name your camera type in the SN and IMEI number from your camera Add location description if necessary You can find SN and IMEI on a sticker inside your camera 4 4 Change camera s...

Page 7: ...a SIM card installed Once you ve installed your camera choose a plan according to how much pictures surf you think the camera takes consumes needs per month If you have the camera in movie mode you ne...

Page 8: ...se the camera again you will then need a new SIM card from the distributor and you will have to pay an additional activation fee The same principle as with ordinary Swedish SIM cards 2 3 It is applica...

Page 9: ...4 Setting camera 4 1 Information In display You can see a wealth of information directly in the camera s display Fig7 Monitor 4 2 Settings The camera can be easily set up either via website or APP...

Page 10: ...oads any new settings you sent via the APP even if there is no trigger The Delay setting is for saving power If the camera is triggered by any animal before 24 hours have passed new settings are downl...

Page 11: ...r delay time is needed Time lapse When you select time delay the camera takes photos or videos at your specified interval without it being triggered by a nearby live animal It is useful for constant t...

Page 12: ...lid before sending test photos Step 2 Once you have confirmed that the network signal is good press the SHOT button to manually take a photo Step 3 Press OK to display the photo and press the MENU but...

Page 13: ...ng true APP 4 5 Other basic settings via APP 1 Check Camera Status 2 View photos or videos 3 Take one photo 4 Kamerainst llningar 5 Change your camera settings 6 Request HQ photos or videos Fig 10 Cam...

Page 14: ...era s motion sensor and angle of view give you the best results in this assembly List The sun should not shine directly on the front of the camera backlight the best pictures you get if the sun comes...

Page 15: ...2 7K 1440P 1080P 720P WVGA PIR sensor Multiple zones PIR sensitivity Adjustable Operating storage temperature 20 60 C 30 70 C Trigger interval 0S 60 minutes Timelapse mode interval 1min 24h Photo Burs...

Page 16: ...nty Improper use of the camera leading to damage is not covered by this warranty The camera manufacturer can provide repair service after the expiration of the warranty The customer is responsible for...

Reviews: