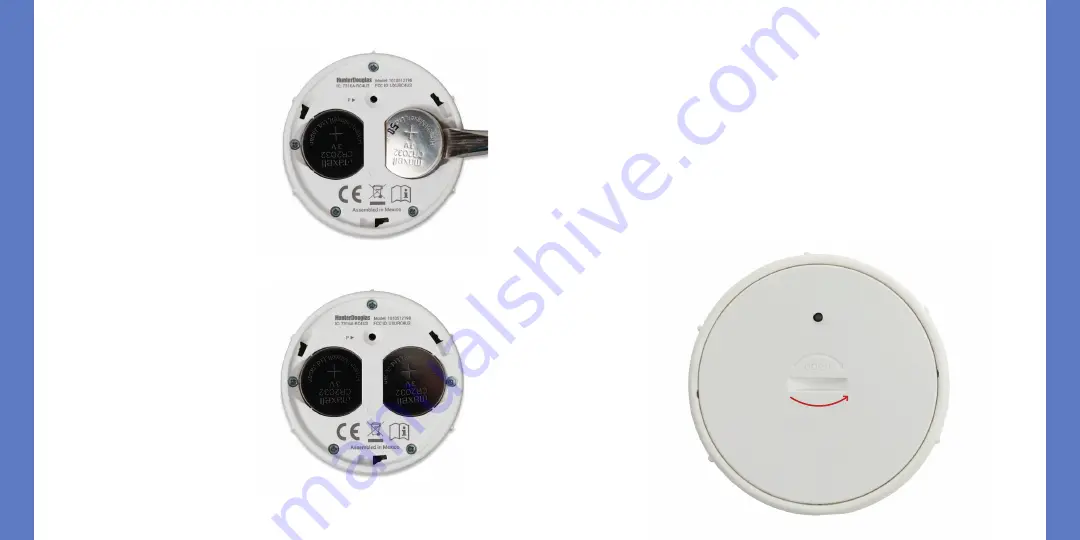
4.
Using a finger or small
screwdriver, gently lift
and remove the
old batteries.
5.
Insert new batteries,
making sure each
is snug.
30
31
6.
Align and replace the back cover onto the
backside of the remote module.
7.
Rotate the back cover counter-clockwise
to lock the back cover in place.
NOTE:
Once the back cover is in place,
ensure the programming access point is
aligned with the recessed
P
button.
8.
Align the ribs on the remote module with
the grooves on the Pebble
®
or the Surface.
9.
Gently push the remote module into the
Pebble or the Surface until it is snug.
B
A
TTER
Y REPLA
CEMENT
B
A
TTER
Y REPLA
CEMENT
Summary of Contents for PowerView Pebble
Page 1: ...PowerView Automation REMOTE CONTROL GUIDE...
Page 3: ...Key Components 3...
Page 15: ...Battery Replacement 27...
Page 18: ...Troubleshooting 33...


