


INSTALLATION
12
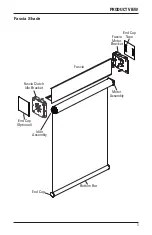
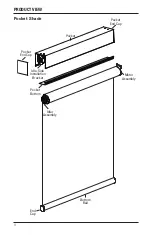
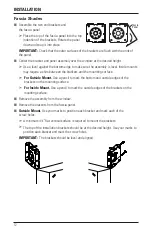
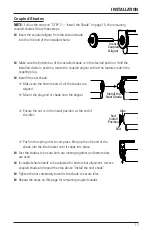
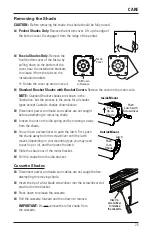
Fascia Shades
■
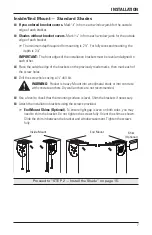
Assemble the two end brackets and
the fascia panel.
➤
Place the top of the fascia panel into the top
indention of the brackets. Rotate the panel
down and snap it into place.
IMPORTANT:
Check that the outer surfaces of the brackets are flush with the ends of
the panel.
■
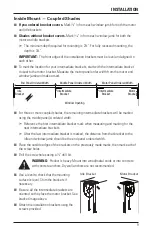
Center the bracket and panel assembly over the window at the desired height.
➤
Use a level against the bottom edge to make sure the assembly is level. Inside mounts
may require a shim between the brackets and the mounting surface.
➤
For Outside Mount.
Use a pencil to mark the bottom and outside edges of the
brackets on the mounting surface.
➤
For Inside Mount.
Use a pencil to mark the outside edges of the brackets on the
mounting surface.
■
Remove the assembly from the window.
■
Remove the brackets from the fascia panel.
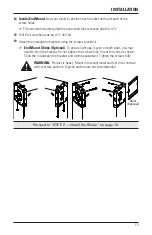
■
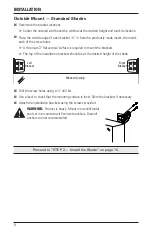
Outside Mount.
Use your marks to position each bracket and mark each of the
screw holes.
➤
A minimum 4
1
⁄
8
" flat vertical surface is required to mount the brackets.
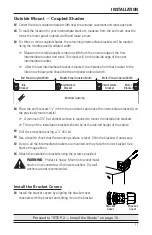
➤
The top of the installation brackets should be at the desired height. Use your marks to
position each bracket and mark the screw holes.
IMPORTANT:
The brackets should be level and aligned.
Fascia
Panel
Summary of Contents for Designer Roller
Page 31: ......


