background image

Powerview® Quick Start Guide Gen 2

This guide will help getting you started with your Powerview® purchase.

Step 1. Install your shades

Make sure you have properly installed your shades and that they are connected to a power source (battery pack or power

supply).


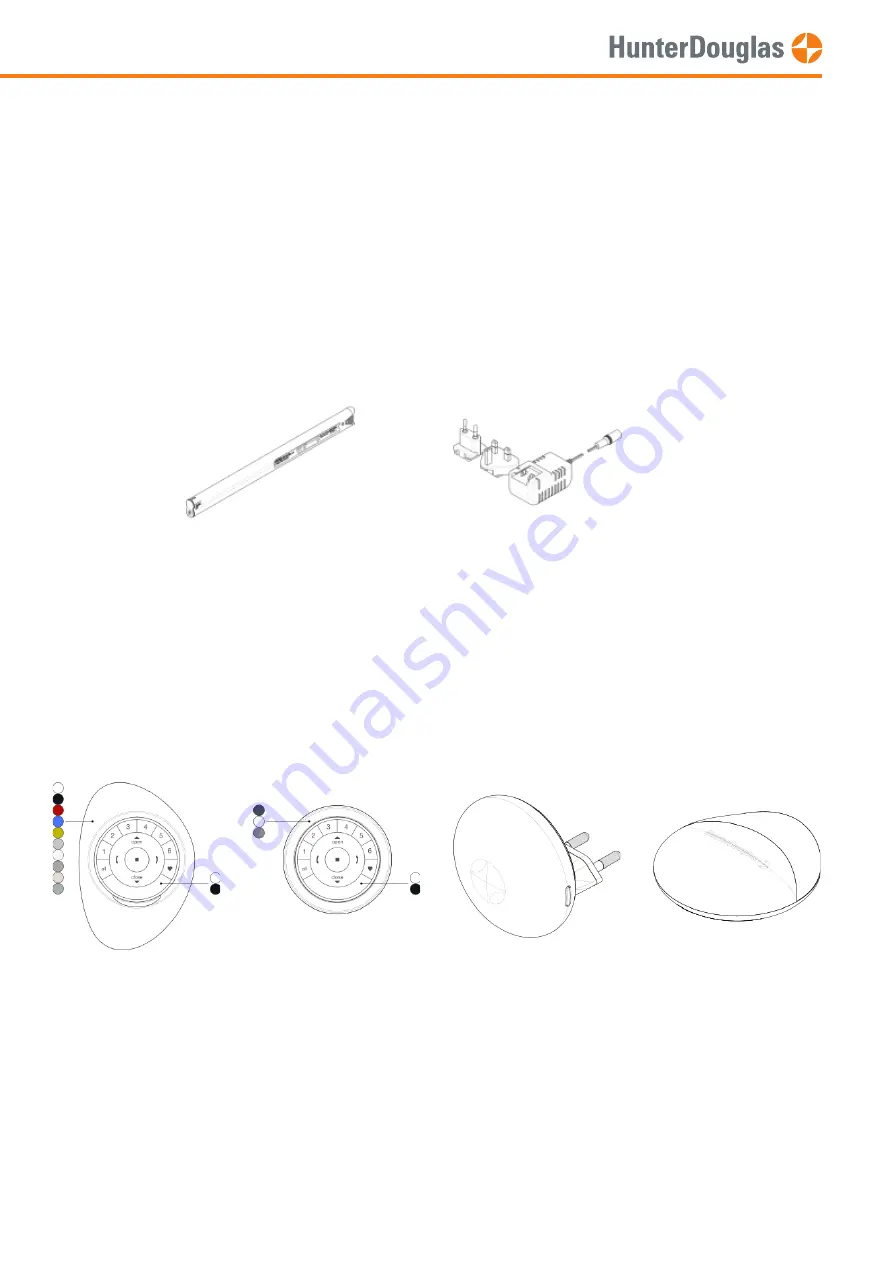
Step 2. Your Powerview® components

Packed with your purchased product you will 

fi

nd one or more remotes, repeaters and a Hub (which is optional and only

required when you want to control your shades using a tablet or smartphone). Remotes come in different colours. Please

locate them all before you start.


Step 3. Pairing remotes

In case no remotes are used or you want to start the setup process using the PowerView® Hub & App, please proceed to 

step 5

.

Battery pack

Power supply

Pebble remote

Surface remote

Repeater

Hub

MANUAL

Page 1 of 23

version: 1.1

Summary of Contents for Powerview Gen 2

Page 1: ...th your purchased product you will find one or more remotes repeaters and a Hub which is optional and only required when you want to control your shades using a tablet or smartphone Remotes come in di...

Page 2: ...e remote SOURCE Name the rest of the remotes TARGET Repeat the following steps until all TARGET remotes have been set 3 2 On the back of the target remote Press the reset button for six seconds The gr...

Page 3: ...n choose your own group 3 5 On the source remote Press and release the stop button As a confirmation the group buttons on the target remote will flash 2x 3 6 If the buttons on the source remote are st...

Page 4: ...S Bottom Up blind CHR Bottom Up blind CHR Top Down Bottom Up blind Vertical Venetian blind Venetian blind Roman shade 4 2 Press and hold the stop button for 6 seconds Keep pressing until the remote li...

Page 5: ...oup1 button This will activate group 1 on the remote 4 4 Press and hold the manual control button 4 5 Press the open button The blind will jog 1x 4 6 Release the manual control button MANUAL Page 5 of...

Page 6: ...w App from the Apple App store or Google Play store on your mobile device 5 2 Connect the Hub with the ethernet cable to your home network router Put the ethernet cable into an empty LAN port Do not u...

Page 7: ...5 3 Connect the power cable of the Hub to a power outlet MANUAL Page 7 of 23 version 1 1...

Page 8: ...inking Amber 5 5 Open the app and select Connect to Hub The app will start looking for an available Hub Make sure your mobile device and the PowerView Hub are connected to the same home network 5 6 Wh...

Page 9: ...ng Hub and follow the in App instructions to Transfer Gen 1 Hub data to the new Gen 2 Hub Note 2 If you already have a Gen 2 Hub installed in your PowerView network and created a Hub backup select Set...

Page 10: ...emote In this quick start guide we select one remote regardless of the amount of remotes you have 5 11 Follow the onscreen instructions to add the Hub to your Powerview network The Hub is added when t...

Page 11: ...ns or a PowerView Remote 5 12 You can now start discovering blinds Hub status LED behaviour Power On Solid Aqua Bootup Blinking Aqua Downloading applying firmware update Solid Amber Ready to connect t...

Page 12: ...operate your shades If some shades do not respond add or relocate a repeater and check again To Optimize the range of your Gen2 Hub you can place it in a central location of your home where it can rea...

Page 13: ...6 seconds Keep pressing until the remote lights start blinking 6 3 Keep the Remote within 50cm from the Repeater and press the stop button The Repeater light will stop blinking and turns off 6 4 The...

Page 14: ...1 to move all shades from all 6 groups on the remote The group button will light up Press the open button Blinds assigned to group 1 will open Press the stop button Blinds assigned to group 1 will st...

Page 15: ...favourite position Press the arrow up button Blinds assigned to group 1 will tilt open or slowly move open Press the arrow down button Blinds assigned to group 1 will tilt down or slowly move closed 7...

Page 16: ...close buttons to move the blind 7 2 3 Press and hold the stop button for 6 seconds Keep pressing until the remote lights start blinking DO NOT select a group on the remote IMPORTANT Watch out to perf...

Page 17: ...manual control button 7 2 5 Press the favourite button The blind will jog 1x to acknowledge the favourite position is set And will indicate green LED 7 2 6 Release the manual control button MANUAL Pa...

Page 18: ...the shade from the Powerview network 7 2 7 The favourite position is set If your remote is still blinking Press the stop button for 6 seconds Keep pressing until the remote lights stop blinking 7 3 1...

Page 19: ...button will light up IMPORTANT Watch out to perform steps 7 3 3 and 7 3 4 within 3 seconds 7 3 3 Press and hold the manual control button 7 3 4 Press the close button The blind will jog 1x to acknowl...

Page 20: ...nes which are created in the App 7 3 5 Release the manual control button 7 3 6 The blind is removed from the remote If your remote is still blinking Press the stop button for 6 seconds Keep pressing u...

Page 21: ...Follow the App instructions Warning Erasing the Hub data will permanently delete all data stored inside the Hub and will put the Hub in its factory default setting The PowerView network blinds and rem...

Page 22: ...essing until the LED turns off 7 6 3 The Hub will reboot All data on the hub has been erased Wait for the hub to start Blinking Amber The Hub is ready to be added to a PowerView network Follow Step 5...

Page 23: ...to use such products or services or a warranty or endorsement thereof Use of such information may require a license from a third party under the patents or other intellectual property of the third par...

Reviews: