background image

2

INSTALLATION PREPARATION

PARTS SUPPLIED

PARTS SUPPLIED

Before installing your 105SX, please ensure the following parts are
included in the box:
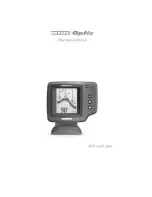
• 105SX fishfinder
• Transducer with 20' (6m) of cable and mounting hardware kit
• Mounting system and mounting hardware kit
• 6' (2m) power cable
• Publications kit
• Temperature Probe

If any of these items is missing, call our Customer Support Hotline.

ACCESSORIES

Humminbird offers a wide assortment of accessories that complement
and expand the capability of your new 105SX. These accessories are
designed with the same high standards and are backed by the same one-
year warranty. The Humminbird Accessory catalog included with your unit
contains descriptions of the many accessories available and ordering
information. All Humminbird accessories are available through your full-
service Humminbird dealer or factory direct through our number listed in
the Customer Support section.

INSTALLATION OVERVIEW

The 105SX consists of two primary components to install: the control
head and the transducer.

The control head contains the sonar transmit and receive circuitry, as well
as the user controls and display. It should be installed in a location that
provides access to the controls and visibility while in use. The control
head mounts on a quick disconnect mounting system that swivels and
tilts providing flexibility for viewing from almost anywhere on the boat.

The transducer converts electrical energy from the transmitter into
mechanical pulses or sound waves. The transducer also receives the
reflected sound waves and converts them back into electrical signals for
display on the control head. It should be installed in contact with the

Summary of Contents for Single Beam 105SX

Page 1: ... Operations Manual ...

Page 2: ... your purchase and help us learn more about you please fill out the warranty registration card at the back of this manual WARNING This device should not be used as a navigational aid to prevent collision grounding boat damage or personal injury When the boat is moving water depth may change too quickly to allow time for you to react Always operate the boat at very slow speeds if you suspect shallo...

Page 3: ... 5 Section 2 USING THE 105SX 6 How Sonar Works 6 Simulator Operation 7 What You See On Screen 8 Control Functions 11 Menu Functions 14 Section 3 ADVANCED FEATURES 21 Using the Diagnostic Feature 21 Section 5 MAINTENANCE AND WARRANTY 22 Maintenance 22 Troubleshooting 23 Warranty 26 Service Policy 27 Customer Resource Center 28 Specifications 29 TABLE OF CONTENTS P N 531082 1 R11012E ...

Page 4: ...ing information All Humminbird accessories are available through your full service Humminbird dealer or factory direct through our number listed in the Customer Support section INSTALLATION OVERVIEW The 105SX consists of two primary components to install the control head and the transducer The control head contains the sonar transmit and receive circuitry as well as the user controls and display I...

Page 5: ...l loss and provides a way to adjust the transducer after installation As an alternative to transom mounting it is possible on many fiberglass hulled boats to glue the transducer on the inside of the boat hull Since fiberglass has similar sonar characteristics as water the sonar signal can pass through the boat hull with minimal loss The hull of the boat must be single layer construction not double...

Page 6: ...ted to mount on most trolling motors using part number AD STM This accessory includes a bracket and hose clamp that allows mounting the transducer to the body of most trolling motors Thru Hull Mounting Thru hull transducers install through a hole drilled in the hull of the boat Larger boats or boats with inboard motors create turbulence that make transom mounting ineffective Also hulls that are ve...

Page 7: ...included provides detailed step by step instructions for installation of the control head and transducer For transom mount transducer installations you will need the mounting template in the center of this manual In addition to the parts included you need the following for installation and operation A powered hand drill and various drill bits Phillips and flat head screw drivers A ruler or measuri...

Page 8: ...onar is very fast A sound wave can travel from the surface to a depth of 600 185m and back again in less than 1 4 of a second It is unlikely that your boat can outrun this sonar signal The 105SX is a 200kHz single beam fishfinder The 200 kHz frequency provides excellent sonar resolution the ability to distinguish small returns or returns which are close to the bottom while providing depth capabili...

Page 9: ...ply press the DOWN ARROW until Simulator is highlighted When the screen times out the unit will be in simulator mode When in simulator operation the 105SX responds to control inputs as if it is in actual operation so feel free to experiment or to customize the unit for your particular operation To exit Simulator mode power the unit off When in simulator mode the word simulator will flash on and of...

Page 10: ...al use the 105SX will remember the settings you enter There are several elements on screen that are common to all modes of operation Speed Temperature The initial screen layout takes one of two basic forms depending on presence of accessories such as Temperature or Speed Temperature sensors Figure A shows the default view when the Speed Temp or Temperature accessory is installed Figure B shows the...

Page 11: ...e display Bottom The graphic depiction of the bottom provides an effective tool for understanding the composition of the bottom If the bottom is hard and smooth the bottom depiction is narrow and dense If the bottom is soft mud or sand the depiction will be thick and less dense This indicates much of the signal is absorbed by the soft bottom If the bottom is rocky or rugged in composition the depi...

Page 12: ...p differences in water temperature These are easily identified by the continuous nature of the return Second Returns When a sonar signal is reflected off the bottom back to the transducer there is often enough energy left in the signal to be reflected off the surface of the water back to the bottom a second time Second returns appear as a slightly weaker bottom representation exactly twice the dep...

Page 13: ...sounds multiple chirps Power The Power button powers the 105SX up for normal operation When the unit is on POWER turns the unit off POWER can also be used to go directly into Simulator mode To enter simulator with the unit powered off press and hold POWER for several seconds until a continuous chirp is heard Light LIGHT controls the unit s display backlight With the unit powered on press LIGHT onc...

Page 14: ... menu used Arrow Keys The UP ARROW and DOWN ARROW make adjustments to menu functions On the left side of every menu there are UP ARROW and DOWN ARROW symbols The symbols indicate which ARROW button has a function in a particular situation Either one or both ARROW buttons can be used to adjust the menu function A hollow ARROW symbol means the corresponding ARROW button has no function Pressing that...

Page 15: ...option or current setting is highlighted in the black box If no adjustment is made this is the selected setting Press an ARROW button while the menu is displayed to select another option Several of the menus are multi step In some situations if an adjustment is made additional options become available for further adjustment Examples of these multi step menus are Depth Range Depth Alarm and Zoom Se...

Page 16: ... the information from progressively smaller sonar returns By decreasing the sensitivity bias 1 through 5 the unit effectively filters small sonar returns In murky or muddy water it is often helpful to reduce the sensitivity This prevents the display from being cluttered with sonar returns from debris or suspended particles In very clear or very deep water it may be helpful to increase the sensitiv...

Page 17: ...on closest to the bottom of the screen will best utilize the available display resolution The 105SX automatically adjusts the depth range depending on the depth of the water The unit tries to maintain the bottom depiction about 2 3 down the total range for example in 20 6m of water the 0 30 0 10m range would be selected This provides the best display resolution and therefore the best target separa...

Page 18: ...e enlarged to provide more detailed information By using the full display to show a small area of coverage the effective display resolution is increased and the unit s ability to separate close targets is enhanced There are four Zoom ranges available 71 2 15 30 and 60 These ranges are not directly user controlled but are instead dependent on the current depth range In shallow water when the 15 or ...

Page 19: ... bottom In manual Zoom the Zoom range does not move as the terrain changes When the range is shown in the menu the upper number represents the top of the current Zoom range The lower number represents the bottom of the Zoom range Use the UP and DOWN ARROW buttons to move this range The upper number can never be less than 0 the surface of the water and the lower number can never be greater than the...

Page 20: ... presence of fish or other targets not connected to the bottom The Fish Alarm has three different settings that correspond to the three different size fish symbols shown on screen The default setting is OFF With the Large fish only setting the 105SX alarms on only those targets that are represented by the large fish symbols The 105SX can be set to alarm on only large and medium fish or set to alar...

Page 21: ...able Off ID ON and Adjust The factory setting is ID On With Fish ID Off sonar returns are displayed as raw information There is no inter pretation made by the unit Selecting ID Off also disables the fish alarm ID On enables the 105SX to interpret the raw sonar data and using a variety of techniques depict appropriate target returns as one of three different size fish symbols The 105SX also display...

Page 22: ...s selection even when the unit is powered off Triplog Triplog provides a running log of information based on input from the Speed Temp sensor Since Triplog requires information from the Temp or Speed Temp sensors to operate if an accessory sensor is not detected by the 105SX the Triplog menu will not appear as a control menu Triplog provides seven pieces of information the current digital depth wa...

Page 23: ...tart up menu on the initial screen Self Test Initially the 105SX will perform a self test This test confirms the operation of all internal circuitry At the conclusion of the test one of two messages will appear Passed indicates the internal test discovered no failures Failed indicates a significant internal problem was discovered and the unit requires factory service A code number appears that tel...

Page 24: ...egory indicates the total time the unit has been in use since shipped from the factory It is normal for some hours to appear in the total time when the unit is new due to factory testing While this is often of interest to the user it is primarily a diagnostic tool for the repair technician should the unit need service MAINTENANCE Your 105SX is designed to provide years of trouble free operation wi...

Page 25: ...tools and techniques are required for reassembly to ensure the waterproof integrity of the housing Repairs should be performed only by authorized Humminbird technicians Many requests for repair received by Humminbird involve units that do not actually need repair These units are returned no problem found If you have a problem with your 105SX use the following troubleshooting guide before calling C...

Page 26: ...ged in water If the transducer is connected to the unit through a switch temporarily connect it directly to the unit and try again If none of these items identifies an obvious problem the transducer itself is probably the problem Be sure to include the transducer if returning the unit for repair 3 There is no bottom reading visible on the display There are a number of possible causes for this cond...

Page 27: ...er needs adjusting If the transducer is transom mounted there are two adjustments available to you height and running angle Make small adjustments and run the boat at high speeds to determine the effect It may take several tries to optimize high speed operation This can also be a result of air or turbulence in the transducer location caused by rivets ribs etc 7 My unit loses power at high speeds Y...

Page 28: ...uipment or accessories by unauthorized individuals will void the warranty Return the warranty registration card and retain your bill of sale for warranty verification Accessories not manufactured under the Humminbird trade name are not covered by our warranty The customer is responsible for shipping charges to Humminbird Humminbird will provide ground UPS or Parcel Post shipping back to the custom...

Page 29: ...ery effort to repair your unit within three working days from the receipt of your unit This does not include shipping time to and from our factory Units received on Friday are usually shipped by Wednesday units received Monday are usually shipped by Thursday etc We reserve the right to deem any product unserviceable when replace ment parts are no longer reasonably available or impossible to obtain...

Page 30: ...roduct Support and troubleshooting guides If after reading Troubleshooting you determine your unit needs factory service please attach a description of the problem and send it with the unit to the address below If you are including a check please attach it to the unit Humminbird Service Department 108 Maple Lane Eufaula AL 36027 Further information on Humminbird products can be found at www hummin...

Page 31: ...60 Place on bottom of hull Align with transom DO NOT LET DEADRISE INTERSECT THIS LINE PLACE EITHER CORNER ON DEADRISE ANGLE TOP Use 5 32 drill bit Drill Drill PLACE EITHER CORNER ON DEADRISE ANGLE TOP Use 5 32 drill bit Drill Drill Level 15 40cm from prop s PLACE EITHER ARROW ON DEADRISE ANGLE TOP Remove and use for Transducer Installation Use drill bit drill two holes for hull type Drill Drill Dr...

Reviews: