background image


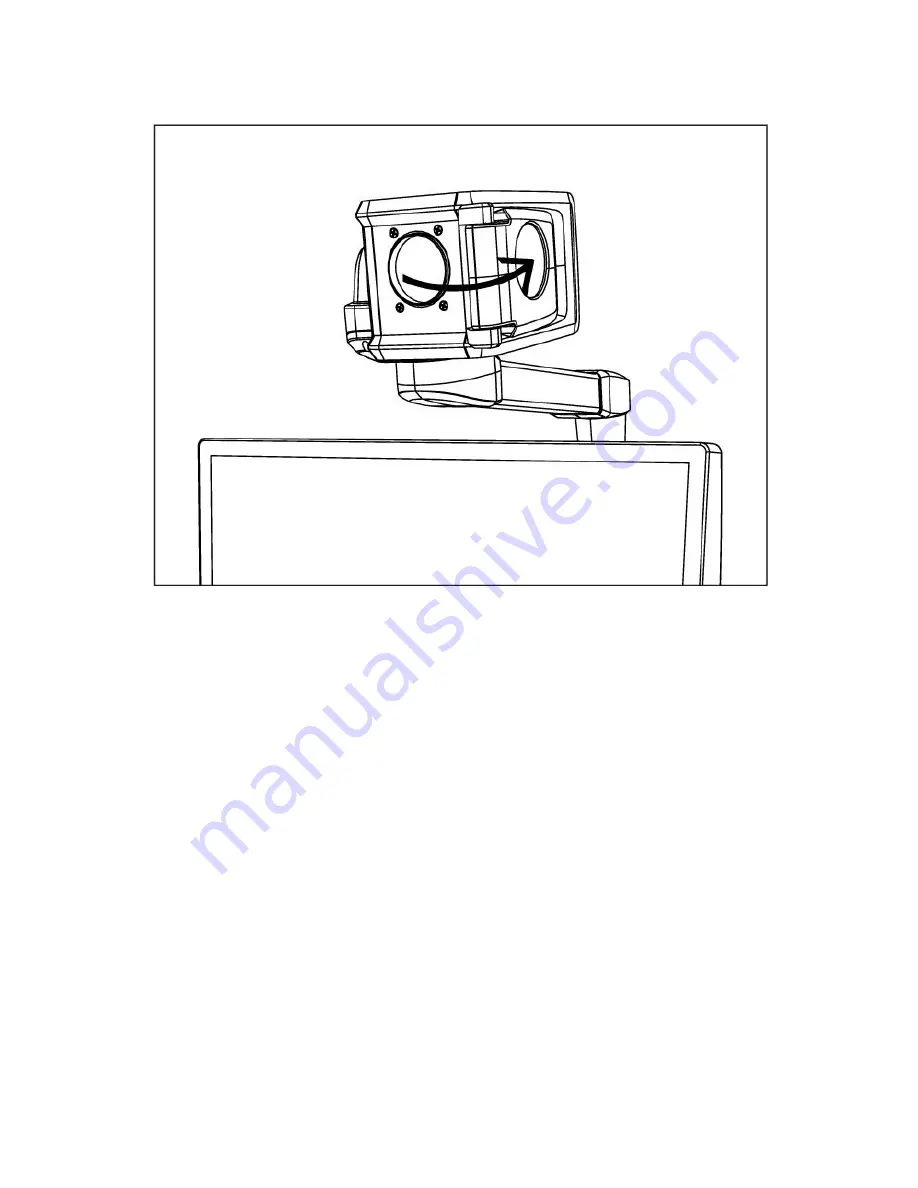
Figure 6: Distance viewing mode: Camera points towards distant object            
               and Close-up lens is OFF 


2.3


Self-viewing mode  

To use the SmartView 360 as a mirror, turn the camera 
so  that  it  points  in  your  direction  when  positioned  in 
front  of  the screen.  The  Self-viewing  mode is  ideal for 
shaving,  applying  makeup,  etc.    Make  sure  to  use  the 
Close-up lens. 

Summary of Contents for SmartView 360

Page 1: ...Synergy 360 User Guide ...

Page 2: ...its agents assume any responsibility for errors or omissions Nor is any liability assumed for damages resulting from the use of the information contained herein About HumanWare HumanWare http www humanware com is the global leader in assistive technologies for the print disabled HumanWare creates products for people who are blind have low vision and or have learning disabilities The innovative ran...

Page 3: ...HumanWare s unique auto reader for people with low vision and SmartView Synergy ...

Page 4: ...ior to cleaning the 360 Only use cables provided with the SmartView 360 The power supply cord is a disconnect device for pluggable equipment The socket outlet should be installed near the equipment and be easily accessible This product should be operated from the type of power indicated on the marking label If you are not sure of the type of power available consult your dealer or local power compa...

Page 5: ...laced near a heat source or exposed to direct sun light for a prolonged period of time Refer all servicing of this product to qualified service personnel Do not attempt to service it yourself as opening or removing covers may expose you to dangerous voltage points or other risks The above exclamation point within an equilateral triangle is intended to inform the user to the presence ...

Page 6: ...of important operating and maintenance servicing instructions in the literature accompanying the appliance ...

Page 7: ...rnings This product is equipped with a 3 wire grounding type plug as a safety feature This plug has a third grounding pin and can only be plugged into a grounding type power outlet If necessary contact an electrician to replace your power outlet with a grounding type power outlet Electromagnetic compatibility The use of accessories and cables other than those specified by HumanWare may result in i...

Page 8: ... radio communications However there is no guarantee that interference will not occur in a particular installation If this equipment does cause harmful interference to radio or television reception which can be determined by turning the equipment off and on the user is encouraged to try to correct the interference by one or more of the following measures Reorient or relocate the receiving antenna I...

Page 9: ...Notice for Canada This Class B digital apparatus meets all requirements of the Canadian Interference Causing Equipment regulations ...

Page 10: ...artView 360 3 1 4 2 Rear panel 4 2 Using the 360 5 2 1 Desktop viewing mode 5 2 2 Distance viewing mode 6 2 3 Self viewing mode 7 3 Control panel and buttons 8 3 1 Description of control panel buttons 9 3 1 1 Power button 9 3 1 2 Enhanced contrast mode button 9 3 1 3 Color mode button 11 3 1 4 Freeze Find button 12 3 1 5 Zoom knob 12 3 1 6 Function button 13 ...

Page 11: ... the menu 15 4 2 Using Sliders 15 4 3 Main menu items 16 5 Maintenance and Troubleshooting 20 5 1 Maintenance 20 5 2 Troubleshooting 20 6 Returning for Service 23 7 Disposal 24 8 Technical Specifications 24 9 Manufacturer Warranty 26 10 Customer support 27 ...

Page 12: ...scribed as an LCD screen mounted with an articulated arm equipped with a camera Because the camera is installed on an articulated arm it can be oriented in any direction It can be used to view objects that are far away it can be pointed down towards the table or even turned towards you to act as a mirror An attached control panel allows you to operate the device and adjust its settings 1 2 Unpacki...

Page 13: ... 1 Lift Base unit from the box by holding the built in handle IMPORTANT do not lift by holding the arm 2 Place the SmartView 360 on a flat and level surface 3 Connect the Control panel to the unit 4 Connect the power cable to the unit and then connect it to an outlet 5 Turn on SmartView 360 to verify connectivity ...

Page 14: ...t by the arm Use the built in handle to lift the 360 out of the box optional carry case 1 4 Physical description of SmartView 360 1 4 1 SmartView 360 Figure 3 SmartView 360 components 1 LCD Screen 2 Control Panel 3 Articulated Arm ...

Page 15: ...4 4 Camera 5 Rear Panel 1 4 2 Rear panel Figure 4 Rear panel 1 Power connector 2 USB maintenance port 3 Control panel connector ...

Page 16: ...lly depending on the position of the Camera 2 1 Desktop viewing mode Swing the arm over the area of your desk that you wish to view Turn the camera downwards Because objects will be relatively close to the Camera you will need to use the Close up lens This mode is perfect for reading writing and for performing manual tasks ...

Page 17: ...o view objects that are further away point the camera towards the desired direction To view objects that are more than a couple feet 60 cm away from the Camera remove the Close up lens The Distance mode is perfect for viewing a blackboard or watching TV The Close up lens is not used in Distance viewing mode ...

Page 18: ...and Close up lens is OFF 2 3 Self viewing mode To use the SmartView 360 as a mirror turn the camera so that it points in your direction when positioned in front of the screen The Self viewing mode is ideal for shaving applying makeup etc Make sure to use the Close up lens ...

Page 19: ...8 Figure 7 Self view mode Camera points towards you and Close up lens is ON 3 Control panel and buttons From left to right the Control panel is comprised of the following buttons and knobs ...

Page 20: ... of control panel buttons 3 1 1 Power button The Power button is the last button on the right It is used to power on and off the SmartView 360 When the Power is on the Power button will glow green 3 1 2 Enhanced contrast mode button The Enhanced contrast mode button is the first button on the left When in Color mode use the Enhanced contrast button to switch to Enhanced contrast mode ...

Page 21: ...ard if Beep option is enabled in the main menu Enhanced contrast mode Full color set When in Enhanced contrast mode press the Enhanced contrast button to cycle through the 16 foreground and background color combinations The selected color combination will be saved as your preferred selection when the unit is powered off Enhanced contrast mode Restricted color set Default This is the default settin...

Page 22: ...lack Note that activating restricted colors when current selection is black on white or white on black will limit the available choices to these 2 combinations Note The Enhanced contrast button is also used to Exit the menu and the Line and Blinds feature 3 1 3 Color mode button When in Enhanced contrast mode use the Color button to switch to Color mode In this mode images will be displayed in ful...

Page 23: ...oom level to a minimum thereby allowing you to get a global view of what is in front of the camera While still holding the Freeze Find button move the camera towards what you want the camera to focus on For Desktop view instead of moving the camera you can rearrange the position of the object you wish to view When you release the Freeze Find button the system returns to the initial zoom level 3 1 ...

Page 24: ...ow a line of text or column while the blinds can be useful to block unwanted sections of the text Short presses of the Function button will cycle through the following options One horizontal line over the display One vertical line over the display Horizontal blinds over the display Vertical blinds over the display No line or blinds The position of the line blinds and the width of the blinds can be...

Page 25: ...revent the camera from focusing on someone passing in front of a blackboard To deactivate Focus Lock press Function again Note that Focus Lock will also be disabled when the camera angle is modified when zoom is used or when changing color modes 3 1 7 Brightness knob While in Enhanced Contrast or Color mode turn the Brightness knob clockwise or counterclockwise to increase or decrease the Brightne...

Page 26: ... on the screen Note that non error beeps can be disabled in the Main menu 4 1 Navigating the menu While in the menu the normal functions of the control panel will be replaced by menu functions The Brightness knob is used to move up and down the menu items The Color button is used to select an option The Enhanced contrast button is used to move up from the Display submenu to the Main menu It is als...

Page 27: ... menu items The Main menu is comprised of the following items Contrast Color mode only Selecting this menu item will display a Contrast slider bar that will allow you to adjust contrast levels Contrast can only be adjusted in Color mode Any attempt to adjust contrast in Enhanced contrast mode will result in an error beep Color Color mode only Selecting this menu item will display a Color slider ba...

Page 28: ...he other colors will be adjusted accordingly Options include Auto Warm Neutral Cool Function key Depending on how the Function is set up in the main menu the Function key is used to activate deactivate the Lines and Blinds default setting or the Focus Lock features Beeps This menu item allows you to disable non essential system beeps Error beeps will remain activated Language This menu item allows...

Page 29: ...ia Netherlands Sweden Australia Zoom Display Select this option to enable or disable the zoom level display when adjusting magnification Lighting Two options are available Florescent and Normal Select Normal in most situations Select Florescent if there are florescent lights in the room and you notice pulsing of the image Light intensity Three levels are available Medium High and Low Select the le...

Page 30: ...le or disable the splash screen when the system is started System Information Selecting this option will display the splash screen normally seen when starting the system Factory Defaults Use this option to return the system to its original settings ...

Page 31: ...e power is switched on at the wall socket Check that the green power light is glowing Check that all cables are properly plugged in Check that the monitor is switched on The LCD screen is automatically powered when the unit is turned on However because the screen may be turned off you should verify that the monitor light is on indicating that is powered on Check that the Brightness and Contrast le...

Page 32: ...rmation please look for Focus lock in the Function button section Clean the monitor screen with a glass cleaning solution If the text looks gray or low in contrast Press the Enhanced contrast button to set the unit in High Contrast mode Check the Brightness and Contrast They should be set to at least 50 Note that the Contrast cannot be adjusted when in Enhanced Contrast mode Please consult the Enh...

Page 33: ...for Color and Enhanced contrast modes Check if you have sufficient ambient light If there is a lot of glare Reduce the Brightness Reduce the external lighting effects Tilt object in a different direction to reduce glare If there is a limited number of false colors Press the Enhanced contrast button to make sure that the SmartView 360 is in Enhanced contrast mode Press and hold the Enhanced contras...

Page 34: ...switch off the machine then press the Power button again to switch on and restart Contact dealer or technical support If the SmartView 360 resets Check all the connections and make sure that they are plugged in properly Contact Help Desk if the machine keeps resetting Other problems Turn the SmartView 360 on and off 6 Returning for Service If you have a problem with your SmartView 360 please conta...

Page 35: ...llow local governing ordinances or hospital procedure 8 Technical Specifications Product Dimensions and weight Width Depth Height Weight 412 mm 250 mm 550 mm 7 75 kg Magnification range Desktop mode 1 5x to 55x magnification for objects 16 inches away from the camera Distance mode 0 2x to 9 0x magnification for objects 10 feet away from the camera Self view mode 2x to 8x magnification for objects ...

Page 36: ...n Class 1 Enclosure Degree of Protection IP20 Mode of Operation Continuous Environmental Operating Temperature 10 to 40º C Transport Storage Temperature 20 to 60º C Operating Humidity 20 to 80 RH Transport Storage Humidity 10 to 95 RH Operating Altitude 200 to 2000 m Transport Storage Altitude 200 to 12 000 m Transport Storage Barometric Pressure 70 103 kPa ...

Page 37: ...lly change please consult our website for the latest information Conditions and Limitations No replacement or repair covered by the warranty will be carried out unless the unit is accompanied by a copy of the original bill of purchase Please retain your original If the unit has to be returned please use the original packaging This warranty applies to all cases where the damage is not a result of i...

Page 38: ...port please contact the HumanWare office nearest you or visit our Web site at www humanware com Australia Asia 61 2 9686 2600 Canada 1 888 723 7273 UK Europe 44 1933 415 800 USA 1 800 722 3393 Netherlands 31 765 496 510 Sweden 46 470 764 490 ...

Page 39: ...or view our Web site at www humanware com 360_support REV00 VER 11 20101221 North America 1 800 722 3393 or e mail to us support humanware com Europe 01933 415800 or e mail to eu sales humanware com Australia Asia 02 9686 2600 or e mail to au sales humanware com www humanware com Rev 01 ...

Reviews: