


11
➊
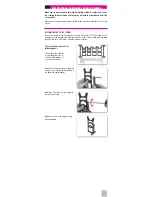
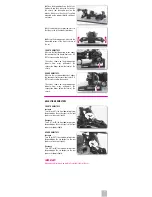
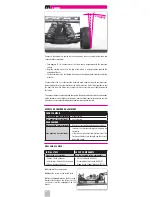
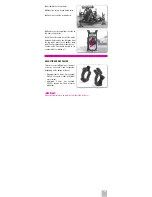
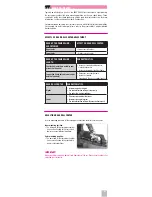
Place the droop blocks on the fl at set-
up board, and then place the fl at part of
the chassis (not the angled part) on the
blocks. Make sure the chassis is solidly
mounted on the support blocks so it does
not move.
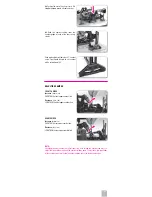
➋
Lift and drop the suspension arms so
that they settle in their lowest positions.
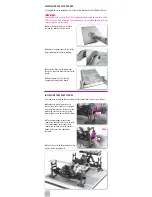
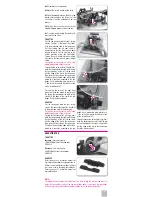
➌
Using the droop gauge, measure the
downstop values at the front and rear of
the car.
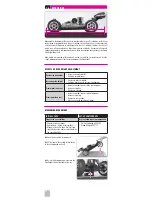
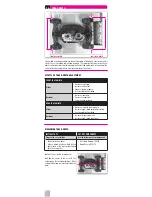
FRONT DOWNSTOPS:
Measure the front downstop values under
the round part of the front wheel axles. DO
NOT measure under the hex part.
The values shown on the droop gauge
indicate how many millimeters the
suspension drops below the level of the
chassis.
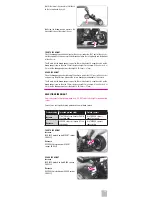
REAR DOWNSTOPS:
Measure the rear downstop values under
the round part of the rear wheel axles. DO
NOT measure under the hex part.
The values shown on the droop gauge
indicate how many millimeters the
suspension drops below the level of the
chassis.
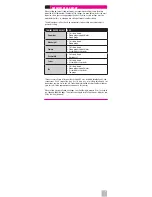
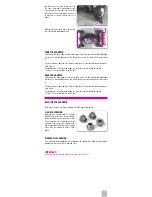
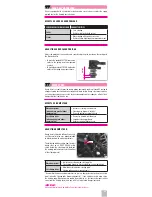
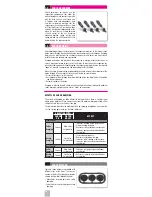
ADJUSTING DOWNSTOPS
FRONT DOWNSTOPS
Increase
Turn IN (or OUT) the front downstop screw
(depending on the car design) so the front
lower arm raises up slightly.
Decrease
Turn OUT (or IN) the front downstop screw
(depending on the car design) so the front
lower arm drops slightly.
REAR DOWNSTOPS
Increase
Turn IN (or OUT) the rear downstop screw
(depending on the car design) so the rear
lower arm raises up slightly.
Decrease
Turn OUT (or IN) the rear downstop screw
(depending on the car design) so the rear
lower arm drops slightly.
IMPORTANT!
Make equal adjustments on both left and right sides of the car.


