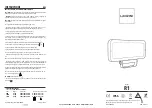
AFL20 – Architectural Floodlight
Installation Instructions
Page 2
Kim Lighting Inc.
• 16555 E. Gale Ave. • P
O Box 60080
•
City of Industry, CA 91716-0080
• 626/968-5666 • Fax 626/330-3861
Reflector and Lens Cleaning:
A regularly scheduled maintenance program should be established to retain light output and minimize heat retention. Dusting
with a clean, dry cloth is normally sufficient for the reflector. Dust or dirt film accumulation should be regularly removed from
both sides of the lens by washing with ammonia and water. Do not use strong alkaline, acid, or abrasive cleaners.
Tool Required:
Phillips Screwdriver
Ballast Access and Replacement:
Make certain the electrical supply is
OFF before accessing or replacing ballast.
1. Loosen four (4) captive screws holding reflector in place. Remove ballast components and retain hardware for installation.
2 Install replacement ballast and make all connections per wiring label on ballast core. Replace reflector.
3
. Check that fixture gasket is clean and in place; close lens frame by applying left pressure to seat frame against hinges
before closing. Tighten screws progressively and evenly to a hand-snug condition with allen wrench.
Swivel Adjustment:
1. Holding fixture so it will not fall, loosen swivel bolt with
L
" socket.
2. Adjust fixture to desired angle and tighten swivel bolt. Teeth lock swivel every 5°.
!
AFL21
Horizontal Flood
AFL22
Vertical Flood
AFL23
Medium Flood
Swivel Bolt
(
L
" socket).
AFL24
Narrow Flood
AFL25 Spot
AFL26 Narrow Spot
INSTALLATION INSTRUCTIONS:
Make certain the electrical supply is
OFF before starting fixture installation.
1.
Feed circuit wires to bottom of swivel assembly and wire accordingly. Install fixtur
e on tenon being careful
not to pinch wires. Orient fixture to desired direction and tighten (2)
C
-16 set screws progressively.
3
. To prevent fixture windmilling, remove (1) tenon set screw, drill recess in tenon for screw point, and replace screw.
2. Attach fixture leads to circuit leads observing polarity, i.e., green-to-ground, white-to-common, and black-to-voltage.
4. Open lens frame and install lamp of type and wattage shown on fixture label and chart below. All lamps must be rated
for “Universal Burning Position” because fixture tilt changes lamp orientation. Check that fixture gasket is in place and
close lens frame by applying left pressure to seat frame against hinges before closing. Tighten screws progressively
and evenly to a hand-snug condition with allen wrench.
!
Lamp Information
Fixtur
e
Lamp Type
Wattage
HPS
AFL20 Serie
s
MH
250 - 400
Pulse Start MH
WARNING
The H.I.D. / Fluorescent fixtures utilizes a lamp that may
contain mercury. For information on disposal of lamp, go
to website:
www.lamprecycle.org


