


4-3
Preparing Cartridges
Applying DLT Cartridge Labels
The LSM uses DLTtape IV or IIIXT cartridges for data, plus diagnostic and
cleaning cartridges. Different types of data cartridges are distinguished by a
small “E” or “D” next to the last number in the VOLSER. Cleaning and
diagnostic cartridges are distinguished by “CLN” or “DG” in the prefix in the
VOLSER. The correct labeling follows:
•
DLTtape IV data cartridges should be labeled with a “D” label.
•
DLTtape IIIXT data cartridges should be labeled with an “E” label.
•
Cleaning cartridges should be labeled with a “CLN” label.
•
Diagnostic cartridges should be labeled with a “DG” label.
Note:
Diagnostic cartridges are physically the same as data cartridges. The LSM
software requires the “DG” label before it will use a cartridge for
diagnostic routines. One diagnostic cartridge is supplied with the LSM.
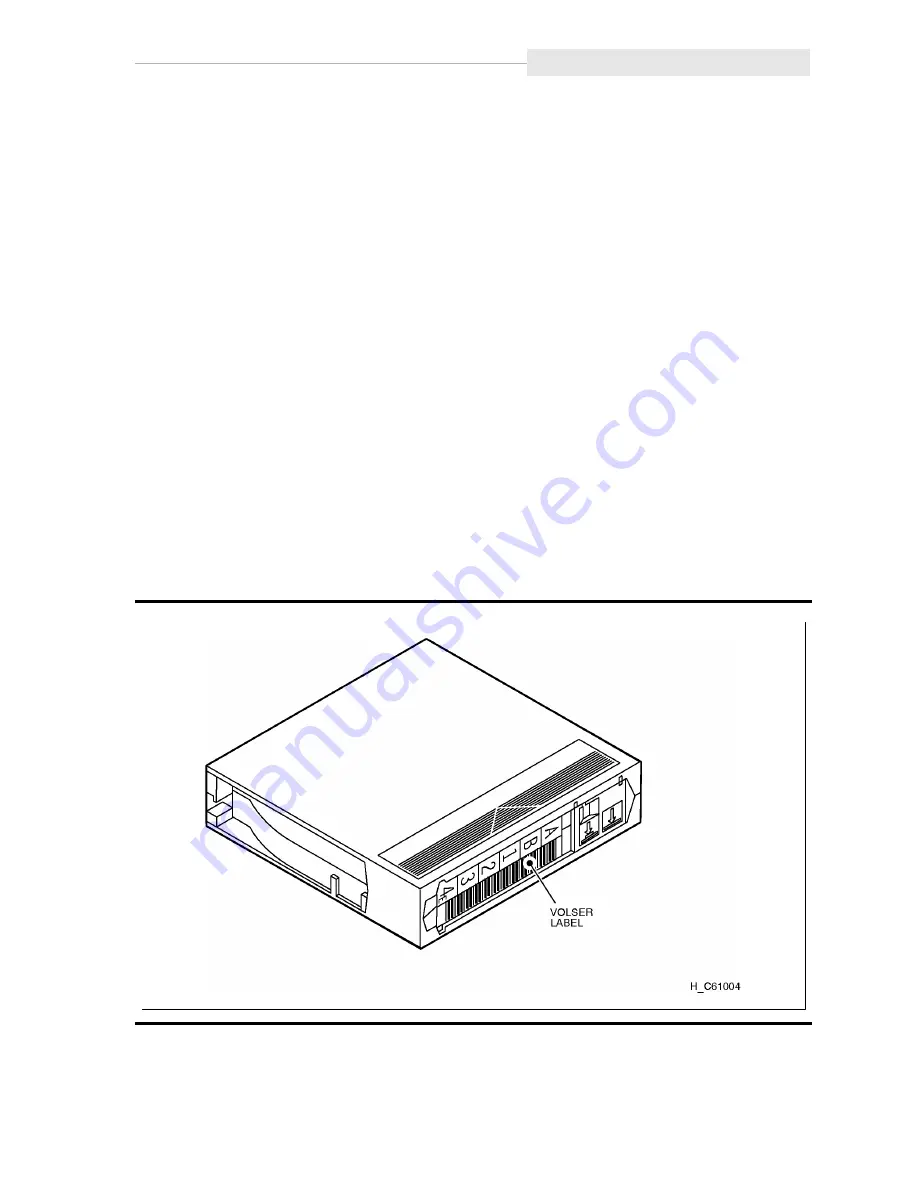
The operator is responsible for applying labels correctly as indicated above and
in
Figure 4-3
. Cartridge surfaces should be clean and at room temperature when
applying labels. Labels can be inserted into the recessed area, or the backing
can be peeled away to expose the adhesive, if a more permanent application is
desired. Do not place labels anywhere but in the recessed VOLSER slot, and
make sure that the edges do not curl up, which might cause misreading or
sticking.
Figure 4-3. Applying DLT Cartridge Labels
Summary of Contents for Surestore Tape Library Model 10/588
Page 1: ...StorageTek ...
Page 2: ......
Page 3: ......
Page 6: ...List of Pages iv This page intentionally left blank ...
Page 14: ...Contents xii This page intentionally left blank ...
Page 16: ...Figures xiv This page intentionally left blank ...
Page 18: ...Tables xvi This page intentionally left blank ...
Page 23: ...xxi About This Guide ...
Page 24: ...About This Guide xxii This page intentionally left blank ...
Page 34: ...AUTO CLEAN Feature 1 10 This page intentionally left blank ...
Page 36: ...LSM Operator Panel 2 2 Figure 2 1 LSM Operator Panel Softkeys Indicators and Display ...
Page 40: ...Setting the SCSI Address 2 6 Figure 2 3 Setting the SCSI Address ...
Page 44: ...Power Switch 2 10 This page intentionally left blank ...
Page 90: ...Index Index 4 ...
Page 93: ......
Page 94: ......


